The MatchPoint Composite Refinement Web Part
Date: 26. Sep 2014
With MatchPoint 4.0.5 the Composite Refinement Web Part (CRWP) was released into the wild. It offers the same functionality as the Refinement Web Part and additionally provides a high flexibility in how the refinement groups are rendered.
Introduction
MatchPoint Snow users could already see the CRWP in action since version 1.0.2. The CRWP is used for example on the landing pages in the left section as a filter. Nevertheless we decided not to include it in MatchPoint 4.0.4, as it was missing some functionality (e.g. native refinement or the support of displaying hierarchical terms) and we didn't want to deliver a "half baked" product.
We'd also like to clarify that the Refinement Web Part (RWP) is not and will not be deprecated. Both Web Parts will be developed next to each other. For users who are always satisfied with simplicity of the RWP, nothing will change as they can continue using the RWP. For those who liked the refinement, but had specific requirements regarding it's optics, the CRWP is exactly the right choice.
In this blog post you will learn about the concept and the functionality of the CRWP and you will see an example of an "advanced" CRWP configuration.
The Composite Refinement Web Part
In a CRWP configuration you can define groups (which are the equivalent to "Columns" from the RWP). For each group you can configure some settings, e.g. which field to refine, if it’s collapsible, the FieldType and so on. All in all this is very similar to the RWP and should be self-explanatory.
Next you have to define a renderer for each group - and this is the big difference to the RWP. All renderers provide a default template and settings and can therefore be used out of the box. You can however provide your own template/settings for most of these renderers and customize them according to your requirements.
Here's a list of the different groups and their most important properties and renderers.
RangeRefinementGroup
This group can be used for the refinement of date and number ranges.
Properties
Boundaries: Optionally you can define your bucket boundaries in which your values will be grouped (e.g. 0, 10, 20, 30, 40, etc.). If you don't define any boundaries, they will be automatically generated for you.
Renderer
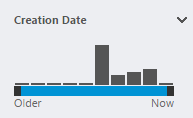
RangeRenderer: Displays a slider with your boundaries. You can choose if you want to display a histogram or not.
SimpleRefinementGroup
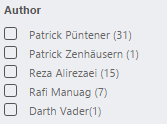
The SimpleRefinementGroup can be used for almost all field types. Normally this group will just display all found values as selectable items. But you can also use this group to display ranges (for example if you don't like the slider from the RangeRefinementGroup), for this reason you can define buckets (similar to the RangeRefinement).
Properties
Buckets: Optionally you can define your bucket boundaries in which your values will be grouped. The buckets can be used for date and number types only.
Renderer
FlatSimpleRenderer:
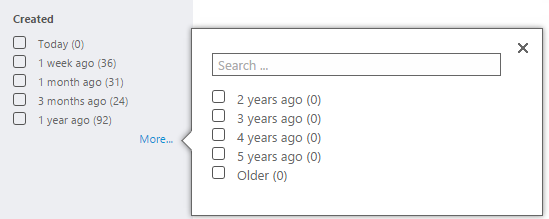
In this renderer you can define a "RowTemplate" and a "SelectedRowTemplate". This means you can style your SimpleRefinementGroup exactly the way you want to. You just have to set the "data-clickScript" and the "data-Key" attribute on the element which should be clickable, respectively used to execute the refinement, by the user. Also you can define how many elements you want to display directly (NumberOfElements) and how many elements you want to display in the ShowMore-Callout (ShowMoreNumberOfElements).
Available ExpressionVariables
The following ExpressionVariables are available within the renderer:
- Node:
The "CompositeRefinementNode" which contains all information about the current refinement node, e.g. Value, Key, IsRoot, IsSelected and so on. For more details see the "CompositeRefinementNode" class. - Count:
The number of occurrences of the DataItem in the result set. Also available with "Node.Occurrences". - Key:
The key which identifies the DataItem. Also available with "Node.Key". - DataItem:
The item which is also used as the refinement value. Also available with "Node.Value".
TagRefinementGroup
Can be used to display tags which are applied to the items you want to refine.
Renderer
FlatTagRenderer:
Flat means that all tags will be displayed the same way - no matter if they are "parent" or "child" tags. The other settings are very similar to the FlatSimpleRenderer.
HierarchicalTagRenderer:
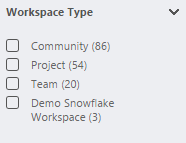
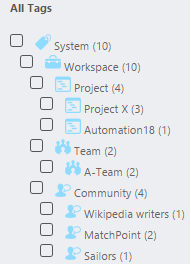
Since tags can have children and therefore can be hierarchical it may be desired that they are also displayed in a hierarchical order. That's exactly why we added the HierarchicalTagRenderer. In addition to the FlatTagRenderer you can define a "RootHierarchyLevelHeader/Footer" and a "HierarchyLevelHeader/Footer". You can also define a "OnRenderCompleteScript" which defines a JavaScript method that is executed after the complete hierarchy has been rendered and after each consecutive refresh (e.g. when the refiners are updated). For details please refer to the example below, where we extended the HierarchicalTagRenderer with a "OnRenderCompleteScript" function and additional HTML.
Available ExpressionVariables
The following ExpressionVariables are available within the renderer:
- Node:
The "CompositeRefinementNode" which contains all information about the current refinement node, e.g. Value, Key, IsRoot, IsSelected and so on. For more details see the "CompositeRefinementNode" class. - Count:
The number of occurrences of the Tag in the result set. Also available with "Node.Occurrences". - Tag:
The tag which is also used as the refinement value. Also available with "Node.Value".
TermRefinementGroup
This group can be used to display terms which are applied to the items you want to refine. It is very similar to the TagRefinementGroup and will therefore not be further explained.
Available ExpressionVariables
The following ExpressionVariables are available within the renderer:
- Node:
The "CompositeRefinementNode" which contains all information about the current refinement node, e.g. Value, Key, IsRoot, IsSelected and so on. For more details see the "CompositeRefinementNode" class. - Count:
The number of occurrences of the Term in the result set. Also available with "Node.Occurrences". - Key:
The key which identifies the Term. Also available with "Node.Key". - Term:
The term which is also used as the refinement value. Note: The current "Node.Value" is either a "Term" or a "TermSet" (the other variable is null). Also available with "Node.Value". - TermSet:
The TermSet which is also used as the refinement value (only for Caml-Queries). Note: The current "Node.Value" is either a "Term" or a "TermSet" (the other variable is null). Also available with "Node.Value". - Label:
The label in the "CurrentUICulture" of the term.
How refinement works
As you've probably already read above, the refinement in the CRWP works the same way as in the RWP. Nevertheless we'd like to describe the basics of the refinement in a few sentences for those of you who don't know this process just yet.
- Create a new CRWP configuration, define the groups (=fields to refine) and place it on a page. Important is the "Name" of it, since it's used to reference the CRWP later. This CRWP is the producer (it produces conditions).
- Next you create a WebPart which uses a MatchPoint DataProvider to display data, e.g. a DataGrid. Don't forget to set a "Name" here either or the refinement won't work later. This Web Part is the consumer.
- Then you have to define an ExpressionCondition on your consumer Web Part which points to the CRWP-Name, i.e. "ConnectionData.MyCRWPName".
- For all refinement-fields (groups) you have defined, the CRWP "asks" the DataProvider of your consumer Web Part which values exist and then displays the appropriate checkboxes / refiner values.
- When you click a checkbox (aka. choose to refine), the CRWP builds a (or multiple) condition(s) and sends them to the DataProvider of your consumer Web Part where a new query containing these new conditions is executed and a new result set is displayed.
- The process restarts at step 4. Which means the CRWP will now show less choices, since there are fewer results and therefore most likely also fewer different values.
As a side note it's good to know that when something is refined, only the result of the consumer WebPart and all refinement values are re-rendered, all other content of the page is not touched.
An example: A collapsible HierarchicalTagRenderer
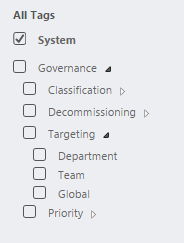
Now that you know about the concept and the functionality of the CRWP it's time to look at an example. The following example shows a HierarchicalTagRenderer in which all children are by default collapsed and can be expanded by the user if he clicks on a toggle icon.
To accomplish this we need to define some JavaScript code and some minimal changes on the render pattern of the default HierarchicalTagRenderer. Important to know is: If the user chooses a tag to refine, all elements inside the group are newly rendered, but the group itself (which means the "outer" HTML) is not touched. We can take advantage of that and save the "expanded/collapsed" state directly on the DOM-Element of the corresponding group of the CRWP. There it is "persisted" as long as the users stays on the same page.
For simplicity the complete code is inside the same configuration file and not splitted up in different files.
Let's tart with what we need:
- A new CompositeRefinementWebPartConfiguration..
- .. with a TagRefinementGroup
- .. and a HierarchicalTagRenderer
Next we will look at the HierarchicalTagRenderer:
First we have to define our RowTemplate:
<li data-clickScript data-key='{Tag.Id}' class='mp-crwpRow'>
    {MPUtility.EncodeHtml(Tag.Name)}
    <span class="toggler"></span>
</li>
The only thing worth mentioning here is the Toggler-span. This will be the place where the user can click to expand/collapse a tag hierarchy. Note that this span has no styles applied, the class is just needed for finding the element later. Also the span will be invisible by default, since it has no size defined and contains no content.
Now we need to define a "OnRenderCompleteScript" method. This is a method from our JavaScript which will be called once the rendering is complete. It's more or less like a "document ready" method for the refiner.
MP.Toggler.Init
The rest of this HierarchicalTagRenderer is pretty straight-forward and will therefore not be described here.
With what we defined in the HierarchicalTagRenderer we will get the following (simplified) HTML structure later:
<ul>
    <li>
        First Tag
        <span class="toggler"></span>
    </li>
    <li>
        Second Tag
        <span class="toggler"></span>
    </li>
    <li>
        <ul>
            <li>
                Second Tag child 1
                <span class="toggler"></span>
            </li>
            <li>
                Second Tag child 2
                <span class="toggler"></span>
            </li>
            <li>
                <ul>
                    <li>
                        Second Tag grand child 1
                        <span class="toggler"></span>
                    </li>
                </ul>
            </li>
        </ul>
    </li>
</ul>
As you can see "children tags" are not direct HTML-Child-Tags of the "parent
- " element. This is important to know, since we need this to find the correct children in the JavaScript below.
Now let's start with the most important part: Tha JavaScript. Because we don't want a separate file we need to place our JavaScript somewhere in the configuration - a good place for this is the "Chrome-CustomHeaderHtml".
The following JavaScript does the complete magic. The script comments (hopefully) explain what's going on here.
MP.Toggler = function(group)
\{\{
    //save the expanded and the collapsed image into two variables,
    //these images will be applied as a background image to the toggler span later
    var layouts = "{SPHelper.GetCurrentWeb().ServerRelativeUrl}" +
                  "/_layouts/15/Colygon.MatchPoint/images/";
    var expandedImage = layouts + "nodeexpanded.png";
    var collapsedImage = layouts + "nodecollapsed.png";

    //save the current context in a variable, so we can use it in closures / functions
    var me = this;
    me.group = group;
    //this array will contain all keys of the elements which are expanded
    me.expandedKeys = new Array();

    //this function will attach a click event to each toggler-span
    //so the user can click on it, to show/hide the child tags
    me.Setup = function()
    \{\{
        mp$(group).find(".toggler").each(function()
            \{\{
                var toggler = mp$(this);
                //get all tags which are possible children of the tag
                //to which the current toggler belongs, it's also possible that
                //the "toggler.parent().next()" is just a sibling
                var possibleChildren = toggler.parent().next();
                //only add a click event, hide the children and apply the css if the
                //"possibleChildren" are really children, this can be detected if a
                //new "ul" tag is started (as we defined in the HierarchicalHeader)
                if (possibleChildren.children("ul").length > 0)
                \{\{
                    //this binds the toggle method to the click event
                    toggler.click(me.Toggle);
                    toggler.css(
                                \{\{
                                "background-image": "url(" + collapsedImage + ")",
                                "display": "inline-block",
                                "vertical-align": "top",
                                "width": "15px",
                                "height": "20px",
                                "cursor": "pointer"
                                }});
                    //since we initially want all tags to be collapsed,
                    //we need to hide them here
                    possibleChildren.hide();
                }}
            }});
    }};

    //this is the function which is executed when a user clicks on the toggler-span
    me.Toggle = function(event)
    \{\{
        var toggler = mp$(event.target);
        var children = toggler.parent().next();

        //toggle aka. hide or show the child-tags
        children.toggle();

        //the data-key attribute contains the value which is used for the refinement,
        //we use this as the key to uniquely identify a tag
        var key = toggler.parent().attr("data-key");
        var index = me.expandedKeys.indexOf(key);
        //if the key is already in the array we need to remove it and vice versa
        if (index > -1)
        \{\{
            me.expandedKeys.splice(index, 1);
            toggler.css("background-image", "url(" + collapsedImage + ")");
        }}
        else
        \{\{
            me.expandedKeys.push(key);
            toggler.css("background-image", "url(" + expandedImage + ")");
        }}
        //stop the event propagation so the refinement click event is not executed
        event.stopPropagation();
    }};

    me.RestoreExpanded = function()
    \{\{
        mp$(me.group).find("[data-key]").each(function()
        \{\{
            var children = mp$(this);
            //check if the user did expand these tags before,
            //this means they are in the expandedKeys-array, if so expand them again
            if (me.expandedKeys.indexOf(children.attr("data-key")) > -1)
            \{\{
                children.children(".toggler")
                        .css("background-image", "url(" + expandedImage + ")");
                children.next().show();
            }}
        }});
    }};
}}

//This is the method which we defined in the "OnRenderCompleteScript" property
//of the CRWP configuration, these parameters are passed to us by MatchPoint,
//both parameters are DOM-Elements:
//refinementWebPart = the complete DOM-Element of the refinemenWebPart
//group = the DOM-Element of the hierarchical group we defined
MP.Toggler.Init = function(refinementWebPart, group)
\{\{
    //if the page is created for the first time we need to instantiate a new instance
    //of our toggler class, we save the instance on the "group" DOM-Element, because
    //this object "persists" and is not re-rendererd when the refinement changes
    if ($.isNullOrUndefined(group.toggler))
    \{\{
        group.toggler = new MP.Toggler(group);
        group.toggler.Setup();
    }}
    else
    \{\{
        group.toggler.Setup();
        //the refinement was used (the user refined something),
        //we need to restore all items, which the user expanded before
        group.toggler.RestoreExpanded();
    }}
}};
And this is how the result will look like:
You could go even further with this: You could store the "expandedKeys" array inside the local storage so that the "expanded settings" of the users are persisted.
We hope that we could give you a good understanding of the concept and the functionality of the CRWP.
If you have any questions feel free to ask us.
