Main Portal
MatchPoint Snow provides you with a global portal to help you navigate your documents and collaborative content of your team, your projects and your organization. By using our intuitive search and filter navigation, you can quickly find any information to which you have access.
The MatchPoint Snow main portal provides five different perspectives on content: "Timeline", "Workspaces", "Content" and "People". Other than on your file shares, you do not need to know any hierarchical folder structures to find information, but can directly use search criteria in the context you are working in.
The portal view: landing page which shows information relevant to the current user, his daily work and last announcements
The timeline: the timeline is the social dimension in Snow. It shows you the recent posts made by your colleagues
The workspaces view: workspaces are the "physical" containers of Snow. All content is stored in workspaces. In technical terms, a workspace is a SharePoint site collection
The content view: in the content view, you can preselect the type of content you would like to see and then filter even large amounts of content to find quickly what you are looking for
The people view the people dimension gives you an alternate access to content someone has created or is working on. It also shows you who is who and lets you find experts within your organization or facilitates contact between employees who do not know each other in person
The dashboard view: the reports dimension shows reports for specific workspace topics. It is divided in Workspace Monitor report and Project Portfolio report.
Use the top-level navigation to switch between the dimensions.

The MatchPoint Snow Welcome Screen
As a new MatchPoint Snow user, you receive a warm welcome when accessing MatchPoint Snow for the first time. A splash screen provides you with direct access buttons for the most important areas. This helps you to find relevant content quickly and start working with MatchPoint Snow, without actually having to be trained and acquire a lot of knowledge first.
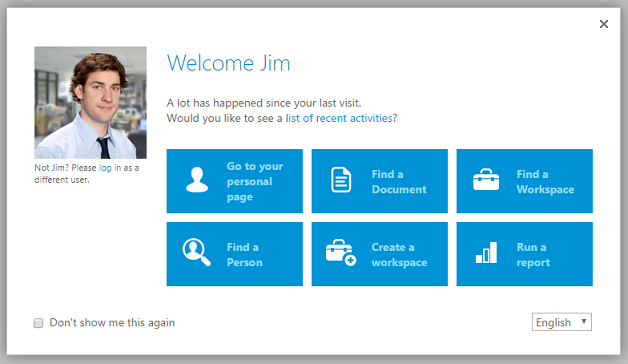
On the MatchPoint Snow welcome screen, you can
- Switch the display language: Switch the entire UI language by selecting one of the available languages from the drop-down menu. Your language settings will be stored in your user profile
- Login as a different user: If another user is logged into MatchPoint Snow, you can log him or her out and log in as yourself
- Discover Snow: Go directly to your personal page, the workspace, content and people pages, create a new workspace, or run a report
If you do not want to see the MatchPoint Snow welcome screen every time you log in, check the "Don't show me this again" checkbox.
The MatchPoint Snow Portal Layout
Throughout the four perspectives (besides portal), MatchPoint Snow provides a unified screen layout, grouping functionality and content in three main areas:
The middle area renders a personalized view of the content of the respective dimension (social posts, workspaces, content or people).
The left wing provides an intuitive, context-sensitive filter navigation with simple page search.
In the right wing, an action panel provides a contextual selection of actions you can perform. The right wing also offers a number of widgets, such as the "Today"-view.
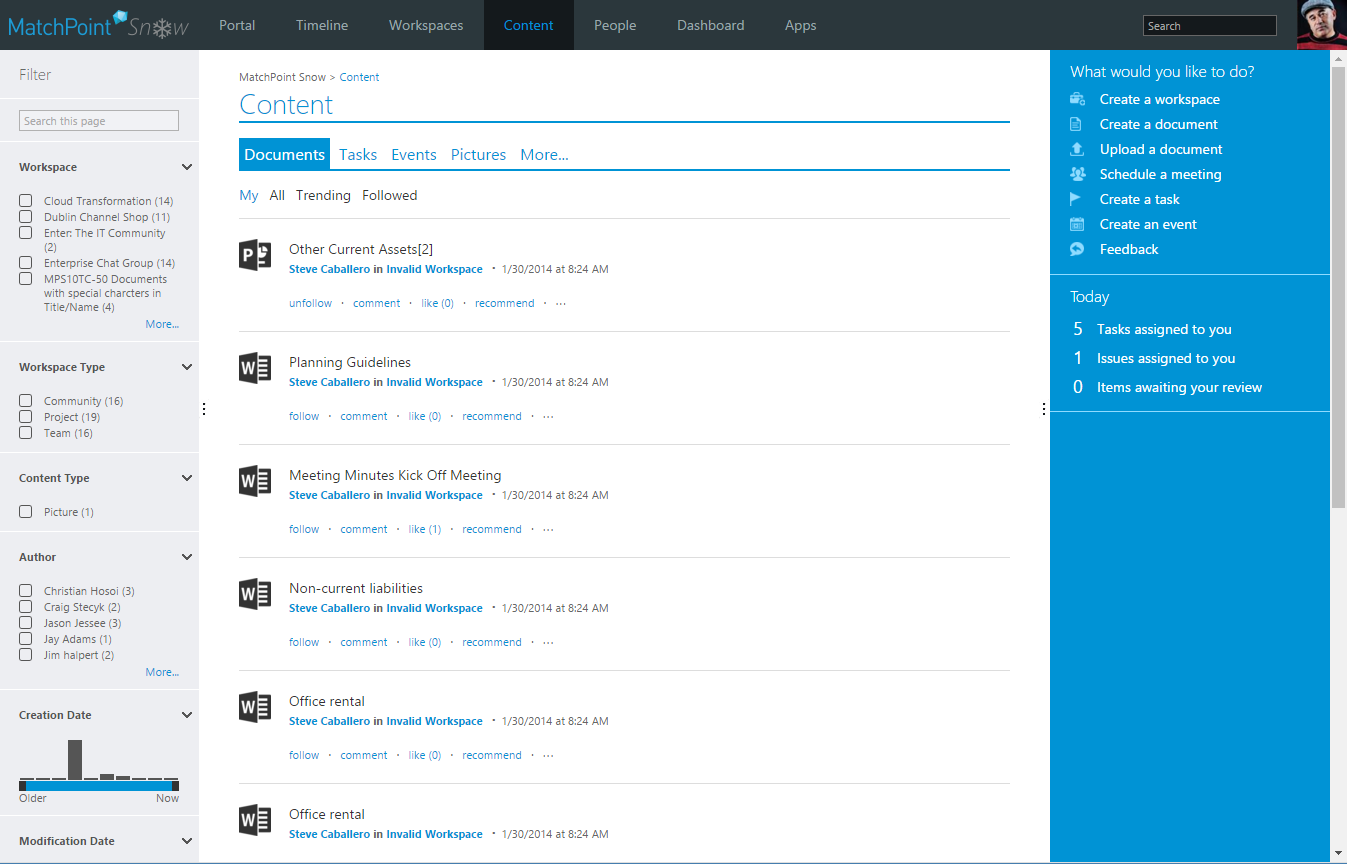
The Content Area
The middle area of any MatchPoint Snow page is the main area displaying content and functionality tightly related to act on the latter, such as view selectors, social features, call-outs and context menus.
MatchPoint Snow automatically crawls and aggregates content of the same type across the entire platform and provides it as a view in the content area of each page. By using SharePoint's powerful FAST search engine and other search algorithms, MatchPoint Snow is able to provide real-time views of all content.
Depending on the view, new content might not show immediately because the FAST index might not have crawled it yet. Expect delays ranging from several minutes to several hours, depending on your server settings.
Overview
The content area is context-specific, which means that it always shows the content available in the specific context of the page you are visiting. We define the context mainly by the layer you are currently working on, such as the main portal (root layer), a workspace or a sub-workspace, but also by the dimension (timeline, workspaces, content and people), type of workspace and your role. For example, the content area in a project workspace will display different content types than the content area in a community workspace, and the timeline shows a chronological view on social content, whereas the content dimension shows content by type. Moreover, if you are the owner of an item, you might have more options to act on it than if you have read access only.
Depending on the context and the selected view, the display in the content area may vary. For example, the people dimension shows thumbnail images, while the timeline, workspace and content dimensions show as a tiles or list of search results.
The filters in the left wing always act on the content displayed in the currently selected view in the content area.
View Selector
Above the content, the view selector provides a number of predefined views. By clicking on a view, MatchPoint Snow applies a filter to the content in the content area according to the selected view. Some views, such as the "My" view, are personalized to the current user, whereas other views, such as the "Trending" view, are based on rules.

All perspectives in the MatchPoint Snow main portal provide at least the following views:
All: shows all content you at least have read access to (unfiltered).
My: shows a personalized view on content owned by you. The filter criteria varies depending on the content. For example, the timeline makes distinguishes between posts mentioning you and posts created by you, the workspace dimension lists workspaces you own, the content dimension lists content you created, and the people dimension shows your colleagues.
Followed: shows a list of all content items you follow. You can use the followed view to manage your favorites, simply by following a content, workspaces or person.
Trending: shows the content items with the highest number of followers and the highest number of likes. Use the trending view to see what is popular and discover new content.
Content Items
The largest part of the content area shows the list of content items. Depending on the selected view and the filters you have applied, different display formats are used. Thera are two types of views:
A familiar search result type of format, displaying a photo or an icon on the left, a link to the item to the right and additional information, such as a description, the name of the owner or author and a link to the corresponding workspace, as well as the social functions.
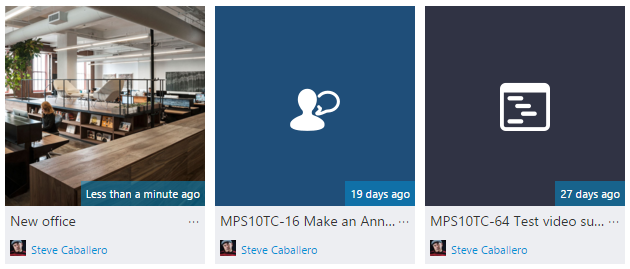
Tile format displaying thumbnail or icon, a title which is a link to the item and the name of author or owner. Depending on view tiles may vary.
Call-outs
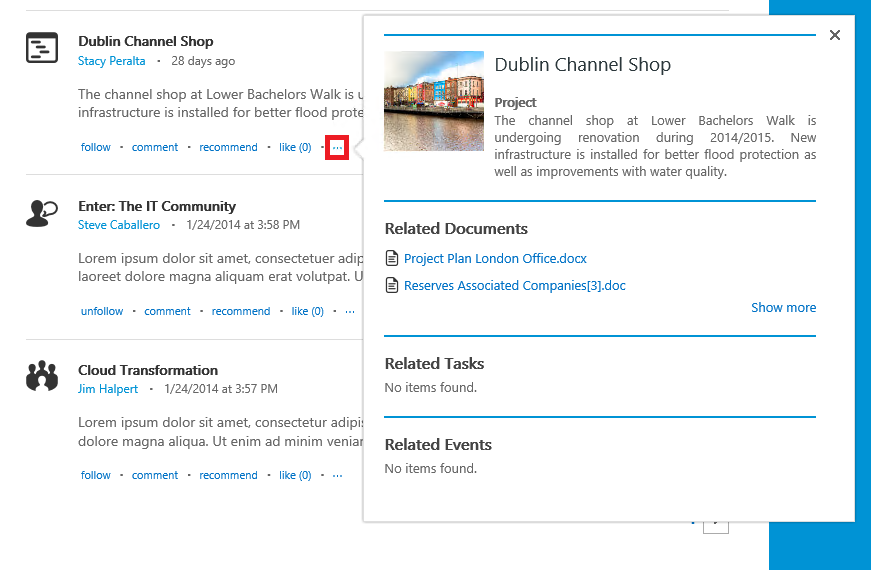
MatchPoint Snow uses call-outs to display additional information about a content item. Call-outs are very useful, because they allow you to get more details about a content without actually having to open it.
A call-out is represented by three dots (...). By clicking on them, the call-out windows pops up. Depending on the type of content and your permissions, the additional information provided by the call-out may vary. In some cases, call-outs may contain links to content. For example, in a workspace call-out, you will see links to the most recent documents and tasks and can open them directly, without having to open the workspace first.
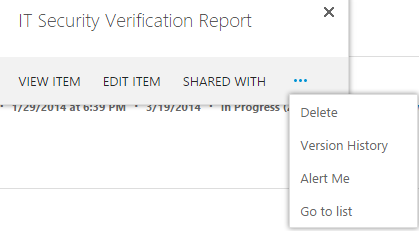
Context menus
To act on a content item in the content area, MatchPoint Snow provides functionality in context menus. A context menu is represented by three dots (...). Depending on the type of content and your permissions, the functions provided by the context menu may vary. The MatchPoint Snow context menus work in a similar way as the standard SharePoint context menus. They can be extended with additional functionality as needed.
The Social Features
MatchPoint Snow provides all popular social features, such as liking, commenting and following, in a completely integrated way adapted to the use in a professional business environment. Social features are helpful to support your processes and to improve your ability to track conversations and collaborative tasks.
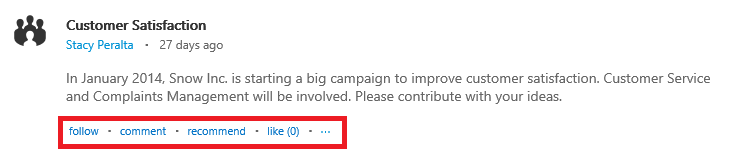
To make the use of the MatchPoint Snow social features as intuitive as possible, we made sure to provide the functionality in a way you already know from Facebook and other social platforms. Social features always refer to a content item (e.g. a document, a workspace, a user, a task etc.) and you will always find them tightly linked with the latter. MatchPoint Snow provides the following social features. Depending on the page you are currently working on and the content type, the availability of social functions may vary.
| Content Type | Follow | Like | Comment | Recommend |
|---|---|---|---|---|
| Workspace | + | + | + | + |
| Content | + | + | + | + |
| People | + | - | - | - |
For a list of available social features including a detailed description on how to use them, please refer to Social Features.
The Filter Navigation
Overview
MatchPoint Snow sports a powerful semantic layer that automatically connects your content to business context, such as your customers, products, organizational units or locations. MatchPoint Snow provides you this metadata and enables you to filter the content accordingly. You can combine several filters to narrow down your content selection to a small number of search results. Contextual filters are a powerful, yet easy to use tool for concise navigation.
Checkbox filters
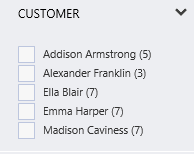
You can check and uncheck one or a combination of filters as needed by clicking on the corresponding checkbox or the checkbox label. The number behind the label indicates the number or items the filter will return. When a filter is applied, the filter navigation automatically optimizes itself to reflect the new search result. This can result in a reduced or modified set of filters. To get back to the initial set, simply uncheck the filters you applied.
Range filters
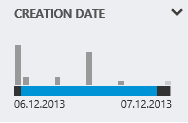
You can use range filters to filter by creation and modification date by moving start date and end date on the slider. The histogram above the slider indicates in which part of the range you can expect content. The height of the bars are representative for the relative amount of content in the respective range.
Expanding and collapsing filters
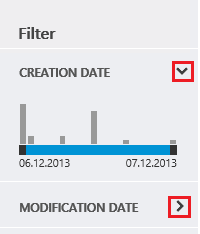
You can expand and collapse filters by clicking on the arrow displayed to the right of the label of each filter.
The "Show More" button
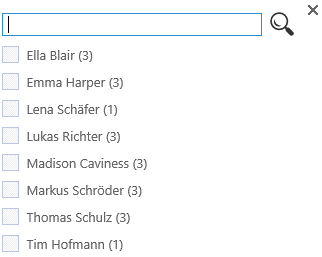
Since the number of checkboxes is limited, use the "Show more" button to access the complete list of filter values. This opens a pop-up dialogue displaying a searchable list of filter values. Just start typing in the search box to narrow down the choice of values, and then select the desired value by checking its box in the pop-up dialog.
The Action Panel
To make its use as intuitive as possible, we make sure MatchPoint Snow provides functionality in a consistent way and in one central place. All the actions you can perform in Snow, such as creating new workspaces, creating or uploading content, or acting on existing content and managing workspaces in various ways, are provided through the action panel that always sits at the top of the right wing.
The action panel is context-specific, which means that it always shows the actions available in a specific context or the page you are visiting. We define the context mainly by the layer you are currently working on, such as the main portal (root layer), a workspace or a sub-workspace, but also by the type of workspace and your role. For example, the action panel in a project workspace will look different from the action panel in a community workspace. Moreover, if you are the owner of a workspace, it might show you more options than if you are a member or a reader.
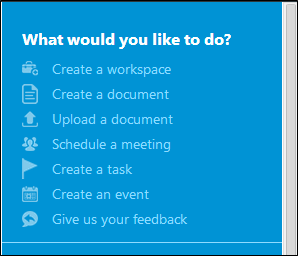
The action panel in the MatchPoint Snow main portal provides you with the most important actions, such as for creating workspaces and for creating or uploading content.
For a complete list of available actions including a detailed description on how to use them, please refer to Action Catalogue.
Widgets
Widgets are useful small helpers MatchPoint Snow is providing in the right wing, just below the action panel. Widgets can be everything from displays providing information, such as lists of recent documents, graphical overviews, ads, weather maps or KPIs, to small interactive tools, such as interfaces to access external applications (e.g. Google, time reporting etc.), surveys or polls.
For a list of available widgets including a detailed description on how to use them, please refer to Widget Catalogue.

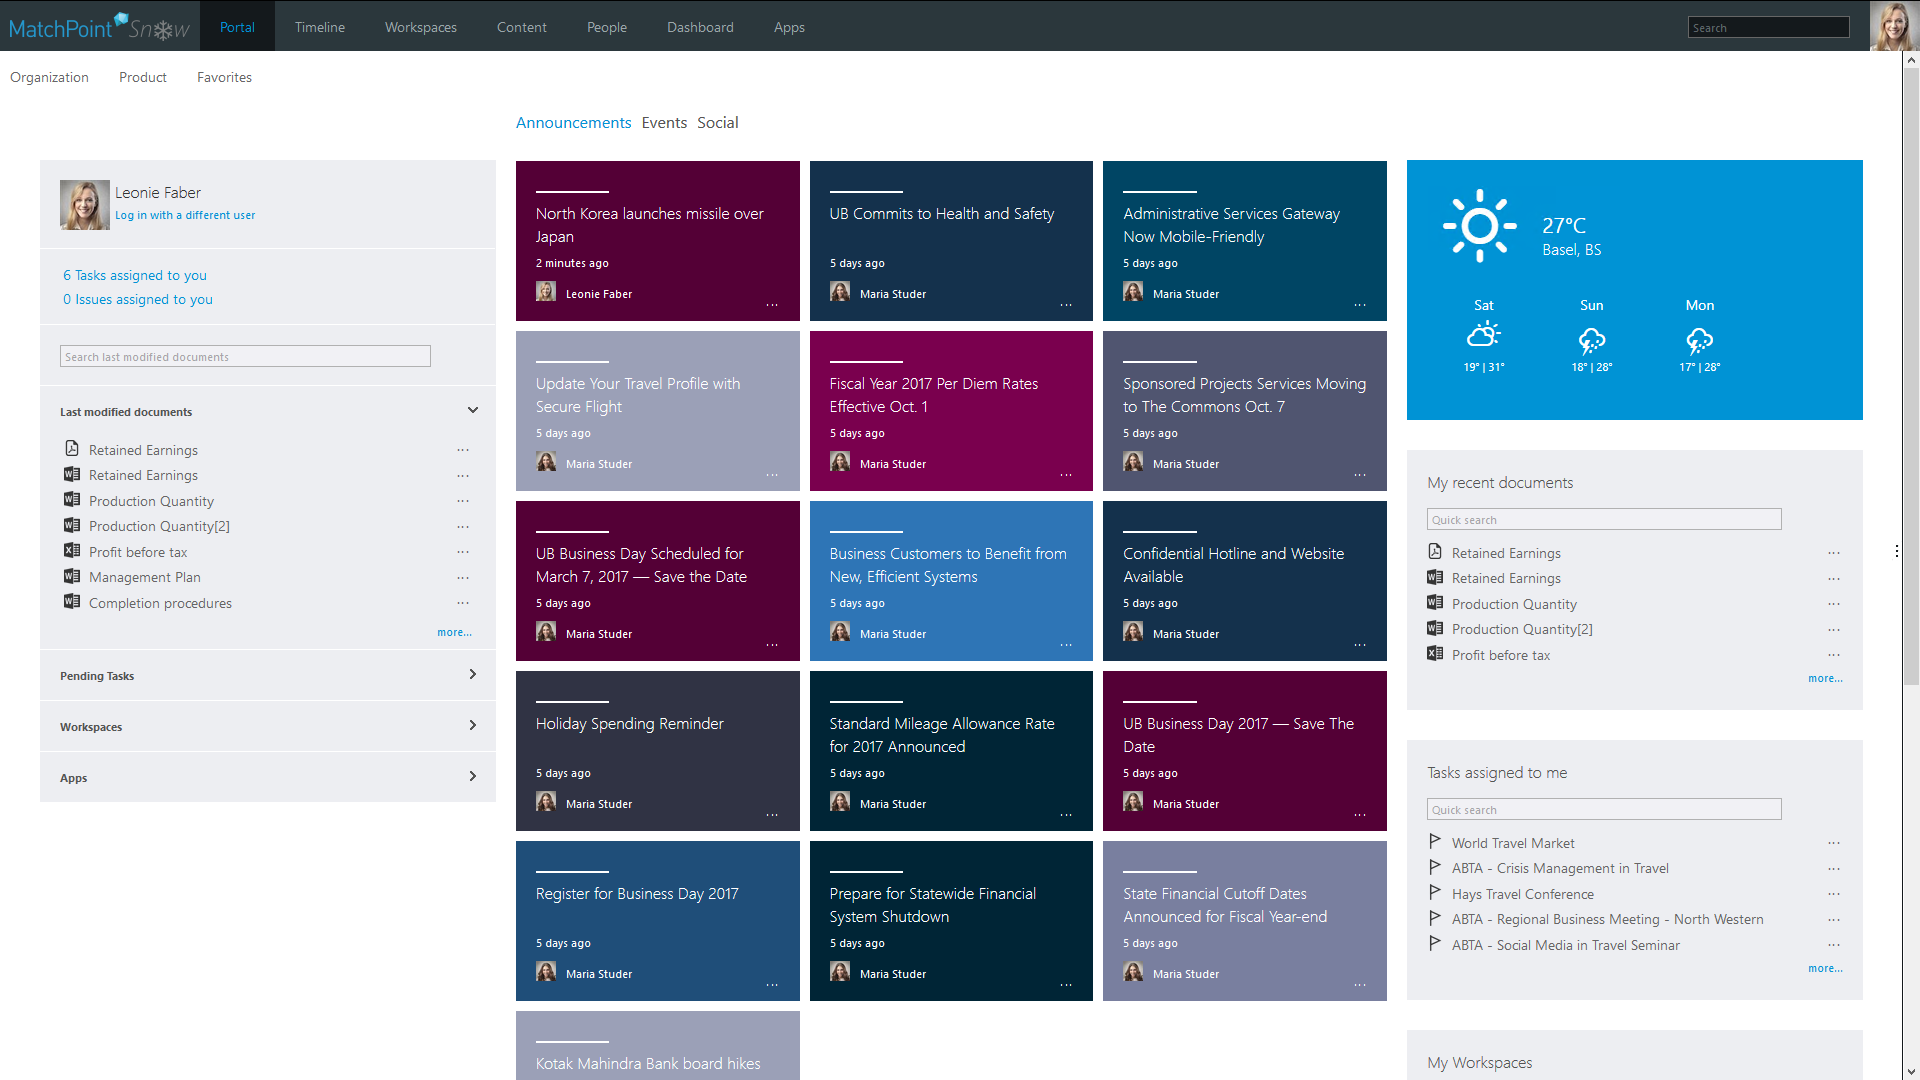
The Portal Dimension
The portal is the landing page in Snow. This page shows information relevant to the current user and is divided into the following sections:
- My Work: This section is located on the left hand side and shows information related to the daily work of the user like documents, tasks and workspaces.
- My News: This is the middle section and contains tabs for announcements, events and the social feed (i.e. the timeline).
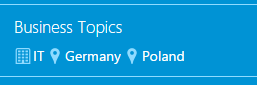
- My Content: The section on the right hand side shows content which is relevant for the user. The user can choose from a set of tags. Web parts associated with these tags will then be displayed. Note that these web parts or rather these configurations are stored in a separate list in snow and can be managed by the corresponding snow admins.
- Mega menu: The mega menu is positioned below the top navigation and stretches across the whole screen. It gives the user direct access to the different, organization specific structure. Note: By default there is just a sample mega menu which has to be adjusted according to your own needs. Naturally it can also be removed if not wished.
The portal welcome page can be changed anytime to a custom welcome page by updating the WelcomePage in the MatchPointSnow configuration file.
The Timeline Dimension
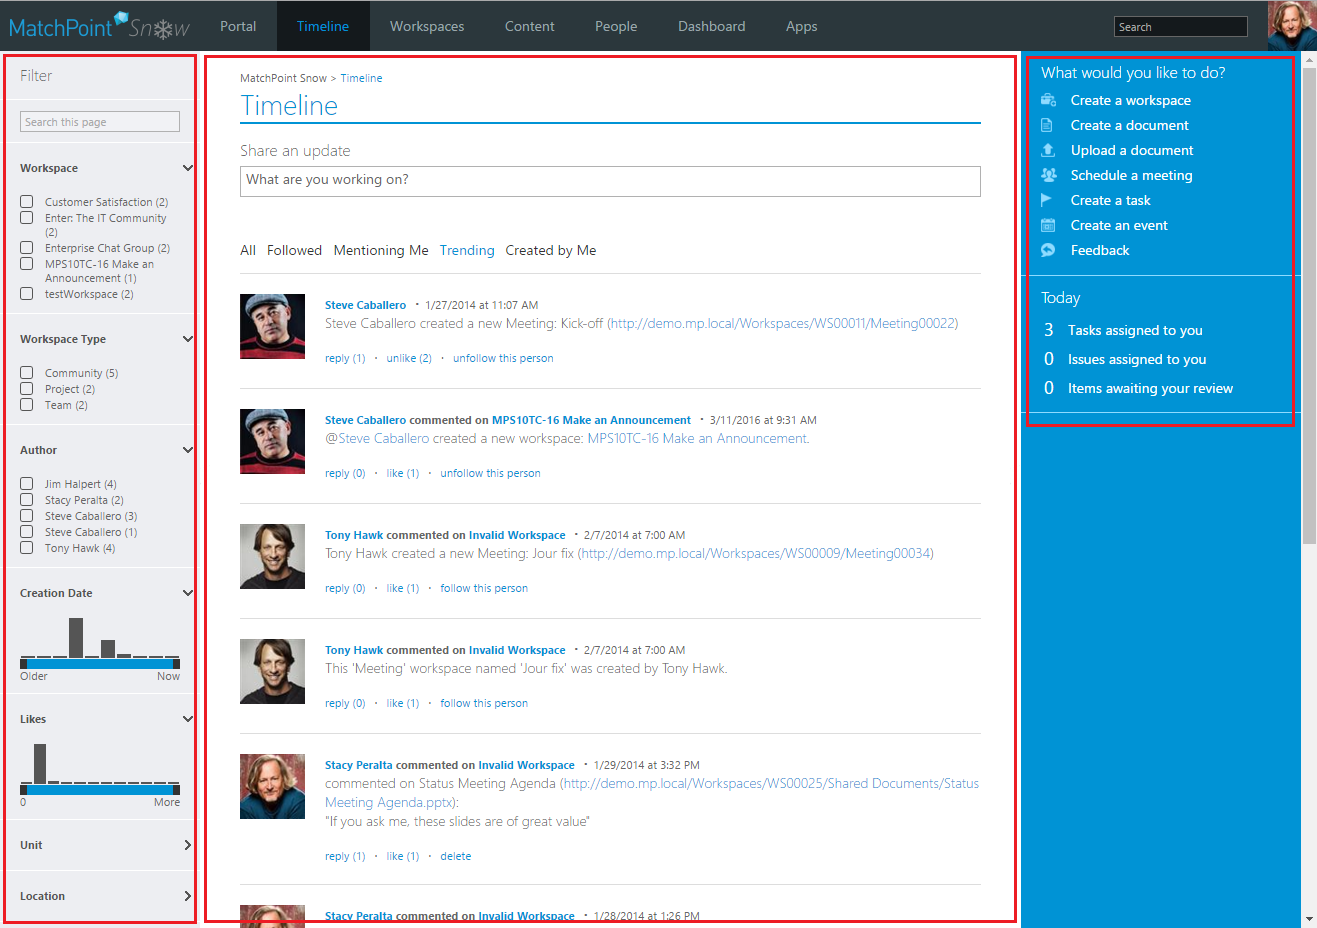
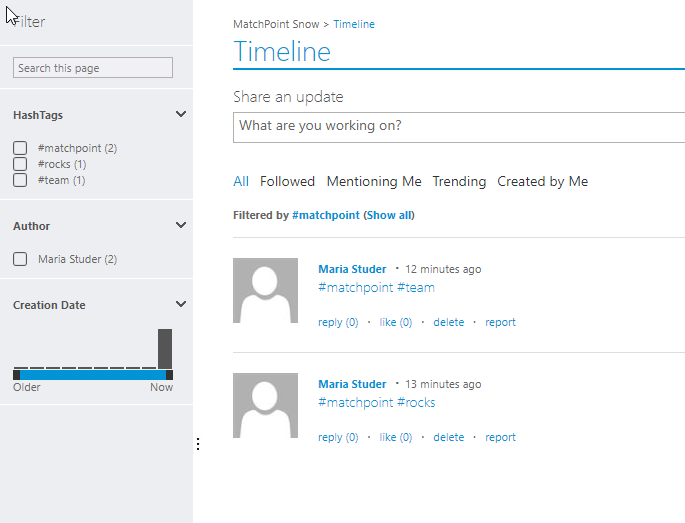
The timeline is the social dimension in Snow. The content area of the timeline shows you an aggregation of the recent updates posted either to the timeline or to a workspace by yourself and your colleagues. The display is security-trimmed, which means that you can only see content you are allowed to see (you need at least read access). Moreover, depending on your profile and the selected view, the content is personalized to your role and interests. Therefore, what you see in the timeline may be different from what other users see.
You can filter the timeline content, even by hashtags, using the filter navigation provided
in the left wing. You can also filter by hashtags if you click on the hashtags itself. By default, the search takes place
in the search component redirecting you from the timeline. But, it can be configured to be displayed in the timeline. You just need to go in the MatchPoint Snow Configuration
and then in the TimelineSettings node to uncheck the OpenHashTagFiltersInSearch condition.
 Moreover, you can perform actions by using the action
panel in the right wing. Please refer to The Filter
Navigation and The Action
Panel for further details.
Moreover, you can perform actions by using the action
panel in the right wing. Please refer to The Filter
Navigation and The Action
Panel for further details.
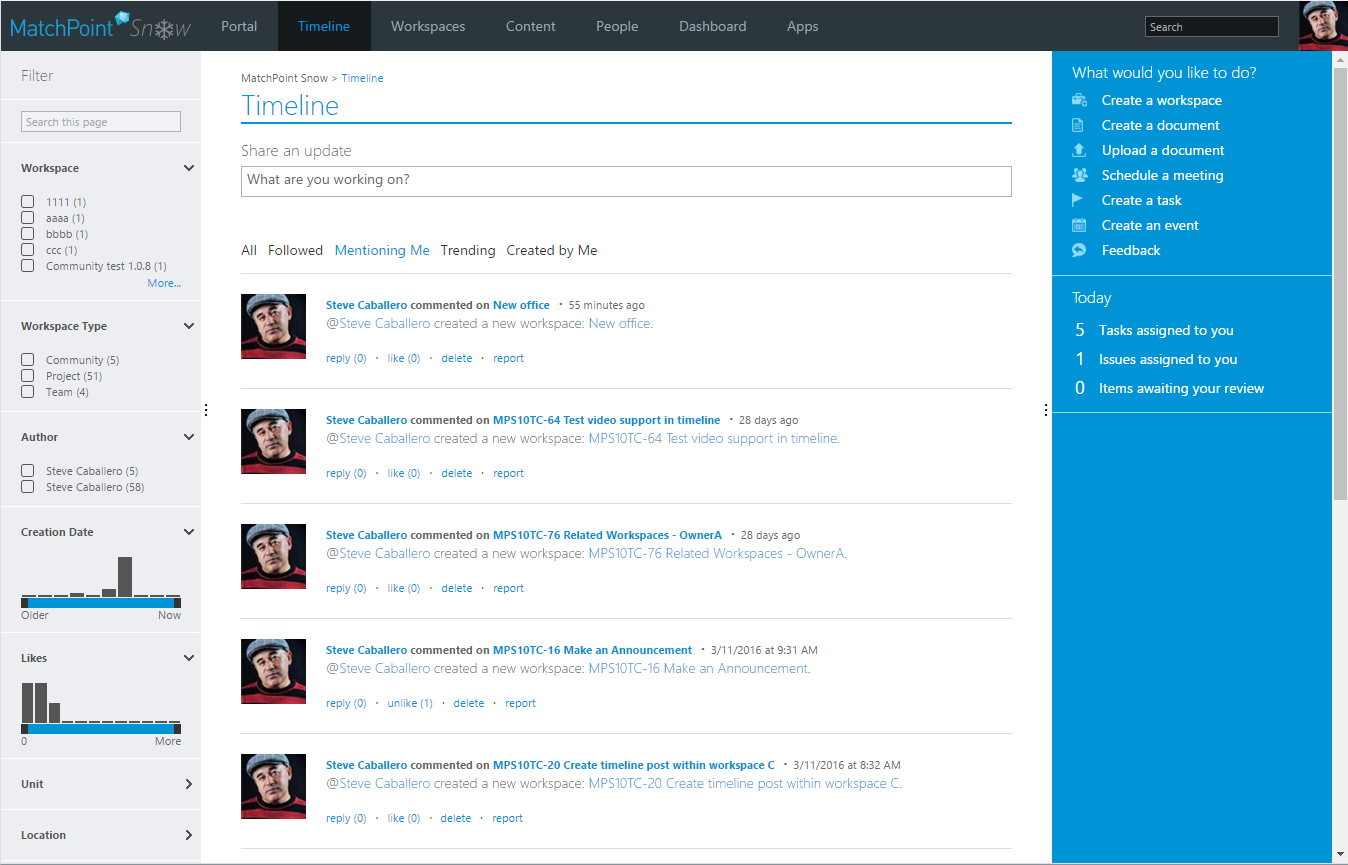
You can create new posts directly in the timeline. Simply write your update into the "Share an update" field in the upper half of the content area and publish it to your colleagues by clicking the "Post" button.

MatchPoint Snow creates updates about important actions and posts them to your timeline automatically. For example, you will receive such automatic notifications when new workspaces and meetings are created, when someone comments on something or when people change their job title. This keeps you informed about important changes concerning content and people related to your work.

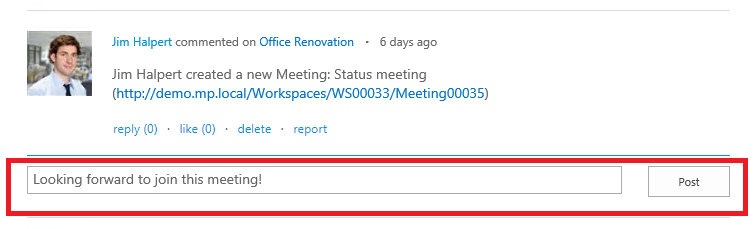
You can reply to a post by pressing the "Reply" button directly on each post. A textbox to enter your reply will open. Simply write your message into the box and press the "Post" button to publish your reply. The number of replies is indicated for each post.
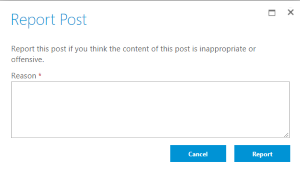
You can report a post if you find it as being inappropriate. The "report" action won't appear for SharePoint automatic generated posts (e.g. A user follows another user). In order to report a post, the user has to specify a reason.
There is the option for a user to dismiss a report if it was created by him. This can be done by using the "dismiss report" button. The button will appear only after a post has been reported and the page has been refreshed. Initially a "reported" text shows up after a post has been reported.
Timeline Moderation
The timeline moderation feature enable users to report innapropriate content or spam posts. This can be done by using the "report" link that appears bellow the content itself.
In order to process the reported posts, a Timeline Moderator role has been introduced. Timeline Moderators can be configured in the MatchPoint Snow Configuration file -> TimelineSettings -> Moderators.
For a Timeline Moderator, a "Timeline Moderation" tab will be visible on the Timeline page.

This view displays all posts that have been reported. The timeline moderator oversees them and does one of the following action:
- show reports: all the reports will be displayed beneath the post.
- delete: will delete the post. A message for the author of the post and for all users that reported the post will be sent via email.
- dismiss: will cancel all reports and will send a message for users that have reported the post.
The Workspace Dimension
The workspace dimension is the physical dimension in Snow. The content area of the workspace dimension shows you an aggregation of the workspaces available. The display is security-trimmed, which means that you can only see content you are allowed to see (you need at least read access). Moreover, depending on your profile and the selected view, the content is personalized to your role and interests. Therefore, what you see in the workspace dimension may be different from what other users see.
You can filter the workspace list using the filter navigation provided in the left wing. Moreover, you can perform actions by using the action panel in the right wing. Please refer to The Filter Navigation and The Action Panel for further details.
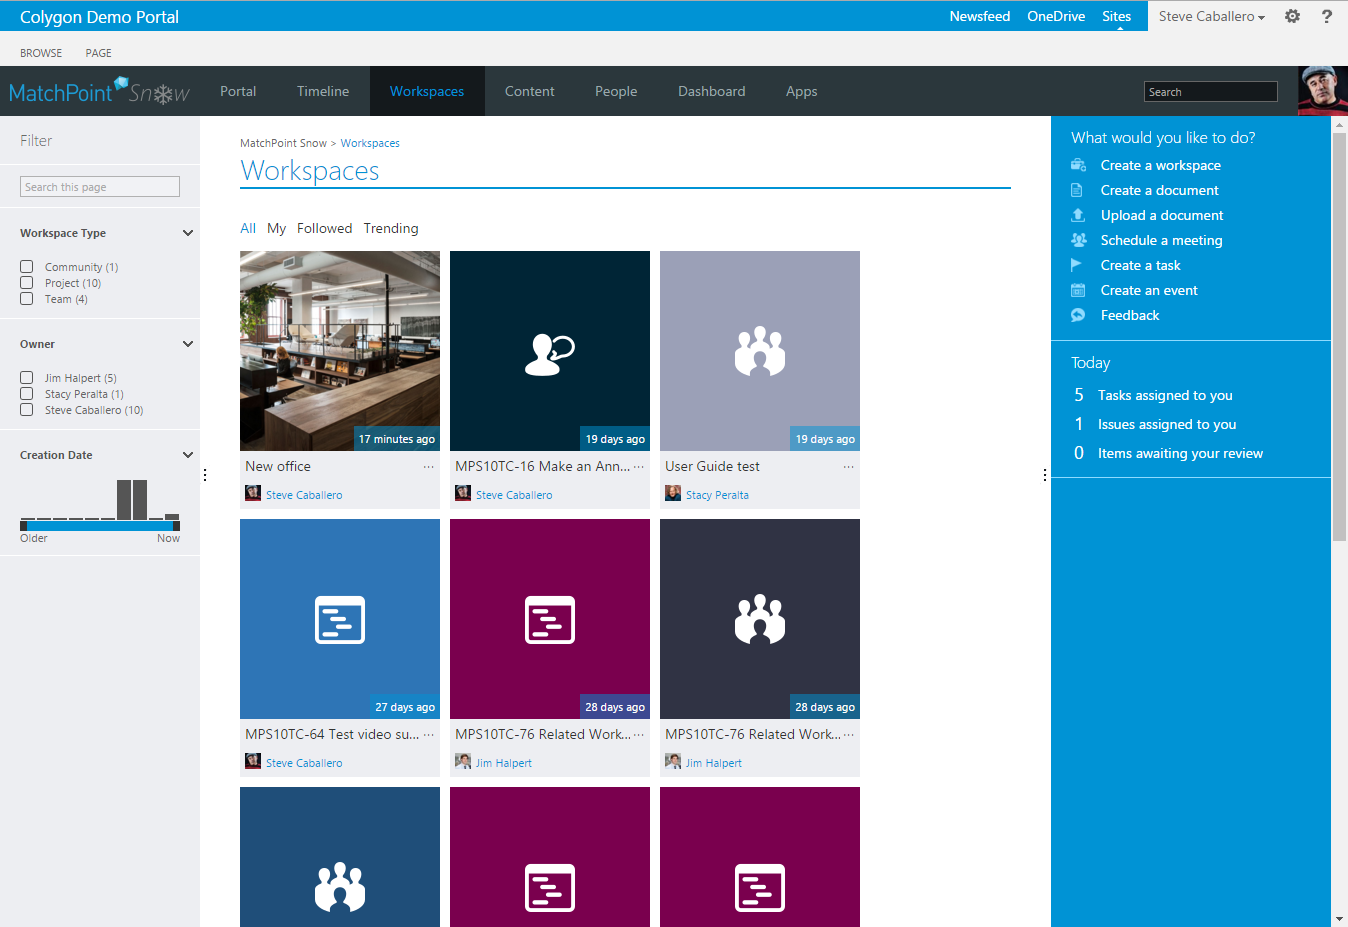
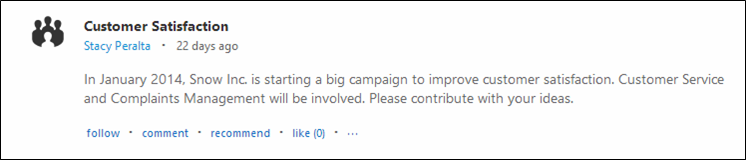
For each workspace in the list, MatchPoint Snow shows you the most important information at a glance:
- The workspace icon: the workspace icon lets you identify the type of workspace based on the workspace template
- The workspace name: click on the workspace name to open the workspace
- The name of the workspace owner: click on the owner's name to open his or her personal page
- The creation time: indicates when the workspace has been created
- The workspace description: gives you a short overview what the workspace is about, not visible on tile view
- The social features: use them to like, follow, recommend or comment on workspaces, not visible on tile view
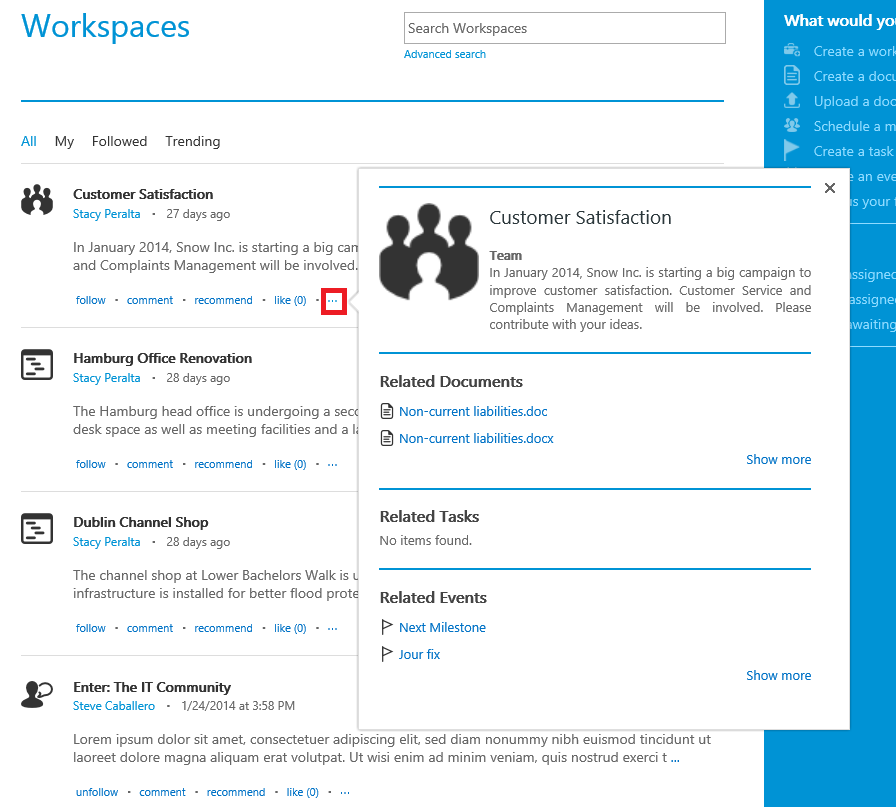
- The call-out: click on the ellipsis (...) to open the workspace call-out
The workspace call-out provides important information about a specific workspace and direct access to recent documents, tasks and events, without the need to open the workspace. This allows you to look at a number of workspaces and quickly to find out more about them.

The Content Dimension
The content dimension is the leading dimension in Snow. The content area of the content dimension shows you an aggregation of the content across all workspaces. The display is security-trimmed, which means that you can only see content you are allowed to see (you need at least read access). Moreover, depending on your profile and the selected view, the content is personalized to your role and interests. Therefore, what you see in the content dimension may be different from what other users see.
You can filter the content using the filter navigation provided in the left wing. Moreover, you can perform actions by using the action panel in the right wing. Please refer to The Filter Navigation and The Action Panel for further details.
To make it easy to navigate through content, you can preselect the content type by using the tab bar in the upper part of the content area.
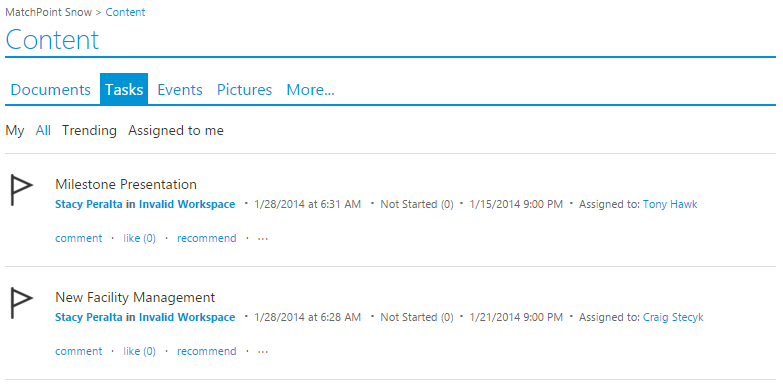
For each content item in the list, MatchPoint Snow shows you the most important information at a glance:
- The content icon: the content icon lets you identify the content type
- The content name: click on the content name to open the content
- The name of the author: click on the author's name to open his or her personal page
- The workspace name: click on the workspace name to open the workspace where the content is stored
- The creation time: indicates when the content has been created
- The social features: use them to like, follow, recommend or comment on content
- The context menu: click on the ellipsis (...) to open the context menu to act on content
The context menu provides direct access to content properties and actions without the need to open the content.

The People Dimension
The people dimension shows you the connections to your colleagues and their content. The content area of the people dimension gives you an overview of people working in MatchPoint Snow. The display is security-trimmed, which means that you can only see content you are allowed to see (you need at least read access). Moreover, depending on your profile and the selected view, the content is personalized to your role and interests. Therefore, what you see in the people dimension may be different from what other users see.
You can filter the people views using the filter navigation provided in the left wing. Moreover, you can perform actions by using the action panel in the right wing. Please refer to The Filter Navigation and The Action Panel for further details.
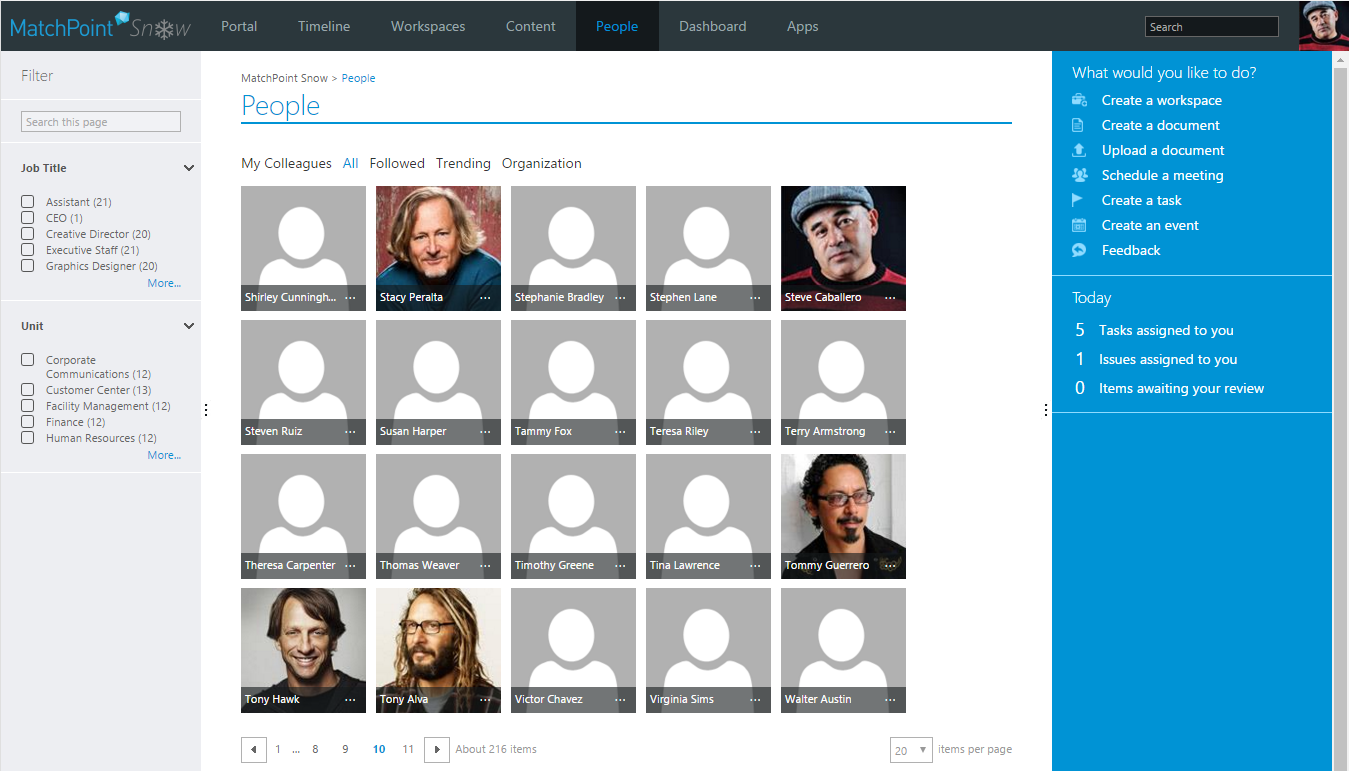
For each user, MatchPoint Snow shows you the most important information at a glance:
- The thumbnail: the thumbnail shows a profile picture to identify people
- The name: click on the name to open the personal page of the user
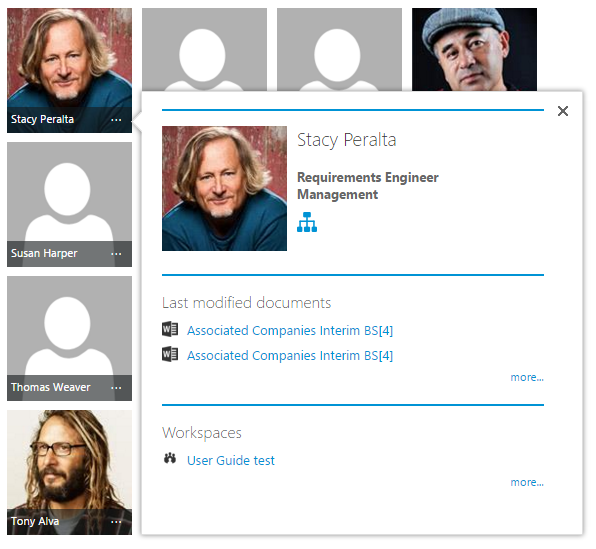
- The call-out: click on the ellipsis (...) to open the people call-out
The people call-out provides important information about a specific user and direct access to his or her recent documents and tasks. This allows you to look at a number of users and quickly to find out more about them.
The Personal Page
Your personal page provides a summary of your content, such as your recent documents, tasks and issues assigned to you and workspaces you are working in. You can access your personal profile page at any time by clicking on the "Go to your personal page" button in the top right corner of the top-level navigation.
In the left wing, you can see your main coordinates, such as your email address and phone number.
The main area is divided into the following sections:
- Latest Activity: your most recent posts
- Pending Tasks: open tasks assigned to you
- Pending Issues: open issues assigned to you
- Last modified documents: the documents you worked on recently
- Workspaces: workspaces you have an active part in (owner or member)
By clicking on the "more" button in either section, you can access the complete list of content. MatchPoint Snow will send you to the content dimension and apply a personal filter, only showing your personal content (e.g. documents created by you, tasks created by or assigned to you etc.)
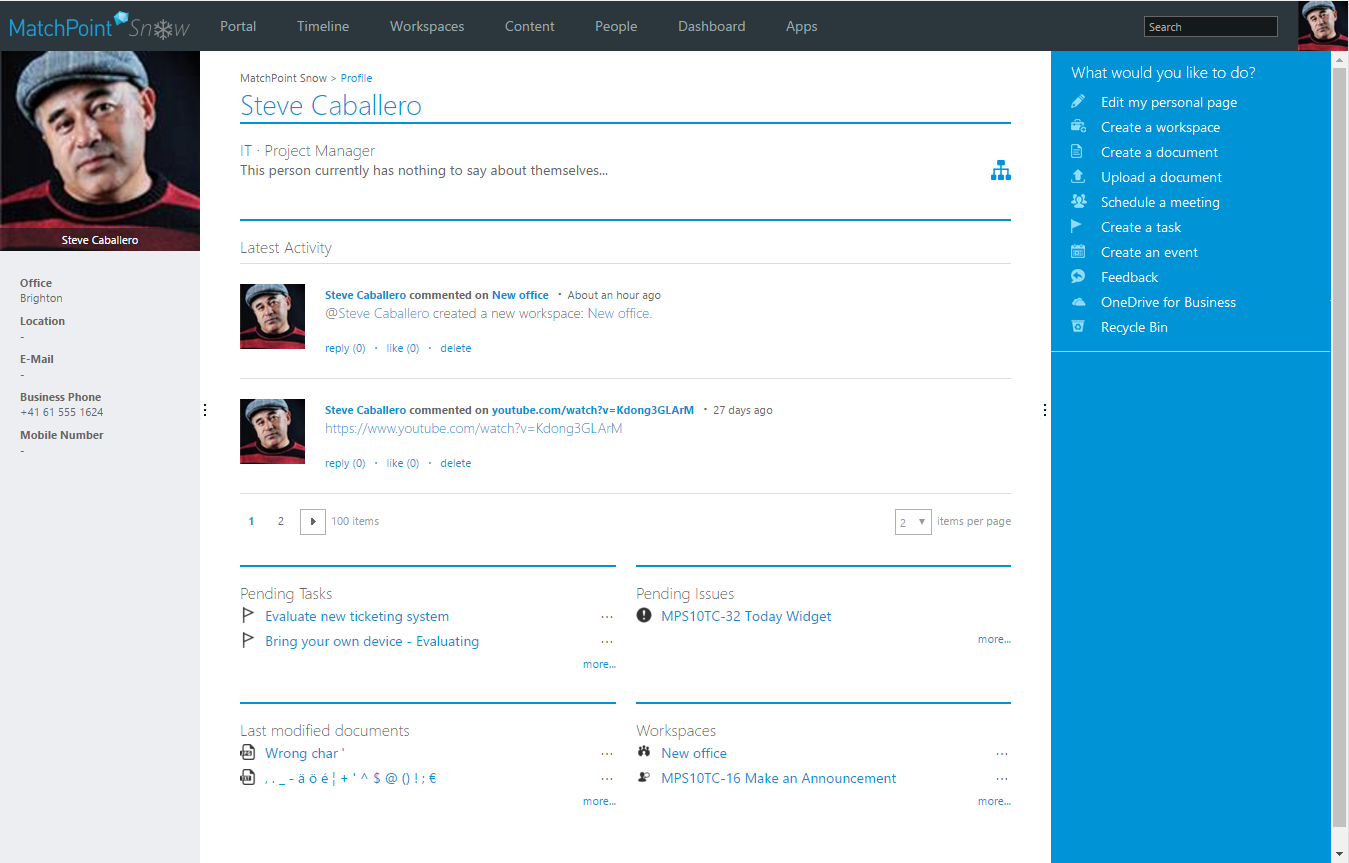
In the right wing the following contextual actions are specific for the Profile Page view :
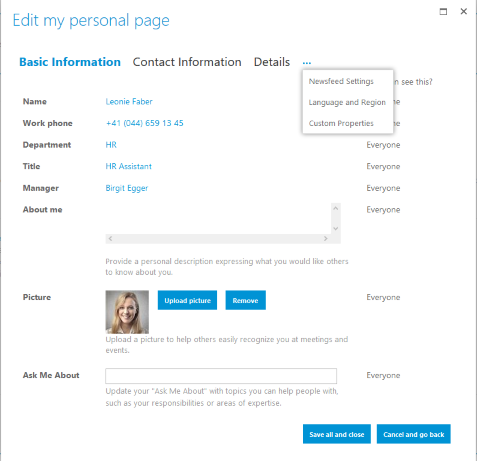
Edit my personal page: opens a dialog to manage personal data in the user profile
OneDrive for Business: opens a place integrated in SharePoint where work files can be stored and shared in the cloud
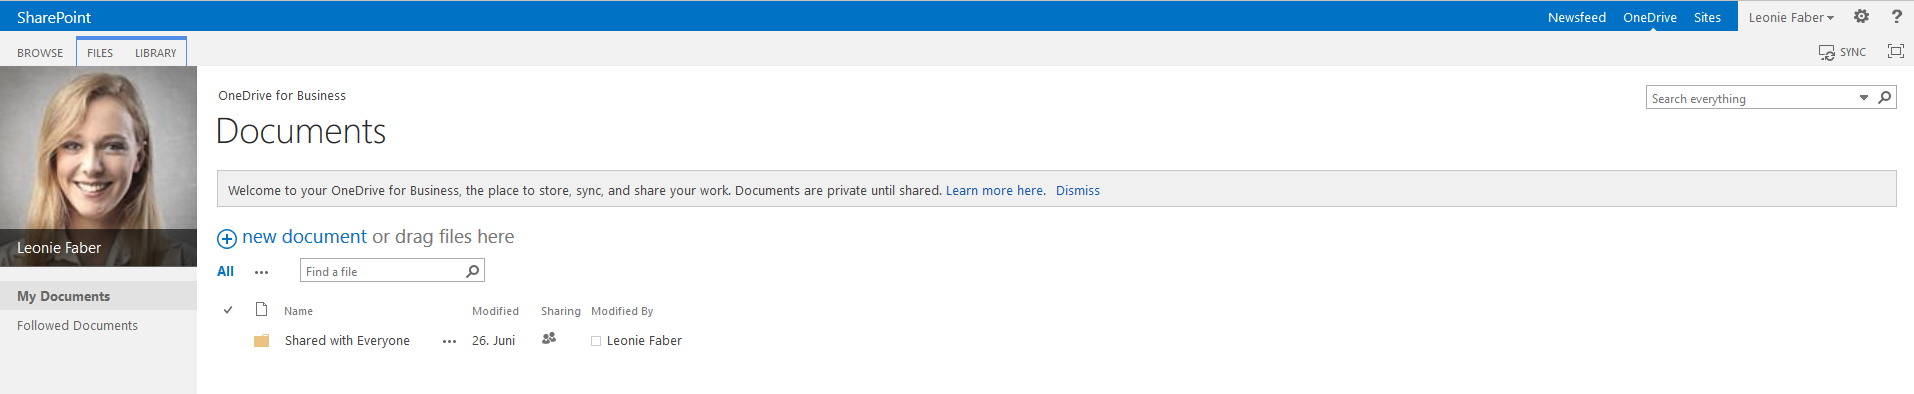
Figure 30: Personal page Recycle Bin: opens the Recycle Bin for the current user
You can access other people's personal pages by clicking on their name wherever you see a link, for example by clicking on the name of a workspace owner or a content author. Moreover, you can select a user in the people dimension and access his personal profile.
Depending on your access permissions, you might not be able to see all content on other uses' profile pages.
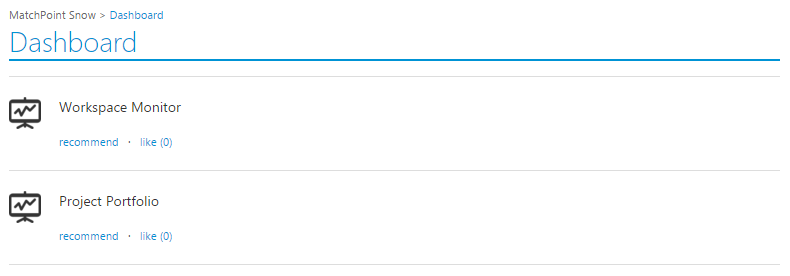
The Dashboard Dimension
The reports dimension delivers possibility to choose between two kinds of reports: "Workspace Monitor" and "Project Portfolio"
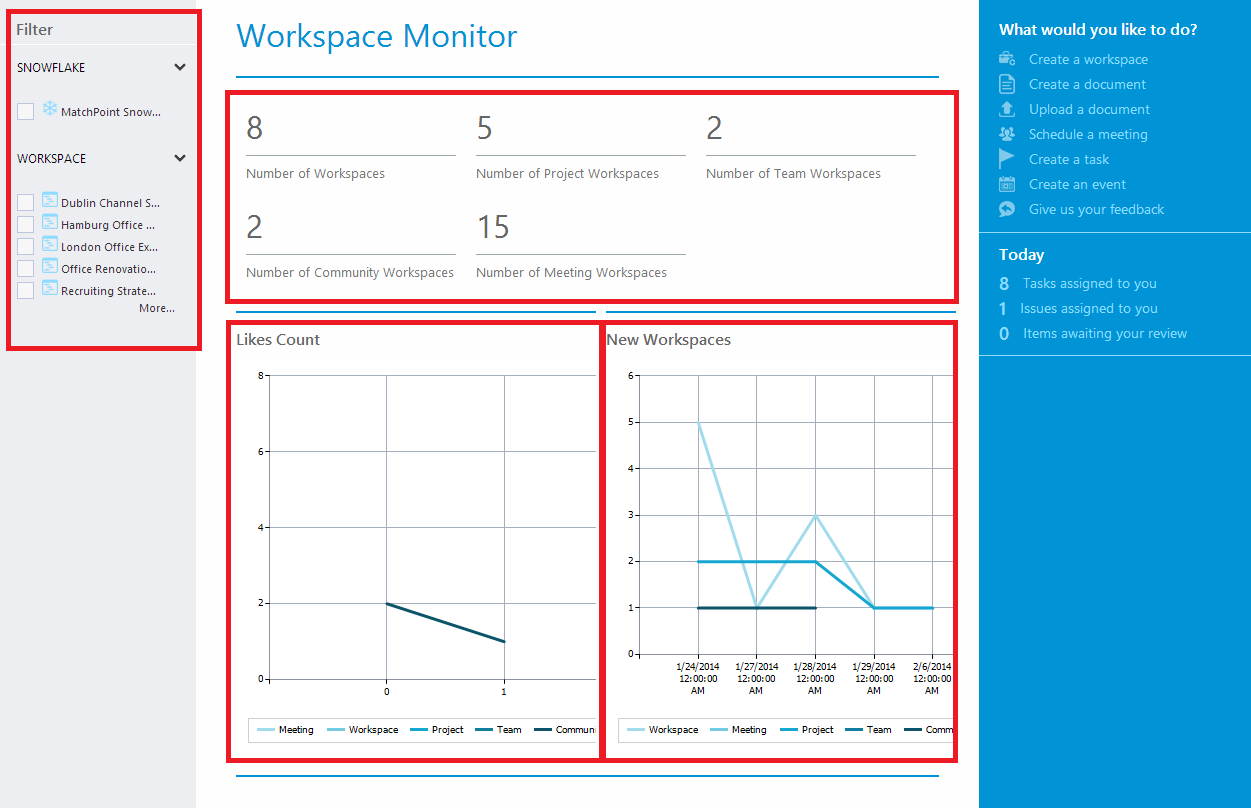
Workspace Monitor
The Workspace monitor delivers an overview dashboard over all workspaces within MatchPoint Snow. On top of the page, general information about the total number of workspaces and the number of specific workspace types is shown.
Beneath, you find two diagrams:
- The "Likes Count" diagram offers information about the number of likes within the workspaces.
- The "New Workspaces" diagram shows, how many workspaces were created over a specific time period.
On the left side, the filter navigations helps you to choose particular workspaces or snowflakes.
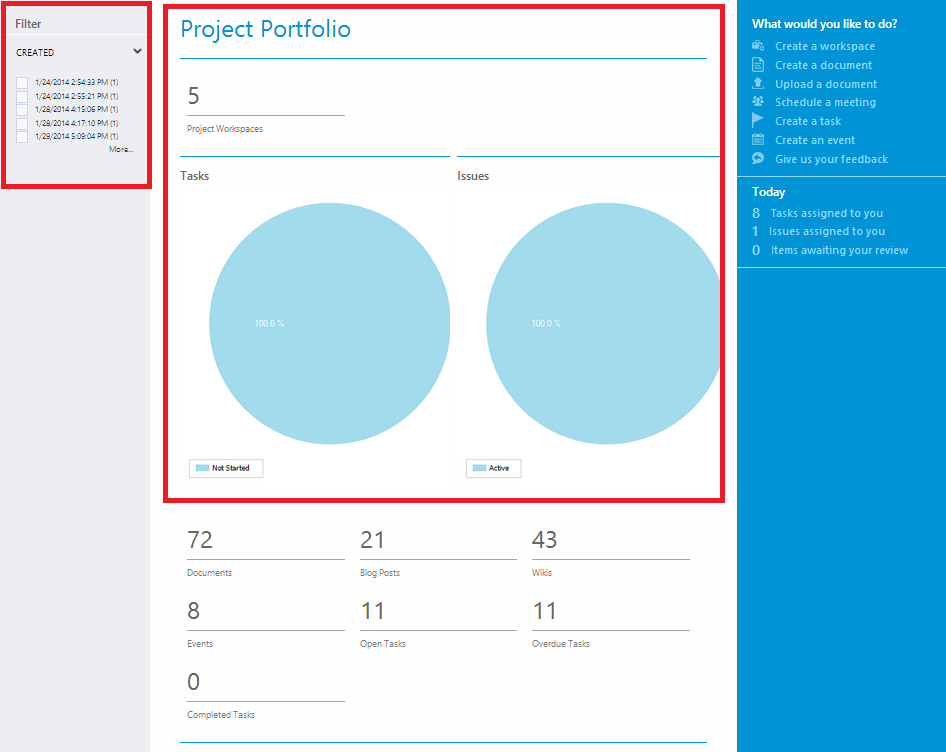
Project Portfolio
The Project Portfolio delivers an overview over existing Project Workspaces. You can find information about the total number of Project Workspaces as well as number of tasks, issues, documents, blog posts, events within those workspaces.
The filter navigation helps you to restrict the view.
Advanced Search
Global search box is always displayed in the top navigation bar. Once you have started typing a search caption, the top ten results from the categories documents, workspaces, people and other content will be displayed. When the user is viewing a workspace, the same searchbox serves as a workspace search.
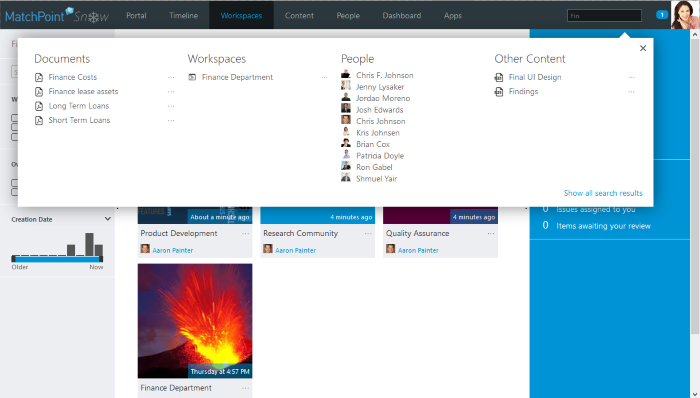
To go to the "Advanced Search", the "Show all search results" in the flyout can be clicked. A double-click on the searchbox opens the advanced search directly. The advanced search page provides a general search box with extended capabilities in the main area, as well as the filter navigation known from the four MatchPoint Snow dimensions in the left wing.
The advanced search helps you to find content with custom search criteria. This is useful if you need to perform a global search and then quickly narrow down the result. Advanced search lets you search for both content (full text) and context (metadata).
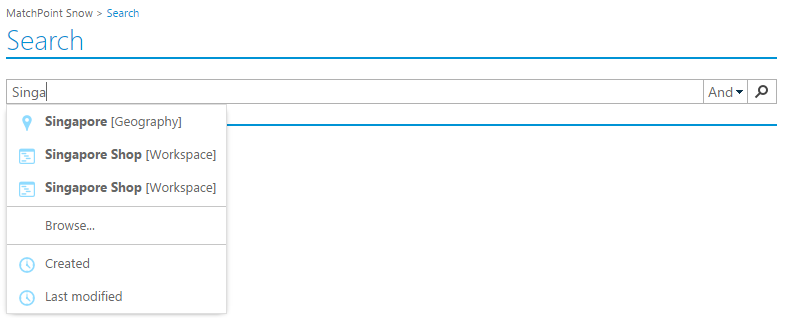
Perform a Search
To perform a search, simply start typing a search term in the search box. MatchPoint Snow will come up with suggestions as you type. You can then either continue typing and search the full text or select one of the suggested terms to search for items tagged with specific metadata. The latter is extremely powerful when you need concise searches and exact search results, since it puts your search term into the desired context.
For example, searching for a name of a product called "Windows" in the content of a document will return a rather blurred result, since the term "Windows" most probably is used in all kinds of contexts in your documents. Only a fraction of the returned results will contain the term in the desired product context. On the other hand, if your metadata category representing your products contains the term "Windows" and you are using this metadata term for your search query instead of the full text term, all returned items will be in the desired context. This improves your search experience and makes you much more efficient.
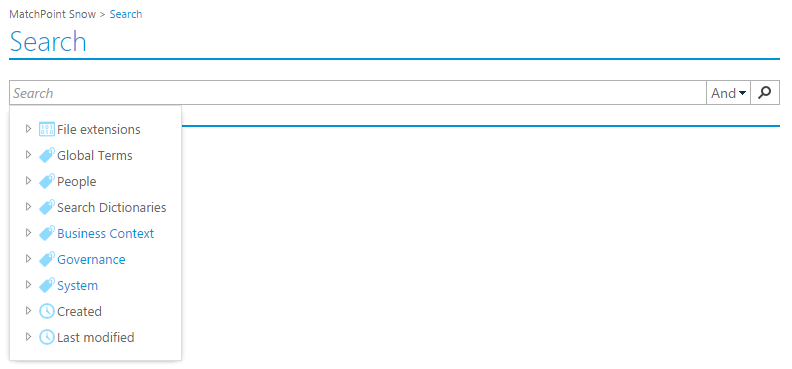
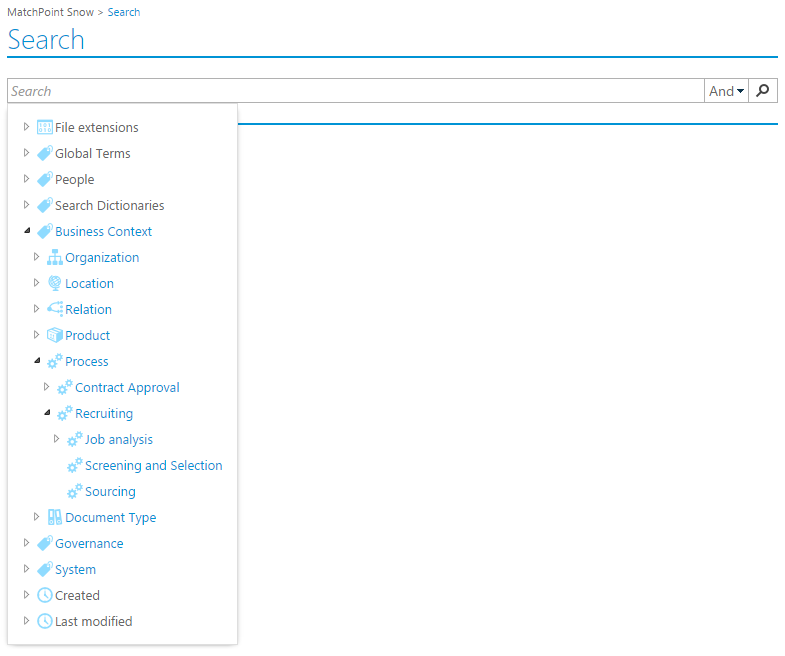
Browsing the Metadata
If you do not know what terms exist in your metadata, you can click in the search box instead of entering a term. A dropdown will open, providing you the complete metadata tree as it has been defined in your MatchPoint Snow platform. Simply browse through the tree and select the terms you want to perform a search.
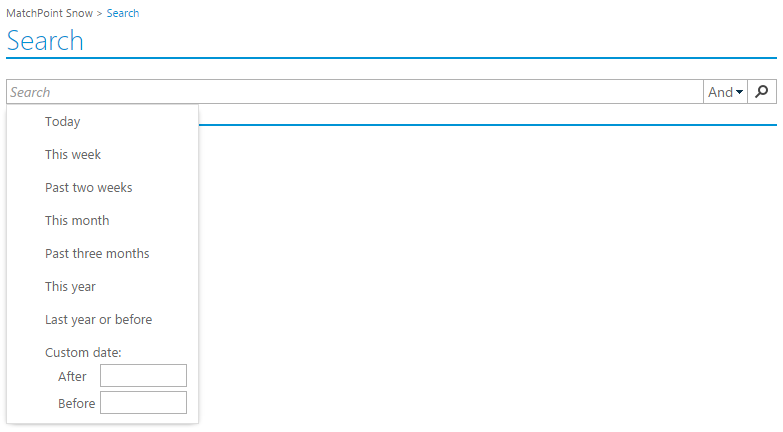
Some categories, such as the creation date or the modification date, offer predefined ranges you can choose from. This makes it very convenient to search for the latest content.
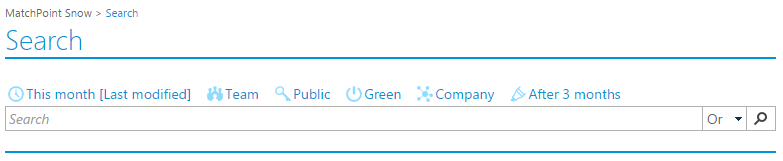
Combining Search Terms
You can enter multiple search terms to narrow down your search by simply adding search terms to the search box as explained above. Search terms can be removed by clicking on them in the search box. You can even decide if the terms are combined using OR or AND clauses.
Filtering the Search Result
As soon as a first search result is displayed, the filter navigation appears in the left wing. You can then use the filters to refine your search result further. Please refer to The Filter Navigation for further details on how to use the filter navigation.
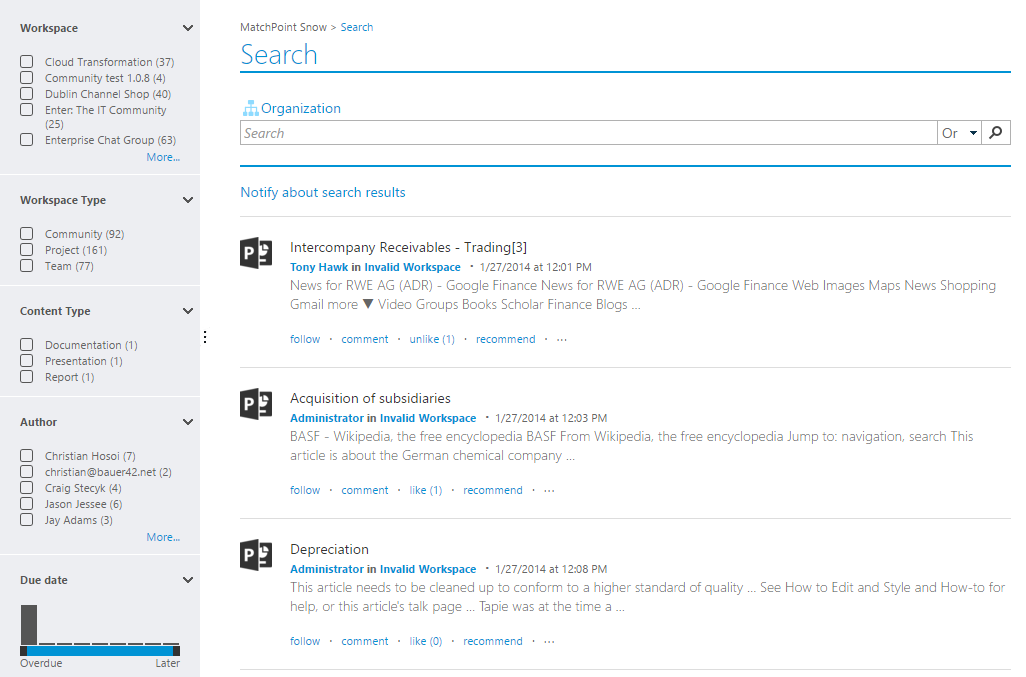
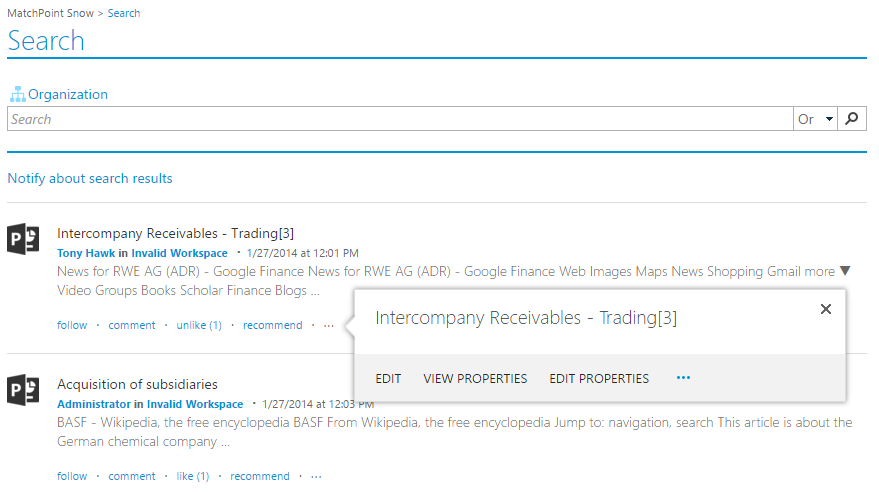
Acting on the Search Result
The items appearing in a search result not only provide links to the content, but also functionality tightly related to act on the latter, such as social features, call-outs and context menus. Please refer to The Content Area and The Social Features for further details on how to act on the search result.
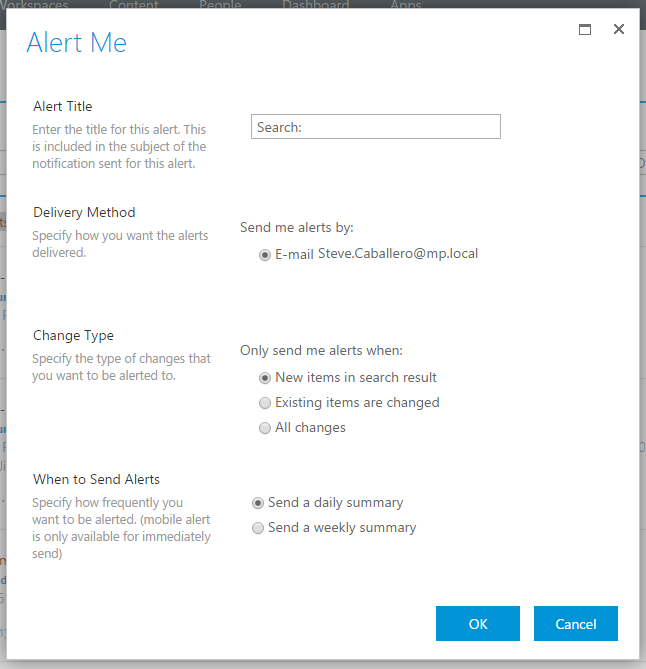
Set notification about new results
If you want to be notified about new results or changes in existing results you can set alert by clicking the Notify about search results link. This will open dialog with form where you can specify alert Title, its Delivery method, Change type and When to Send Alerts.
Notification Center
MatchPoint Snow provides a central place where notification messages are displayed and
can be managed. On the top right you can always see how many unread notifications there
currently are, by clicking on it you can display list of them.
Any item on list can be mark as read/unread, delete, flag/unflag or filtered.
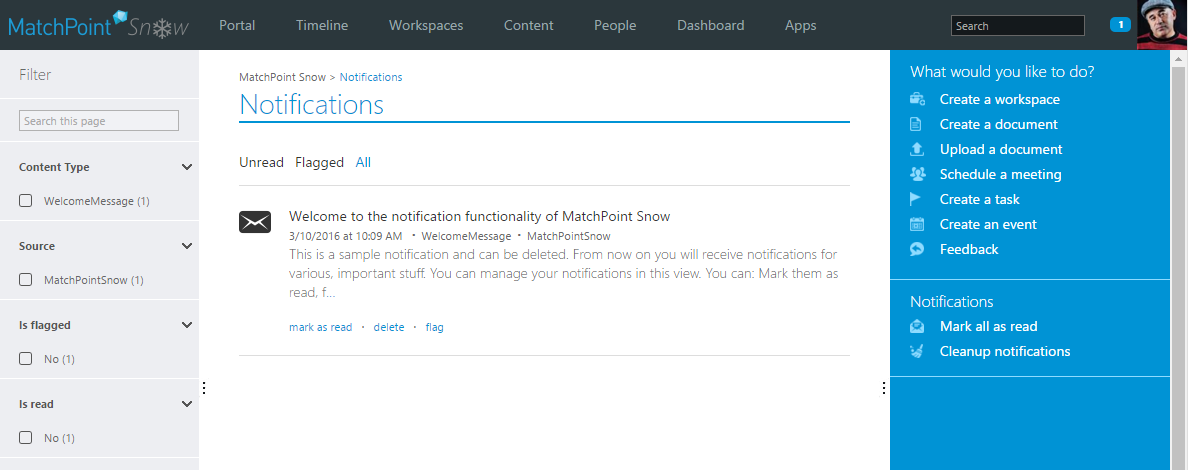
MatchPoint Snow itself does not yet send any messages, that's why the notification center is still disabled in configuration by default.