Demo Scenarios
The MatchPoint Snow demo environment contains a social collaboration platform from a virtual sports goods company called Snow Inc. It is setup with predefined content and users. The goal is to illustrate the functionality of MatchPoint Snow. The demo scenarios described within the following sections are designed to facilitate the understanding of the general functionality of MatchPoint Snow, as well as to quickly learn how to use the demo environment to showcase the product.
Snow Welcome Screen
New users receive a warm welcome when accessing MatchPoint Snow for the first time A splash screen provides them with direct access buttons for the most important areas. This helps new users to quickly find relevant content and start working with MatchPoint Snow, without actually having to be trained and acquire a lot of knowledge first.

Things to do
On the welcome screen, you can
- Switch the display language: Switch the entire UI language between German and English.
- Login as a different user: If another user is logged in, you can log him out and log in as yourself.
- Discover Snow: Go directly to the timeline, the workspace, content and people pages, create a new workspace (creator permissions are required) or run a report.
Snow Main Portal
When opening MatchPoint Snow, you will see the main portal. It provides four dimensions: the timeline, the workspaces, the content and the people view. Each dimension is on a separate page and you can use the top navigation to quickly switch between them.
- The timeline: the timeline is the social dimension in Snow. It shows you the recent posts made by your colleagues
- The workspaces view: workspaces are the "physical" containers of Snow. All content is stored in workspaces. In technical terms, a workspace is a SharePoint site collection
- The content view: in the content view, you can preselect the type of content you would like to see and then filter even large amounts of content to quickly find what you are looking for
- The people view: the people dimension gives you an alternate access to content someone has created or is working on. It also shows you who is who and lets you find experts within your organization or facilitates contact between employees who don't know each other in person
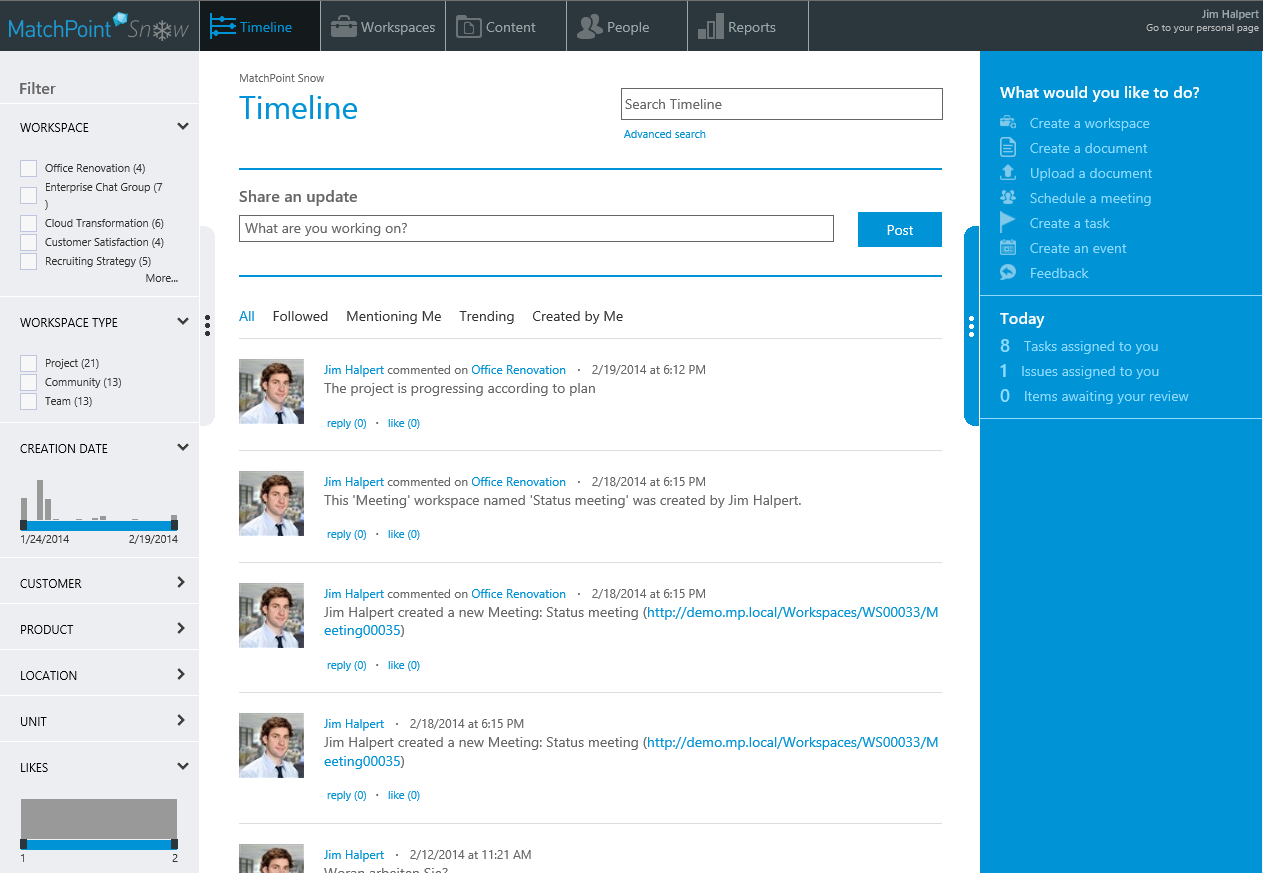
Left Section
In all four dimensions, you see a left section providing a contextual filter navigation based on metadata. It automatically detects which filters are available for you depending of the content currently displayed. Use the navigation to browse through social posts, workspaces, documents, and other content, or to find people with specific skills, functions or from a certain department in the people dimension.
Middle Section
In the middle area, you always have a personalized view of the items that belong to the respective dimension (social posts, workspaces, content or people). Depending on the page, you will have the following options:
- Search: you can filter the item with a find-on-type functionality or switch to an advanced search page
- Views: choose between "All", "My", "Followed", "Trending" and other views, displaying the items based on rules and personalization criteria
- Content selector tabs (content page only): preselect the type of content you are interested in
- Information about the items: owner, creation date and description, link to the corresponding workspace
- Social features: you can follow, like and recommend, or comment items, depending on their type
Right Section
In the right section, there is the action panel providing you a contextual selection of actions you can perform. Depending on the page, you can
- Create a new workspace: use a wizard to create new workspaces. Select among three different workspace templates (project, team and community)
- Create a document: use a wizard to create a new document from a template and store it in a workspace document library. Select an existing workspace using an intuitive search interface.
- Upload a document: use a wizard to upload a document to the document library of a workspace. Select an existing workspace using an intuitive search interface
- Schedule a meeting: use a wizard to create a meeting workspace and an entry in the event calendar of a workspace. Select an existing workspace using an intuitive search interface
- Create a task: use a wizard to assign a task to someone. Select an existing workspace using an intuitive search interface
- Create an event: use a wizard to create an event and store it in the event list of a workspace. Select an existing workspace using an intuitive search interface
- Give us your feedback: send a note to the portal owner
Below the action panel, you can see a section with widgets. The today section shows you a daily digest of upcoming tasks, open issues, documents to approve and other important information across all workspaces. The today widget links to your personal profile page, where you can see more detailed lists.
Things to do
Log in as "Jim Halpert" in the Snow portal and try some of the following things:
- Navigate through the different dimensions: Switch from the timeline to the workspace view, from there to the content page and then to the people dimension. See how the content changes.
- Filter page content: Go to either of the timeline, workspace, content or people page and use the filter navigation in the left section of the page to filter the content in the middle of the page. Switch from the "All" to the "My" view and preselect content types with the tabbed selection menu on the content page.
- Use business context to find what you are looking for: You will quickly reduce the amount of items on each page by specifying the business context in the left filter section. Choose among location, unit, customer and product context and combine them.
- Get more information: Go to the workspace page and press on the ... right of the "like" button to display a call-out with details about the workspace. The call-out gives you direct access to the latest documents and tasks without even opening the workspace.
- Use the social features: follow or like a workspace, write an update on the timeline, recommend a content.
- Create a workspace: Use our workspace wizard in the action panel to choose among different workspace templates to create new workspaces.
- Upload a document: In the action panel, select "Upload a document". In the dialog, select an existing workspace and choose a document to upload. It will be automatically saved in the workspace document library.
- Assign a task:
In the action panel, select "Create a task" to assign a task to
Stacy Peralta. In the dialog, enter some meaningful name and select
Stacy Peralta in the "assigned to" field. Choose today's date as the
start and end date for the task.
When logging in with Stacy Peralta later, the task will be listed within the "Today" section in the right bar. You will also see the task in the task list on his personal profile page
- Schedule a meeting: In the action panel, select "Schedule a meeting" and select an existing workspace. Enter the meeting details in the dialog. A meeting site will be created as a sub web to the workspace. The meeting will also be listed in the "Events" list on the workspace start page.
Project Workspace
Within a project workspace, the same sections are available:
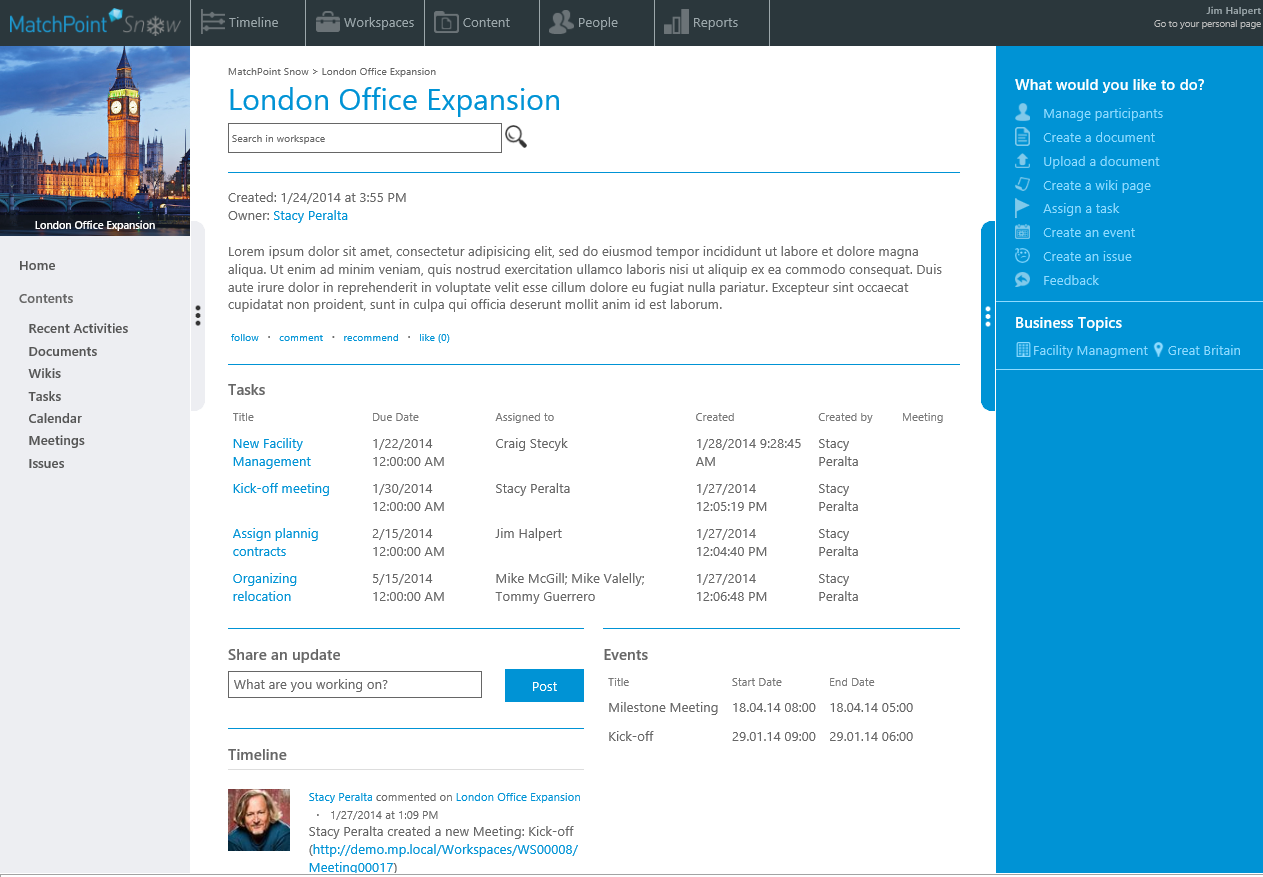
Left Section
The left section provides access to the actual content of the site. Use the navigation to browse through documents, tasks, issues or meetings.
Middle Section
In the middle area, you get
- Information about the workspace: owner, creation date and description. Here, you can follow, like and recommend the workspace, or write a comment
- A task overview: the latest tasks are listed showing a number of columns with useful information such as due date and if the task is in relation to a meeting
- A list of recent activities: all social updates and comments regarding the workspace are listed here
- A list of events: important events and meetings related to the workspace are listed here
Right Section
Within the right section, there is the action panel already known from the main portal. You can
- View users: see who is the owner, a member of the workspace or has read access. Workspace owners can add and remove users to/from the available roles
- Manage document templates: use a wizard to manage document templates
- Create a document: use a wizard to create a new document from a template and store it in the workspace document library
- Upload a document: use a wizard to upload a document to the workspace document library
- Create a wiki page: use a wizard to create a new project wiki
- Create a task: use a wizard to assign a task to someone
- Create an event: use a wizard to create a new event in a calendar view
- Create an issue: use a wizard to create an issue and store it in the issue list
- Schedule a meeting: use a wizard to create a meeting workspace and an entry in the project event calendar
- Change the logo: upload an image to replace the workspace logo (access only for workspace owners)
- Govern workspace: manage workspace properties, add business tags and define content targeting rules for your workspaces (access only for workspace owners)
- Give us your feedback: send a note to the portal owner
Below the action panel, you can see a widget showing the business tags that have been assigned to the workspace. This can help you to filter your workspaces by business context such as location, unit or customer both in the main Snow portal as well as in search. Since all tags are inherited to all content, you can also use business context to find content.
Things to do
Stacy is currently busy with an office expansion in London and has created a project workspace called "London Office Expansion". Log in as Stacy Peralta in the Snow portal, switch to the "Workspaces" page and filter your workspace list for "London Office Expansion". Open the workspace and perform one of the following actions:
- Add additional members: Within the action panel, select "View users" and click on the "Members" tab. Enter a letter in the search field and pick a user to invite him to the workspace.
- Give read access: Within the action panel, select "View users" and click on the "Readers" tab. Enter a letter in the search field and pick a user to give him read access to the workspace.
- Remove members:
In the action panel, select "View users" and click on the
"Members" tab. Select an existing member by clicking on the picture
and click "Remove" to revoke access for that user. You can select
multiple users by holding down the CTRL Key and remove them
together.
Remark: you can also select a group and add it to a workspace role instead of single users
- Upload a document: In the action panel, select "Upload a document". In the dialog, choose a document to upload. It will be automatically saved in the workspace document library
- Assign a task:
In the action panel, select "Create a task" to assign a task to
Jim Halpert. In the dialog, enter some meaningful name and select
Jim Halpert in the "assigned to" field. Choose today's date as the
start and end date for the task.
When logging in with Jim Halpert later, the task will be listet in the "Today" section in the right bar.
- Schedule a meeting: In the action panel, select "Schedule a meeting" and enter the meeting details in the dialog. A meeting site will be created as a sub web to the current workspace. The meeting will also be listed in the "Events" list on the workspace start page.
- Govern workspace: On the governance page, click the edit button and add some business tags to the workspace. The tags will automatically be applied to all workspace content and can be used as filters in the workspace and content pages of the MatchPoint Snow Portal.