Action Catalogue
To make its use as intuitive as possible, we make sure MatchPoint Snow provides functionality in a consistent way and in one central place. All the actions you can perform in Snow, such as creating new workspaces, creating or uploading content, or acting on existing content and managing workspaces in various ways, are provided through the action panel that always sits at the top of the right wing.
The action panel is context-specific, which means that it always shows the actions available in a specific context or the page you are visiting. We define the context mainly by the layer you are currently working on, such as the main portal (root layer), a workspace or a sub-workspace, but also by the type of workspace and your role. For example, the action panel in a project workspace will look different from the action panel in a community workspace. Moreover, if you are the owner of a workspace, it might show you more options than if you are a member or a reader.
The following catalogue provides an overview of the actions available in MatchPoint Snow and describe their functionality. The matrix below shows, where in MatchPoint Snow each action is available:
| Action | Main Portal | Project Workspace | Team Workspace | Community Workspace | Meeting Workspace | Personal Profile |
|---|---|---|---|---|---|---|
| Create a workspace | + | - | - | - | - | + |
| Manage document templates | - | + | + | + | - | - |
| Create a document | + | + | + | + | + | + |
| Upload a document | + | + | + | + | + | + |
| Schedule a meeting | + | + | + | + | - | + |
| Assign/Create a task | + | + | + | + | + | + |
| Create an event | + | + | + | + | - | + |
| View User | - | + | + | + | + | - |
| Create a wiki page | - | + | + | + | + | - |
| Create an issue | - | + | - | - | - | - |
| Create a link | - | + | + | + | - | - |
| Create an announcement | - | - | + | + | - | - |
| Subscribe | - | - | - | + | - | - |
| Unsubscribe | - | - | - | + | - | - |
| Change the logo | - | + | + | + | - | - |
| Govern workspace | - | + | + | + | - | - |
| Give feedback | + | + | + | + | + | + |
| Add agenda entry | - | - | - | - | + | - |
| Add minutes | - | - | - | - | + | - |
Create a Workspace
You can create new workspaces by using "Create a workspace" from the action panel. A pop-up dialogue opens, displaying a selection of workspace templates you can choose from.

Simply click on a workspace template (e.g. "Project") to go to the next dialogue. If more than four workspace templates are available, you can either browse through them or enter their name in the "Quick search" box. MatchPoint Snow will filter the list as you type.
After you have selected the workspace template, a new dialogue appears to enter the information required to create your workspace. Depending on the selected template, the values you have to provide may vary.
Mandatory fields have a red asterisk (*) and have to be filled in. All other fields are optional, but we encourage you to provide as much information as possible. Keep in mind that the more information you provide about your workspace, the easier it is for your colleagues to understand what it is for and to find it. You can use the tab key to move from one field to the next. Press the "Create" button to start the workspace provisioning, when you are finished.

The provisioning process might take some time. As soon as your workspace is ready, a confirmation dialogue with a link appears, allowing you to go directly to your new workspace by clicking on the link.

Create a Document
In MatchPoint Snow, you can create a new document from a template at any time, wherever you are. By selecting "Create a document" from the action panel, a creation wizard will guide you through the process.
To make it easy to store your new document in the correct location, you can select a workspace or enter the name of your workspace into the "Quick search" box in the "Workspace Selection" dialogue. MatchPoint Snow will filter the list of available workspaces as you type.
The "Workspace Selection" dialogue does not appear when you are already in a workspace and select the "Create a document" action. In this case, the creation wizard will guide you directly to the "Create a Document" dialogue instead.
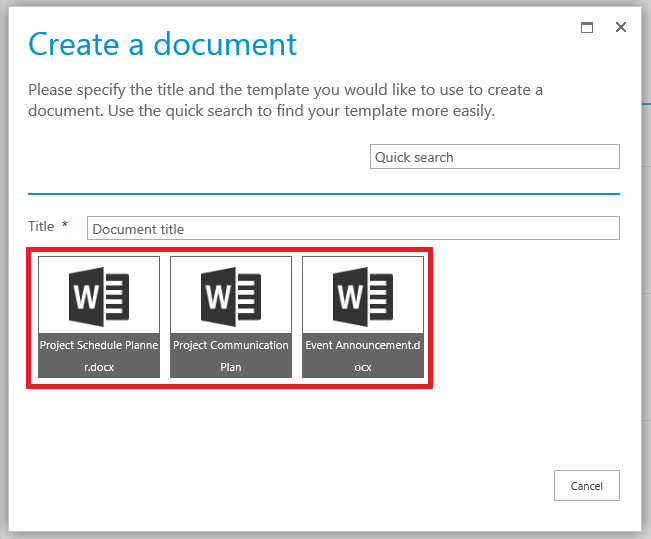
Once you have selected your workspace, the creation wizard will ask you for the title and the document template you would like to use for your new document. First, enter your document title in the "Title" field (mandatory). Then, select one of the document templates provided, or enter the name of your document template in the "Quick search" box. MatchPoint Snow will filter the list of document templates as you type. Optionally, you can specify folder in which document will be created.
By clicking on your document template, the wizard will automatically create a new document and store it in the document library of your workspace.

Once MatchPoint Snow has finished creating your new document, you will see a confirmation dialogue. If you want to start editing your new document, press "Open" to open it, or "Go to list" to open the document library in the workspace where your document is stored.

Upload a Document
By selecting "Upload a document" from the action panel, you can upload a document at any time, wherever you are. A creation wizard will guide you through the process.
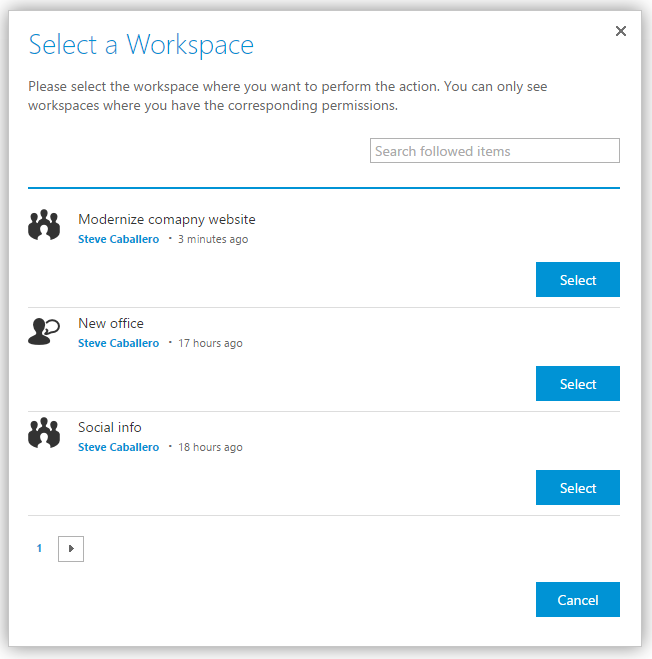
To make it easy to store your uploaded document in the correct location, you can select a workspace or enter the name of your workspace into the "Quick search" box in the "Workspace Selection" dialogue. MatchPoint Snow will filter the list of available workspaces as you type.
The "Workspace Selection" dialogue does not appear when you are already in a workspace and select the "Upload a document" action. In this case, the creation wizard will guide you directly to the "Upload a Document" dialogue instead.
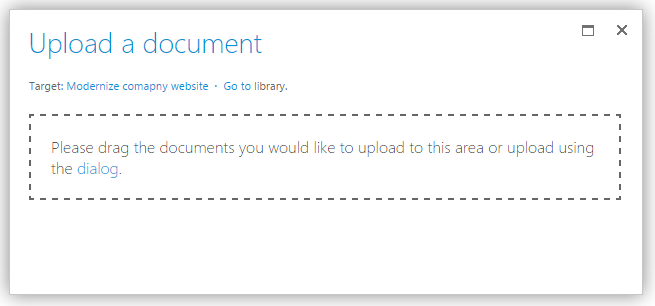
Once you have selected your workspace, simply drag and drop the document you want to upload to the upload area of the "Upload a Document" dialogue. You can even upload multiple documents with one single upload.
Alternatively, you can select the "dialogue" button to select a single document in a standard upload dialogue. On the other hand, by selecting the "GO TO" link, you can open the document library and upload your document through the functionality provided by the SharePoint ribbon.
The wizard also gives you the option to open the workspace by clicking on the "Target" link. The workspace will open in a new browser tab, so you will still be able to continue in the upload wizard after having visited the workspace.
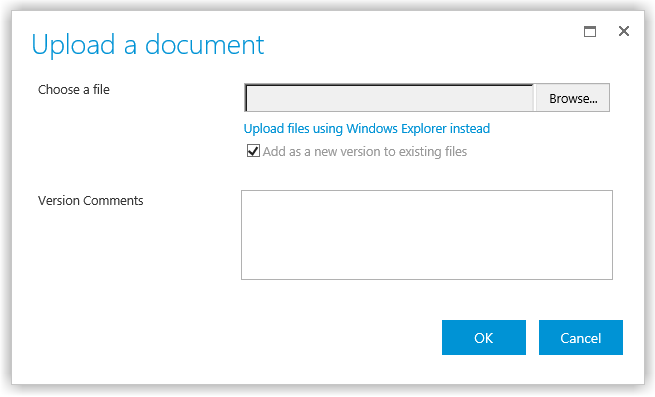
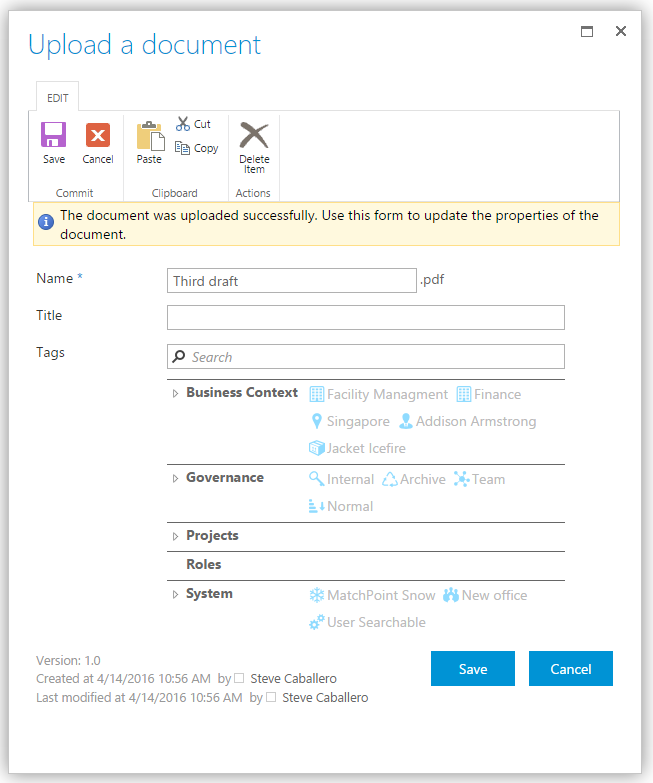
In the standard upload dialogue that you can access by selecting the "dialog" link in the upload area, press the "Browse" button to select the document you want to upload in your file system. You can only upload one document at a time. By checking or unchecking the "Overwrite existing files" checkbox, you can determine whether existing documents with the same name will be replaced by the document you upload.
If you used the standard upload dialogue to upload your document, you have the option to modify the document name and title and to add additional metadata tags. To add tags, simply click in the "Search" box and start typing the name of a tag. MatchPoint Snow will display all corresponding tags as you type. By clicking on a tag from the drop down list, you can apply the tag to your document.
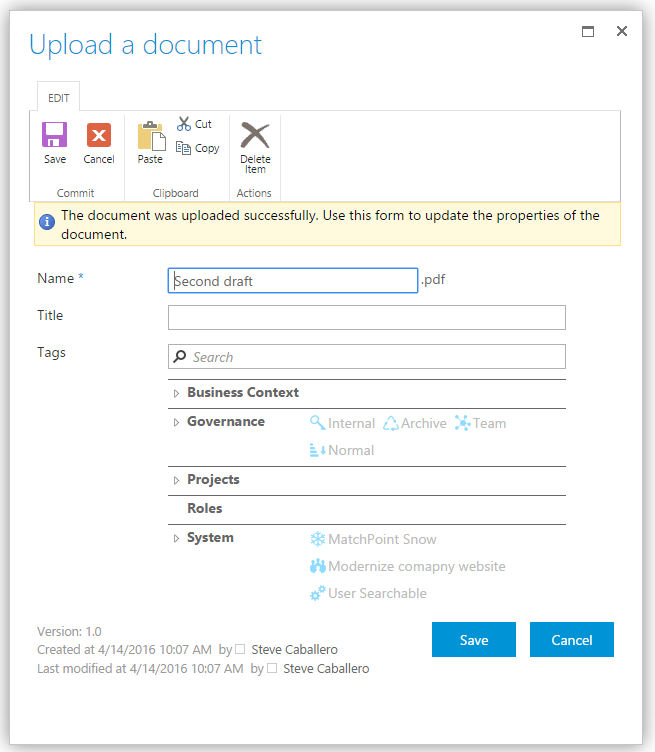
Alternatively, you can expand and browse the tag trees of the "Business Topic", "Governance" and "System" sections to select additional tags.
To keep document management as user-friendly and straight forward as possible, manual tagging is optional in MatchPoint Snow. MatchPoint Snow applies all important tags automatically to your documents. This happens either by inheriting them form the workspace, or by applying them according to rules defined by a system administrator.
Depending on your system settings, some tags (e.g. "Governance" and "System" tags) are displayed for your information only and might not be open for editing. This can be important to ensure the compliance and long-term consistency of your platform.
Schedule a Meeting
By selecting "Schedule a meeting" from the action panel, you can schedule a new meeting and provision a corresponding meeting workspace at any time, wherever you are. A creation wizard will guide you through the process.
To make it easy to create your new meeting in the correct workspace, you can select a workspace or enter the name of your workspace into the "Quick search" box in the "Workspace Selection" dialogue. MatchPoint Snow will filter the list of available workspaces as you type.
The "Workspace Selection" dialogue does not appear when you are already in a workspace and select the "Schedule a meeting" action. In this case, the creation wizard will guide you directly to the "Schedule a Meeting" dialogue instead.
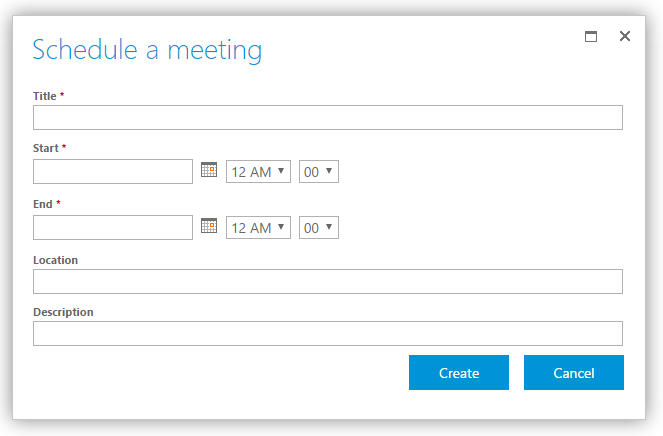
Once you have selected your workspace, simply enter the meeting information in the corresponding fields in the "Schedule a meeting" dialogue. Fields with an asterisk (*) are mandatory. We encourage you to provide as much information about your meeting as possible, such as the location (e.g. meeting room) and a short description. This will make it easier for your colleagues to do their work. To initiate the scheduling process and to provision the meeting workspace, press the "Create" button.
The provisioning process might take some time. As soon as your workspace is ready, a confirmation dialogue with a link appears, allowing you to go directly to your new meeting workspace by clicking on the link.
Moreover, MatchPoint Snow creates an entry in the event calendar for each meeting, making it easy to see all events including meetings in the same calendar.
Create a Task
By selecting "Create a task" from the action panel, you can assign a new task to yourself or your colleagues at any time, wherever you are. A creation wizard will guide you through the process.
To make it easy to create your new task in the correct workspace, you can select a workspace or enter the name of your workspace into the "Quick search" box in the "Workspace Selection" dialogue. MatchPoint Snow will filter the list of available workspaces as you type.
The "Workspace Selection" dialogue does not appear when you are already in a workspace and select the "Create a task" action. In this case, the creation wizard will guide you directly to the "Tasks – New Item" dialogue instead.
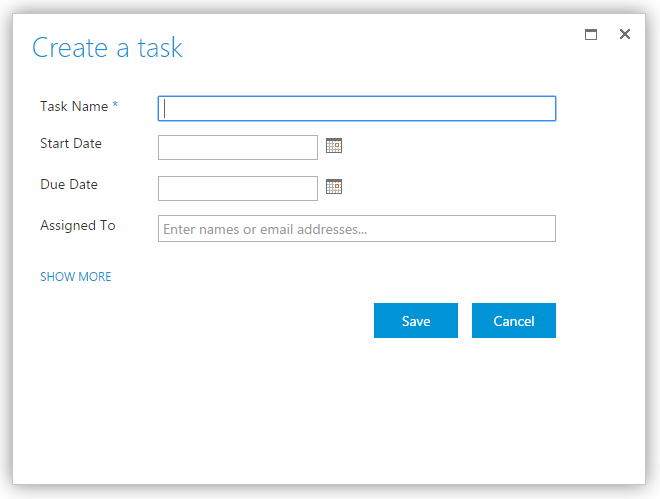
Once you have selected your workspace, simply enter the task information in the corresponding fields in the "Assign a task" dialogue. Fields with an asterisk (*) are mandatory. We encourage you to provide as much information about your task as possible, such as the start and due date and the name of the person you assign the task to. This will make it easier for your colleagues to do their work. To complete the process, press the "Save" button.
Create an Event
By selecting "Create an event" from the action panel, you can create a new event at any time, wherever you are. A creation wizard will guide you through the process.
To make it easy to create your new event in the correct workspace, you can select a workspace or enter the name of your workspace into the "Quick search" box in the "Workspace Selection" dialogue. MatchPoint Snow will filter the list of available workspaces as you type.
The "Workspace Selection" dialogue does not appear when you are already in a workspace and select the "Create an event" action. In this case, the creation wizard will guide you directly to the "Calendar" dialogue instead.
Once you have selected your workspace, pick a date for your event from the calendar. By pressing "+Add", the wizard will lead you to the next dialogue.
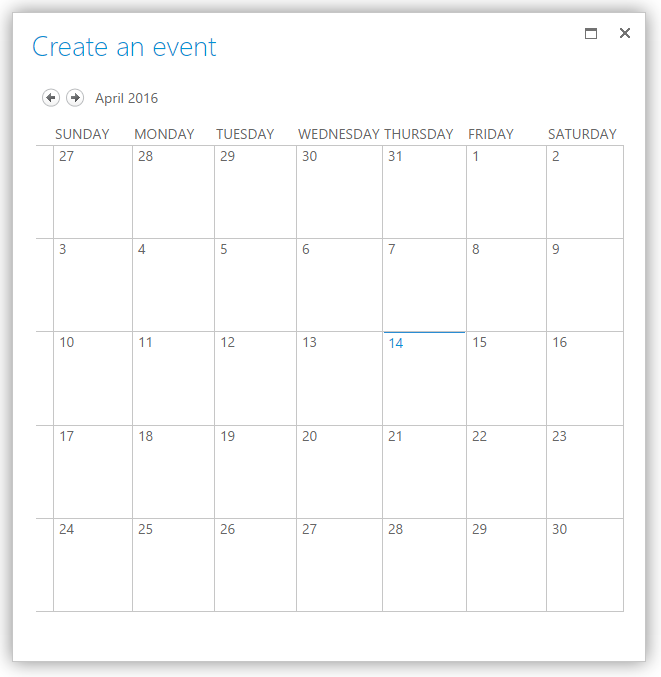
In the "Calendar - New Item" dialogue simply enter the event information in the corresponding fields. Fields with an asterisk (*) are mandatory. We encourage you to provide as much information about your event as possible, such as the location, category or a short description. This will make it easier for your colleagues to do their work. To complete the process, press the "Save" button.

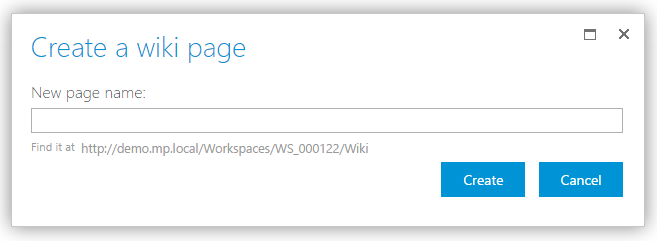
Create a Wiki Page
By selecting "Create a wiki page" from the action panel, you can create a new wiki in a workspace supporting wiki pages. A creation wizard will guide you through the process. Simply enter the name of your wiki page in the corresponding field in the pop-up dialogue. To complete the process, press the "Save" button. MatchPoint Snow will automatically store the new wiki page in your workspace's wiki library where you can open and edit the page.
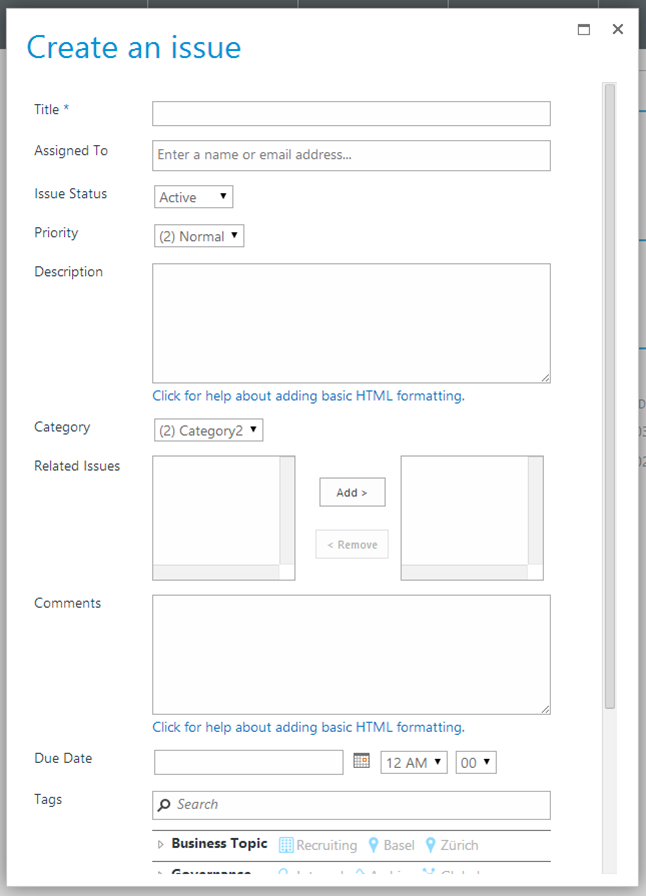
Create an Issue
By selecting "Create an issue" from the action panel, you can create a new issue in a workspace supporting issues. A creation wizard will guide you through the process. Simply enter the issue information in the corresponding fields in the "Create an issue" dialogue. Fields with an asterisk (*) are mandatory. We encourage you to provide as much information about your issue as possible, such as the description and the name of the person you assign the issue to. This will make it easier for your colleagues to do their work. To complete the process, press the "Save" button.
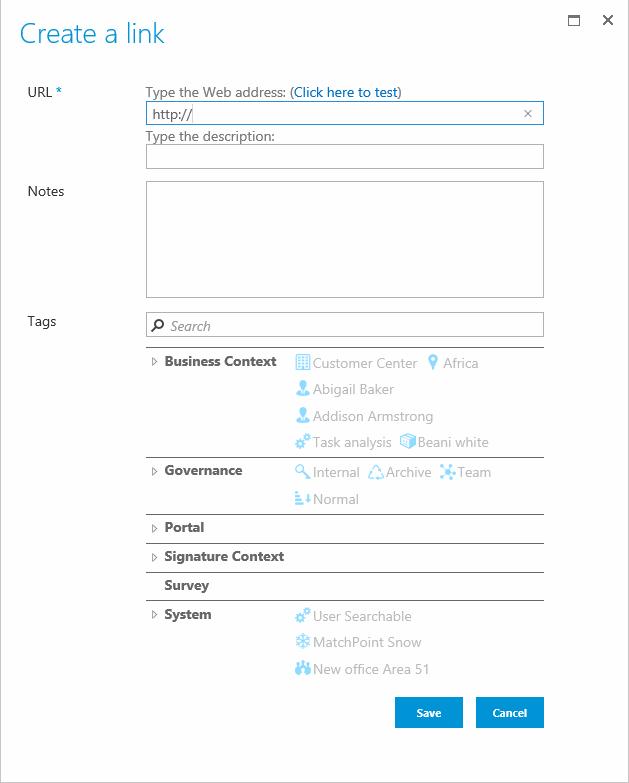
Create a Link
By selecting "Create a link" from the action panel, you can create a new link in a current workspace that contains a Link library. Simply enter the link information in the corresponding fields in the "Create a link" dialogue. Fields with an asterisk (*) are mandatory. To complete the process, press the "Save" button.
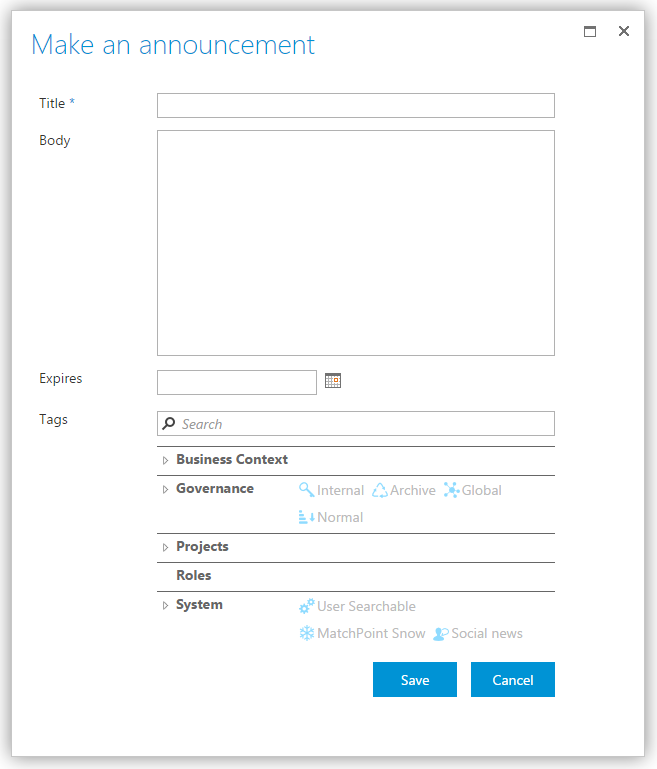
Make an Announcement
By selecting "Make an announcement" from the action panel, you can create a new announcement in a workspace supporting announcements. A creation wizard will guide you through the process. Simply enter the requested information and the content of the announcement in the corresponding fields in the "Create an announcement" dialogue. Fields with an asterisk (*) are mandatory. We encourage you to provide as much information about your announcement as possible, such as the description and the expiration date. This will make it easier for your colleagues to do their work. To complete the process, press the "Save" button.
Start a Discussion
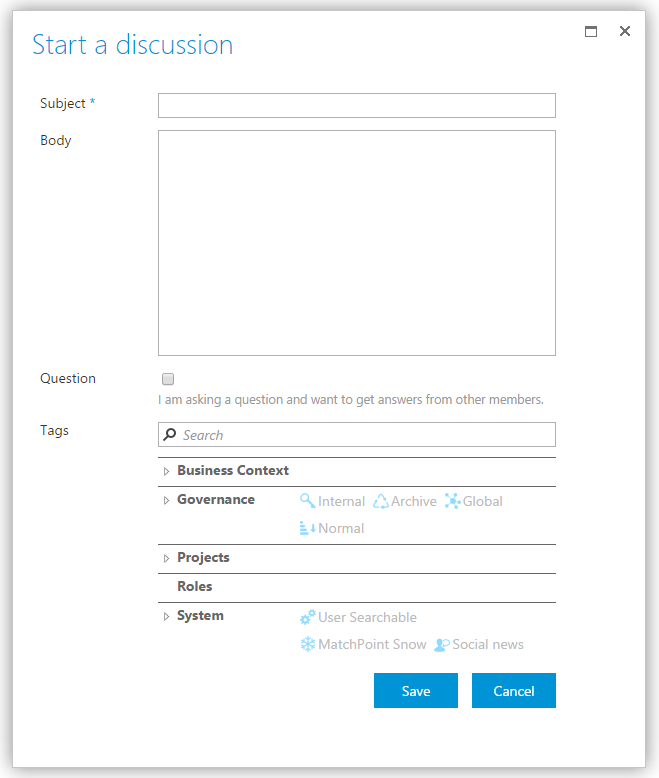
By selecting "Start a discussion" from the action panel, you can start a new discussion in a workspace supporting discussions. A creation wizard will guide you through the process. In the "Start a discussion" dialogue simply enter the discussion title and body in the corresponding fields. Fields with an asterisk (*) are mandatory. We encourage you to provide as much information about your discussion as possible. This will make it easier for your colleagues to do their work. To complete the process, press the "Save" button.
Give Feedback
You can use the "Feedback" action to give valuable information about MatchPoint Snow to your administrator. We encourage you to use this possibility to report any unexpected behavior of MatchPoint Snow, inappropriate content as well as to make suggestions for future improvements.
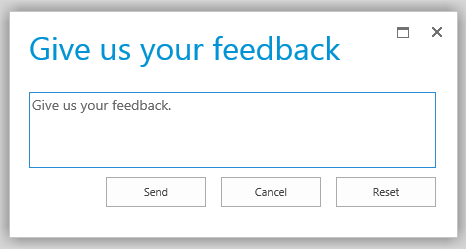
To enter your feedback, simply select the "Give us your feedback" action and enter your message in the feedback dialogue. By pressing the "Send" button, your feedback will be sent to the MatchPoint Snow administrator. To start over with an empty form, press the "Reset" button.
View Users
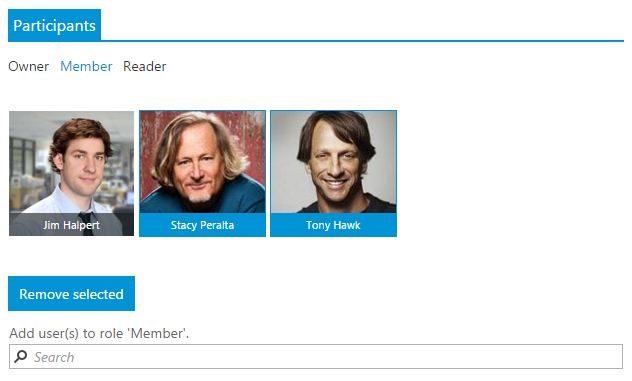
Use the "View users" action in a workspace (or the "Manage participants" action in a meeting workspace) to see who has access to the workspace and in what role he or she is participating. Depending on your own role in the workspace, you might only be able to look at the other user's roles (if you are a member or a reader), or you might be able to invite other users to participate (if you are the owner of the workspace).
MatchPoint Snow provides three user roles out of the box:
Owner: the owner of a workspace is allowed to read, create, edit and delete content, to invite other users by assigning a role to them, and to revoke the permission to access the workspace by removing the role from another user. The owner can also schedule meetings, change the workspace icon and govern the workspace.
Member: a member can actively participate in a workspace by reading, creating and editing content and participating in meetings, but cannot invite other users or govern the workspace.
Reader: a reader can see the workspace and its content, but cannot participate. In workspaces with self-subscription, readers can subscribe to become a member (please refer to chapter Subscribe and Unsubscribe for details).
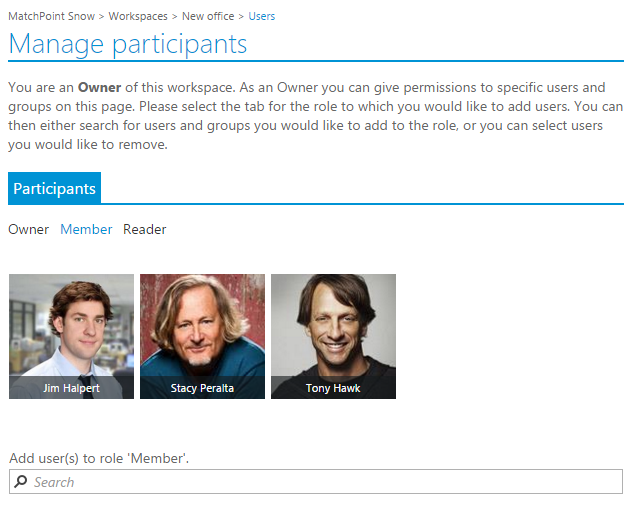
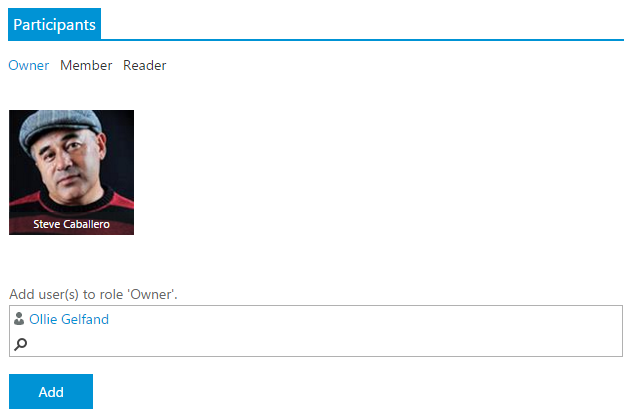
As a workspace owner, you can invite new users by adding them to the owner, member or reader role. Simply click on the corresponding role tab, enter the name of one or multiple users into the "Add users to role ..." field and press the "Add" button.
If, for some reason, you would like to revoke the permission to access the workspace in his or her current role from one or multiple users, you can select the user(s) you want to revoke the permissions from and press the "Remove selected" button.
To change the role of one or multiple users, you have to first remove the users from their current role and then switch to their new role and add them again.
Depending on the workspace template and on permission settings in your environment, the permission levels of the owner, member and reader roles may vary.
Subscribe and Unsubscribe
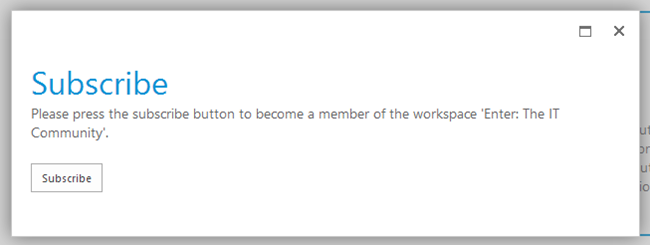
In workspaces with activated self-subscription (e.g. in a public community), you can sign up by using the "Subscribe" action. This will increase your possibilities to participate actively in the workspace as a member. Simply accept the subscription by clicking "Subscribe" in the dialogue.
Once subscribed, you will notice that receive permission to create and modify content in the workspace, and that you can use a larger number of actions in the action panel. Moreover, MatchPoint Snow replaces the "Subscribe" action by an "Unsubscribe" action. Simply select "Unsubscribe" if you do not want to be a member of a workspace any longer. This will revert your permissions to read only. You can switch back to the member role at any time.
Govern Workspace
By selecting "Govern workspace" from the action panel, MatchPoint Snow guides you to the "Govern Workspace" page, providing access to the governance parameters grouped in sections. As a workspace owner, you can update your workspace title and description, as well as assigning a number of business and content targeting metadata to your workspace. Clicking the "Edit" button will enable a modification of the particular workspace parameters. Fields with an asterisk (*) are mandatory. We encourage you to provide as much information about your workspace. To complete the process, press the "Save" button.
General section
In the "General" section, you can modify the title and description of your workspace, see when it was created, edit privacy settings, set relations between workspaces or add external roles.
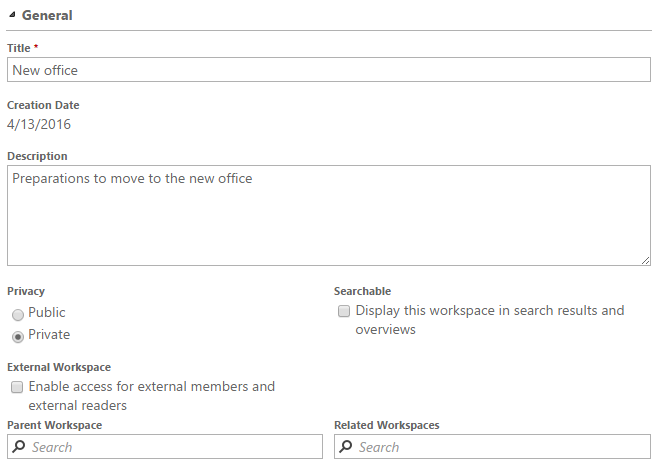
Privacy settings
This option can be selected during creation or governing of a workspace. If public is selected, Everyone is added to the reader role. If private is selected this won't happen. Additionally if private is selected the user can also choose if the workspace should be "searchable". This means that the workspace is then shown in the workspace overview and can therefore be found by all users. The users which don't have permissions can then request access for the workspace using the default SharePoint access request way.
External workspace
This option can be selected during creation or governing of a workspace. If it is selected, two additional roles (External Readers & External Members) will be created in the workspace. These new roles have the same permissions as the "normal" readers and members. However this makes it easier to distinguish and manage external members (e.g. freelancers or employees from other companies) and internal employees.
Related workspaces
In this option you can select parent workspace and related workspaces.
- Parent Workspace: A workspace which serves as the parent for the current workspace can be specified.
- Related workspaces: Workspace owners can define workspaces that are somehow related to the current workspace. This provides the user with an easy way to navigate to workspaces which might also be of interest. This will be displayed in the right panel of the workspace landing page below the contextual actions.
Business Context section
In the "Business Context" section, you can apply business tags (metadata) to your workspace in order to provide more context. MatchPoint Snow supports five main categories of business tags for unit, location, customer, process and product. These categories can be configured and administrators can define additional categories.
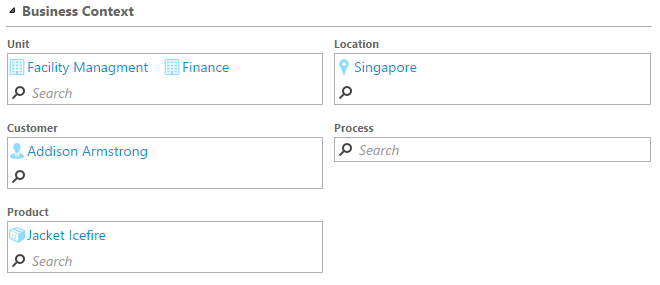
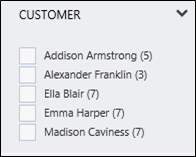
Business tags will help other users to find your workspace better out of the business context they are working in. For example, users belonging to a certain organizational unit and working with a specific customer might be especially interested in that particular unit and/or customer. By providing such information for your workspace, you enhance the index with additional metadata that can be used for searching and filtering by others. For example, a user can filter content by customer in the filter navigation provided in the left wing of the MatchPoint Snow main portal:
Moreover, Matchpoint Snow automatically inherits business tags to all workspace contents. For example, if a workspace member uploads a document to your workspace, it will automatically get the context information you provided for the workspace, meaning that others can find the document by searching for the business context. The same applies for all other types of content, as can be seen in the following sample:
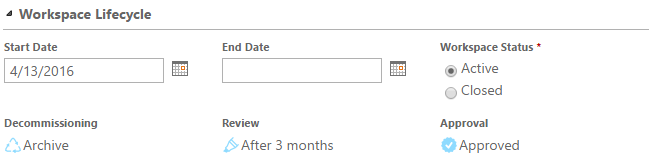
Workspace Lifecycle section
In the "Workspace Lifecycle" section, you can edit workspace dates and status or see the governance metadata that apply for your workspace. By default the start date is the workspace creation date, and the end date is not specified. Workspace staus represents corresponding tag that is set for workspace. By default all workspaces are active. MatchPoint Snow supports rules for archiving, review and approval. These rules can be configured and administrators can define additional rules. Since the governance metadata is defined on a global level per workspace template, you cannot change it, even as a workspace owner.
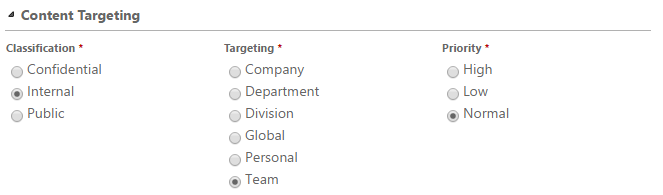
Content Targeting section
In the "Content Targeting" section, you can modify the content targeting metadata for your workspace. By default, your workspace will provide values for classification, targeting and priority as defined in the workspace templates. As a workspace owner, you can change these values according to your needs. Content targeting metadata can influence the workspace behavior and the ranking when your workspace appears in a search result or a view.
Depending on the settings in your workspace templates, the behavior of the business, workspace lifecycle and content targeting metadata as well as your ability to modify may vary.
Change Workspace Icon
As a workspace owner, you can use the "Change the logo" action to replace the standard workspace icon with a personal picture representing the workspace. You can use any picture in the .png, .jpg or .gif format. The optimal size of the workspace picture is 200x200 pixels, although you can use any square picture and MatchPoint Snow will adjust the size automatically for you.
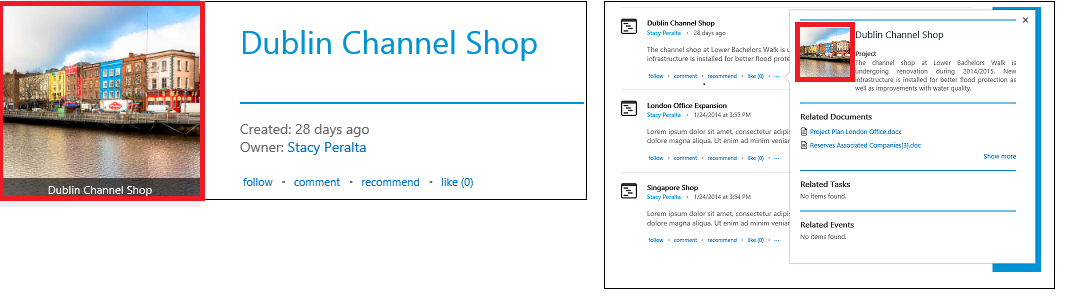
To change the workspace icon, simply upload your picture by selecting it in the pop-up dialogue. Workspace pictures will show in the top left corner of your workspace as well as in call-outs.
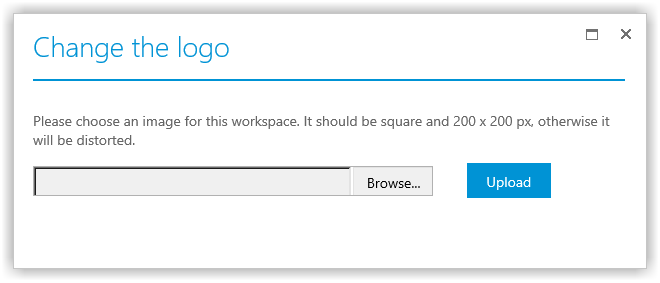
Please make sure your picture is exactly square. If you upload a non-square picture, it will be distorted due to the automatic seizing process.
Please do not upload pictures containing inappropriate content. Be aware that, as a workspace owner, you bear a certain responsibility for your workspace. Moreover, the workspace owner role clearly puts the responsibility of the workspace pictures in your hands, as you are the only one being able to upload them. Your picture selection is representative. It should improve the overall user experience, making it enjoyable to be part of your workspace.
Manage document templates
As a workspace owner, you can define your own document templates to be used in your workspace. By using the "Manage document templates" action from the action panel, MatchPoint Snow will guide you to the document template library of your workspace. Simply upload the templates you want to provide or edit existing templates to update them. The document template library is a normal SharePoint document library providing the common features in the ribbon.
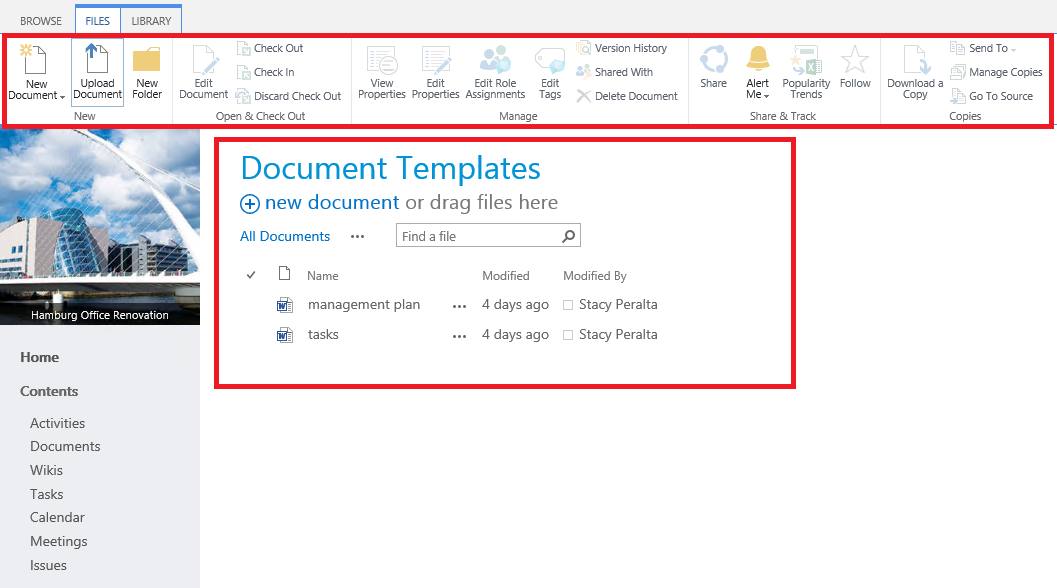
All document templates stored in a workspace's document template library will be available to workspace users when creating new documents for that workspace using the "Create a document" action from the action panel. Snow will automatically provide them along with the globally provided templates.
If you have a document template that should be available in all workspaces of a specific workspace template or even on a global level, please talk to your MatchPoint Snow administrator.
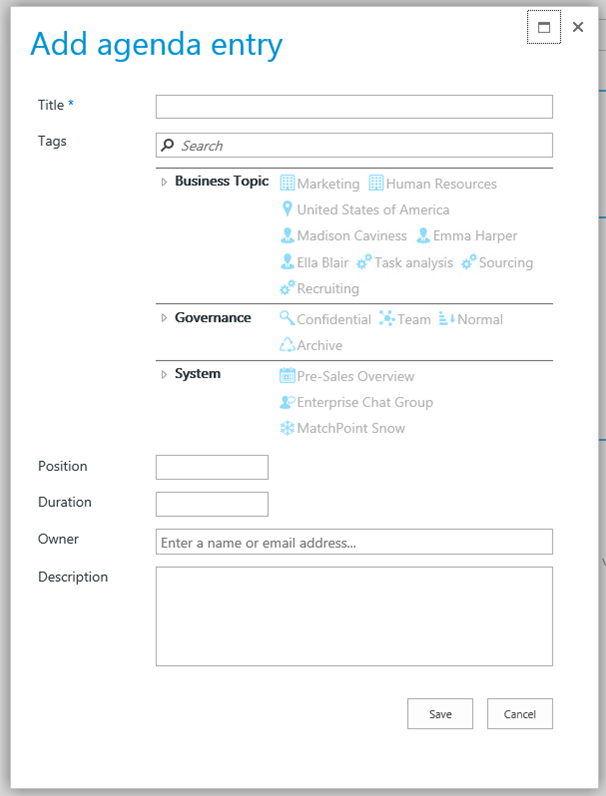
Add agenda entry
As a workspace member or workspace owner, you can modify the agenda of a meeting by using the "Add agenda entry" wizard from the action panel within a meeting workspace. Simply enter the agenda entry information in the corresponding fields in the "Add agenda entry" dialogue. Fields with an asterisk (*) are mandatory. We encourage you to provide as much information about your entry as possible, such as the duration and description. This will make it easier for your colleagues to prepare for the meeting. To complete the process, press the "Save" button.
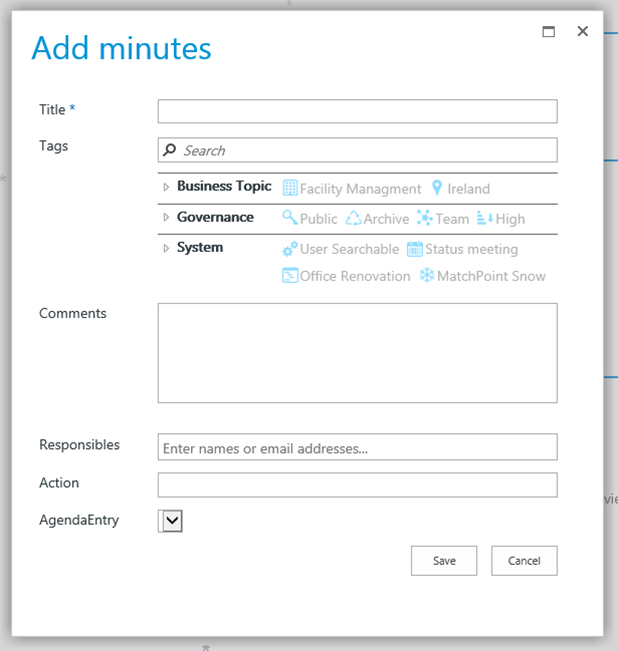
Add minutes
By selecting "Add minutes" from the action panel within a meeting workspace, you have the possibility to append notes to the particular meeting. Simply enter the meeting minutes information in the corresponding fields in the wizard. Fields with an asterisk (*) are mandatory. We encourage you to provide as much information about your entry as possible, such as comments and responsible persons. To complete the process, press the "Save" button.