Creating content
In the Newsroom module, the content creation process starts with the creation of Newsrooms. A Newsroom acts like a physical and contextual container for news items, which can be grouped either by business units, e.g. “Marketing News”, “Corporate News” or by any other preferred criteria.
Who can create content in the Newsroom Snowflake?
Any user with edit rights on the News site collection can start creating content in the Newsroom Snowflake.
The main roles who create content are author and editor.
Creating a Newsroom
Newsrooms are workspaces, which behave like well-defined container able to store an unlimited number of items.
To create a new Newsroom, open the menu tab “Apps” from the top navigation and select the Newsroom Snowflake. The landing point is the “Newsrooms” view, populated by existing workspaces.
On the right side, use the action “Create Newsroom” from the action panel.
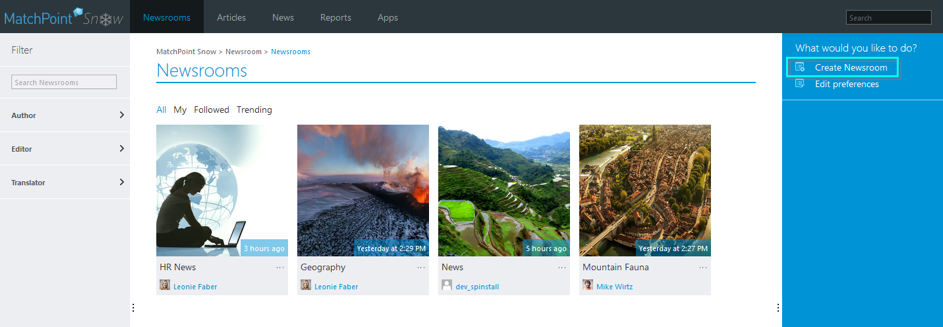
Figure 4 – Newsrooms
A modal dialog appears, containing the fields for the Newsroom creation.
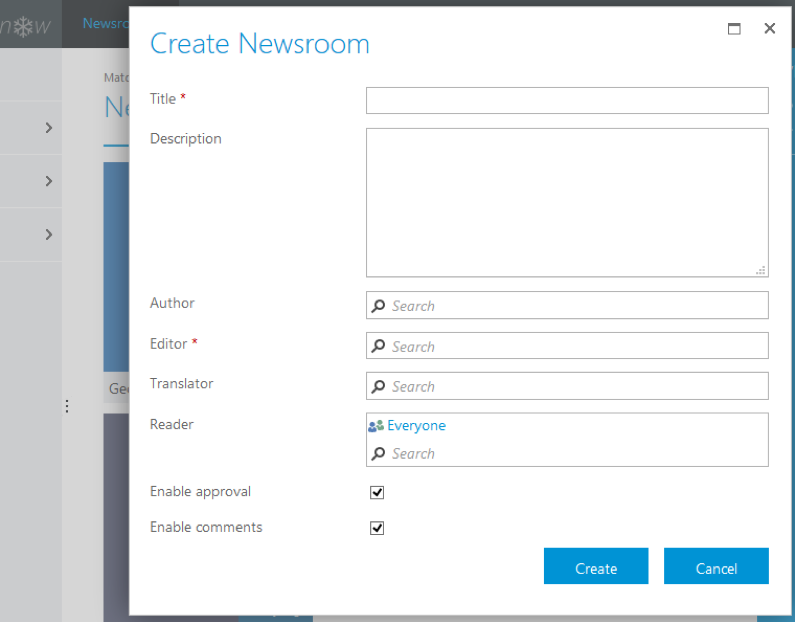
Figure 5 – Create Newsroom
Brief overview on Newsroom fields
- Title (mandatory) – The title of the Newsroom
- Description (optional) – A short description that summarizes the idea of the workspace. The description will be shown in the Newsroom.
- Roles (Author, Editor, Translator, Reader) – Permission fields; you can set single users and/or user groups to define roles. A workspace must have at least an editor, which is why this field is mandatory.
- “Enable approval” checkbox – This checkbox specifies whether the approval workflow is enabled in the Newsroom and is by default selected.
- “Enable comments” checkbox – This checkbox specifies whether the comment function is enabled on the news articles in the readers’ view and is by default selected.
Once created, the new workspace will be seen in the overview “Newsrooms” as well as in the intranet section “Workspaces”.
Roles and permissions
The highlight of workspaces consists in the ability to target content through permissions trimming. The standard roles available are author, editor, translator and reader.
In each Newsroom you can assign different groups or users to these four role categories.
Each role can perform a different set of actions within the workspace, however there are some actions that can be performed by more than one role, e.g. both authors and editors can create new articles.
Brief description of roles in a Newsroom
Author
Authors are able to create new articles and teasers, edit and delete them. They are not able to publish content, or edit articles created by other users.
Editors
Editors have the highest permission level in a Newsroom. They can approve or reject news or teasers, edit and delete all contents within the workspace, govern the workspace and manage the participants.
Translators
Translators are allowed to translate existing news and teasers into different languages. They can only edit and delete translations created by themselves.
Readers Readers do not have access to the Snowflake cockpit. Readers can view content only in the end user view. They can like and share news articles, mark their favourites, download documents and search for content.
| Action | Editor | Author | Translator | Reader |
|---|---|---|---|---|
| Read news and teasers | X | X | X | X |
| Edit preferences for news | X | X | X | X |
| Create news and teasers | X | X | – | – |
| Translate news and teasers | – | – | X | – |
| Edit news and teasers | All | Own | – | – |
| Delete news and teasers | All | Own | – | – |
| Delete translations | All | Own | Own | – |
| Upload assets (images and videos) | X | X | X | – |
| Manage assets properties | X | X | X | – |
| Delete assets | All | Own | – | – |
| Approve news and teasers | X | – | – | – |
| Publish teasers to timeline | All | Own | – | – |
| Govern workspace | X | – | – | – |
| Manage participants | X | – | – | – |
| View participants | X | X | X | – |
| Change the workspace logo | X | – | – | – |
| Create / assign tasks | X | X | – | – |
Adding or removing user permissions in a Newsroom is done with the action “Manage participants”.
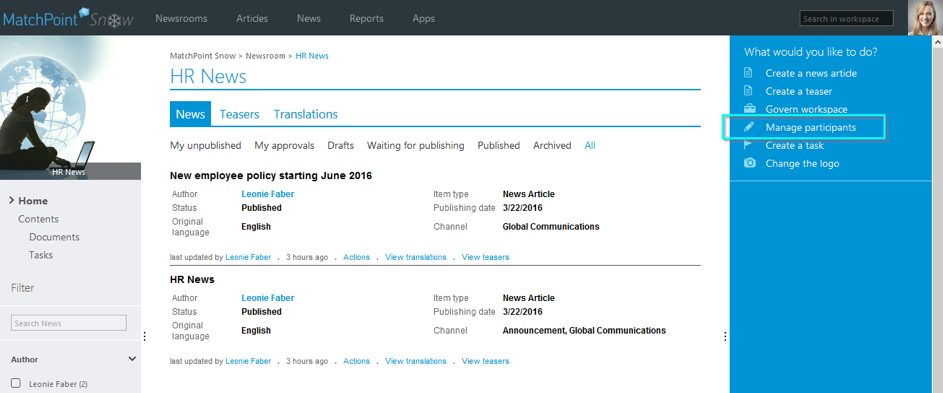 Figure 6 – Manage participants
This action redirects the editor to the permissions page.
To add a new user or group, start typing a name in the search box. The suggested search will show available results that match.
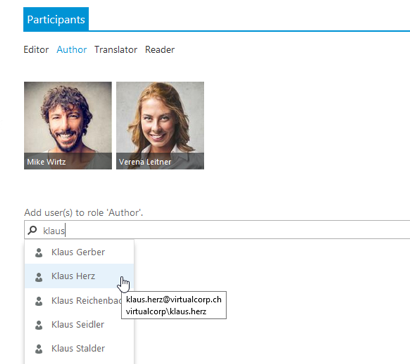
Figure 7 – Search for a user
Select the user and press the button Add.
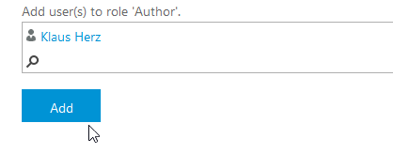
Figure 8 – Add a user
The new user is added to the list and a success message is displayed.
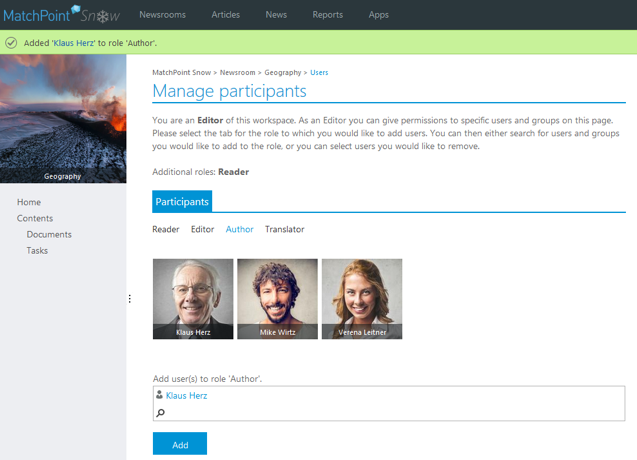
Figure 9 – User successfully added
To remove a user, click on the user and press the button Remove selected.
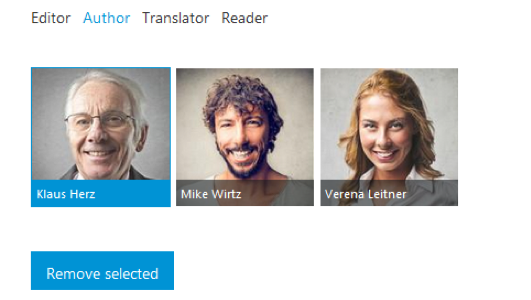
Figure 10 – Remove a user
Action panel
The action panel contains module-specific and context relevant actions, corresponding to the various tools an author/editor/translator needs in the news creation and publication process.
 Figure 11 – Action panel in a Newsroom
Scope of actions in Newsroom
- Create a news article – opens the news creation wizard
 Figure 12 – Create News wizard
The news creation process is described in detail in chapter Creating a News article.
- Create a teaser – opens the teaser creation wizard

Figure 13 – Create Teaser wizard
The news creation process is described in detail in chapter Creating a Teaser.
- Translate – opens the translation wizard
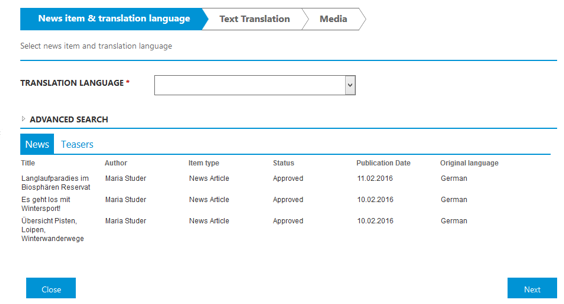
Figure 14 – Translate
The news translation process is described in detail in Translating content chapter.
- Govern workspace – opens the workspace properties page, where editors manage the workspace metadata and description (see Govern workspace)
- Manage participants – opens the user permissions page, where editors add or remove permissions
- View participants – opens the user permissions page, where authors and translators visualize the permissions
- Change the logo – opens the picture upload modal, where editors upload a customized logo for the workspace
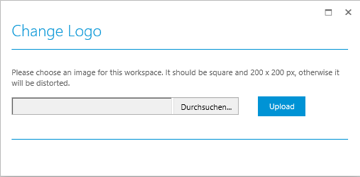
Figure 15 – Change Logo
- Assign a task – opens the task creation modal dialog
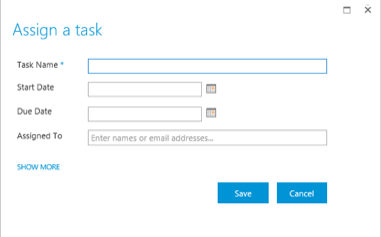
Figure 16 – Task creation modal dialog
Note: Tasks are for internal use in the workspace. It is not possible to publish them. They support the collaboration within a workspace.
In addition, it is possible to upload documents. These are stored in the workspace documents library.
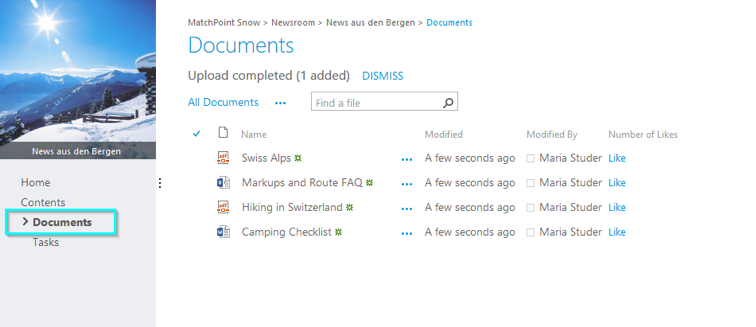
Figure 17 – Workspace document library
This library supports collaboration within the workspace. Documents in this library are not planned to be published on news items. Users with normal read permissions on the workspace do not have access to the documents in this library. Only editors, authors and translators can access and modify these documents. The standard SharePoint functionalities for documents are available to them.
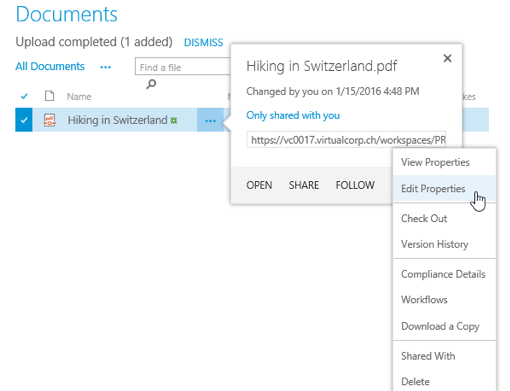
Figure 18 – SharePoint document functionalities
Views
In a Newsroom, the content is grouped in different views, meant to ease the access and management of news items.
Firstly, news and teasers populate separate views. In this way, authors can easily manage content and quickly access the different items by switching a tab.
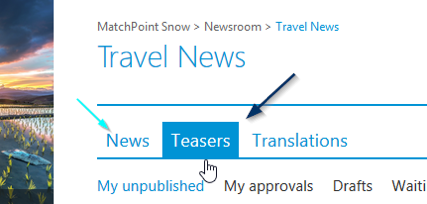
Figure 19 – News and Teasers views
In each of these views, the content is divided by status, e.g. published or archived items. There is also a centralized view “All” showing all items within the workspace.
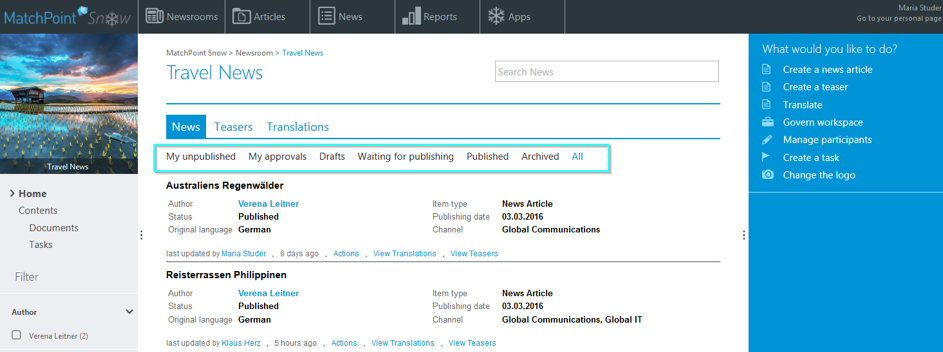
Figure 20 – Views in a Newsroom
The views are depending on whether the approval is enabled in the Newsroom or not. A workspace where the approval is disabled will not contain the views “My approvals” and “Drafts”.
Description of views
- My unpublished – this view is present both in Newsrooms with and without approval. In this view, authors and editors see only items created by themselves. These can be in the status draft, waiting for approval or approved but not published yet, when the start date is not yet reached.
- My approvals – this view is present only in Newsrooms with approval enabled. An editor sees the items that request his approval, when he is an approver of those specific items.
- Drafts – this view is present only in Newsrooms with approval enabled. It displays all items that are in progress and have not been sent yet to approval. Drafts created by all users are shown. Once an item has been sent to approval by an author, it passes from “draft” to the status “waiting for approval”.
- Waiting for publication – this view is present both in Newsrooms with and without approval. When approval is enabled, the view shows items that have been approved, but the start date is in the future. When approval is disabled, the view shows items where the start date is not yet reached.
- Published – this view is present both in Newsrooms with and without approval. It displays all items that are published and visible for the readers.
- Archived – this view is present both in Newsrooms with and without approval. It shows all items created by all users, having reached the end publication date.
- All – this view is present both in Newsrooms with and without approval. It shows all items created by all users, regardless of their status.
Refinements
The standard solution comes with an out-of-the-box refinements configuration for filtering the items in a Newsroom. This configuration can be easily changed by an administrator through adding or removing filter categories.
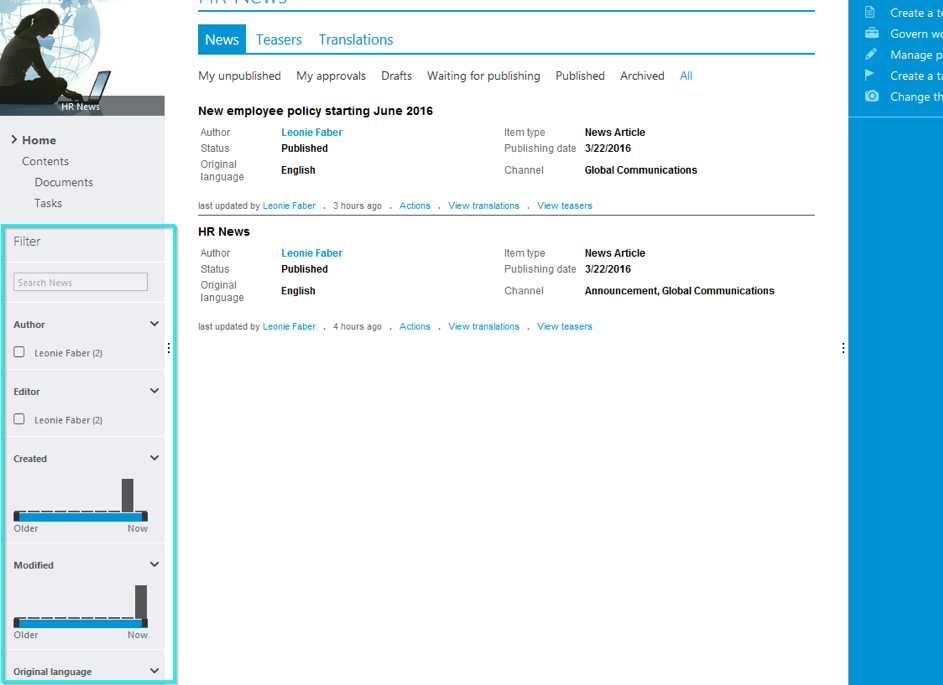
Figure 21 – Refinements in a Newsroom
Search
The search box provides a further instrument for quickly finding an item in a Newsroom.
As soon as you start typing a search term, the content is narrowed down dynamically, according to the view you are searching in. For example, if you cannot find a news item you are sure it exists in your workspace, then you are probably searching in the wrong view. In this case, or if you do not know exactly what approval status your item has, then go to the view “All” and type in your search there.
As an alternative, you may use the global search box “Search in workspace” from the top navigation.
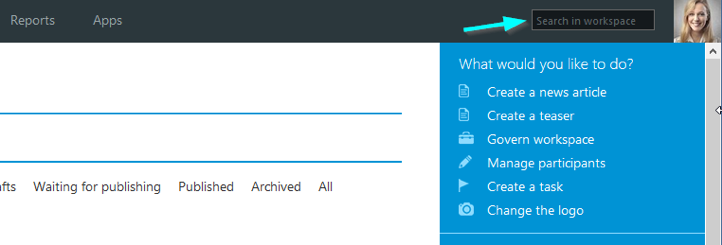
Figure 22 – Search in workspace
The search inside a workspace can find items by title and full text. As soon as you start typing, the search results dialog will open and display both news and teasers. These are recognizable by their icon, as pictured in the screenshot below.
Note: The items displayed in the “Search in workspace” Fly-out box are retrieved through SharePoint Search. For this reason, newly created content will be visible here after a SharePoint crawl has run.
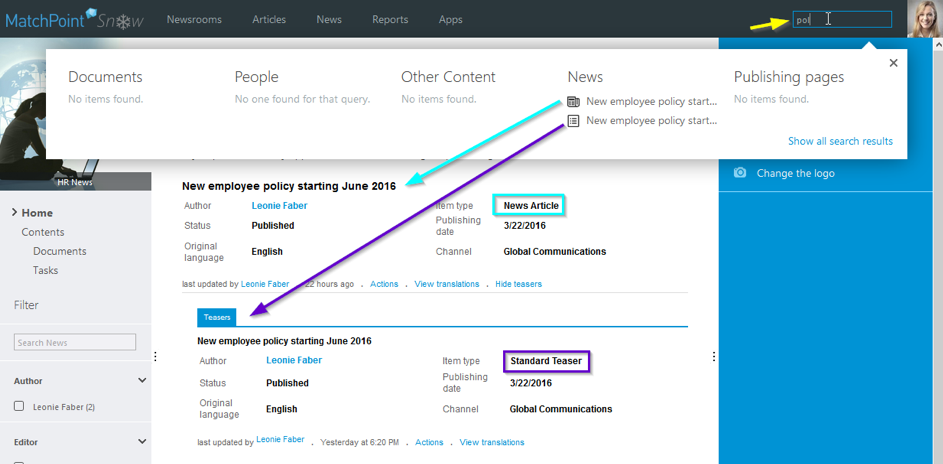
Figure 23 – Search in workspace: search results
Govern workspace
Only editors can perform this action. The “Govern workspace” page allows them to change the title and description of the Newsroom, set or adjust metadata.
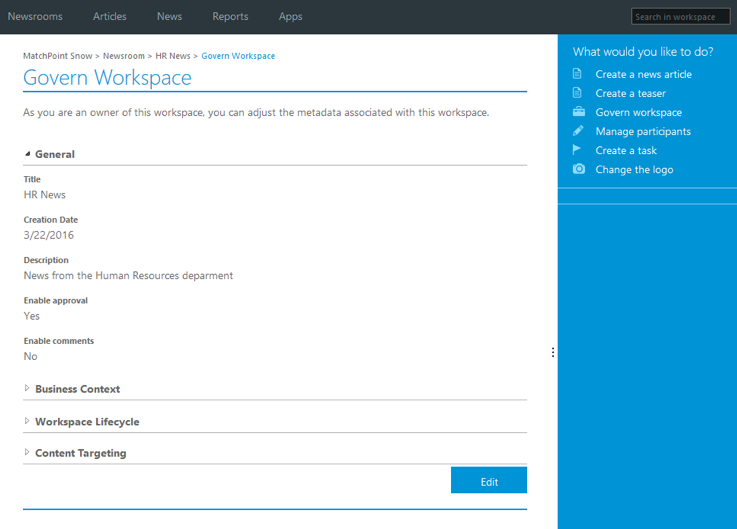
Figure 24 – Govern workspace
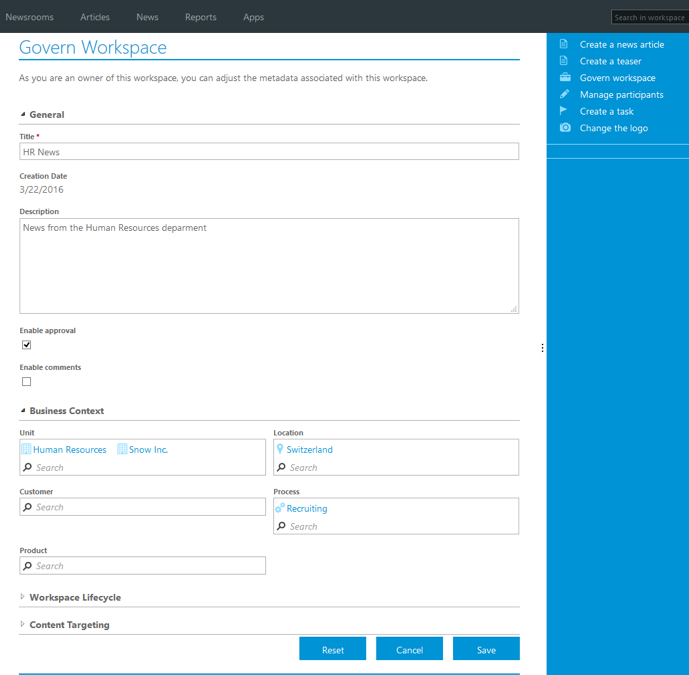
Figure 25 – Edit workspace fields
Metadata set on the workspace will populate the tag fields of newly created items, as suggestions. For more details on this topic, see also chapter 2.2.3.4.
Creating a News article
Layout selection
The standard Newsroom module provides a set of layouts right out of the box. Custom layouts can be added, depending on the business needs of each organization. In addition, existing layouts can be further customized.
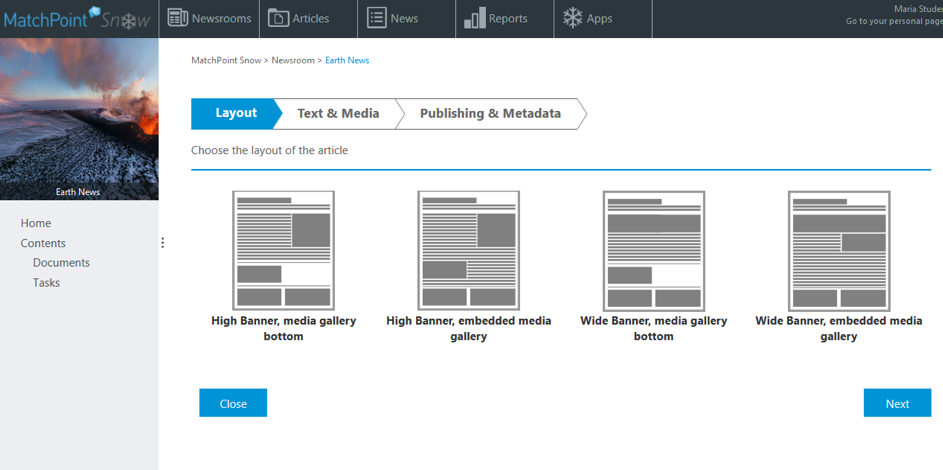
Figure 26 – Layout selection
The layout icons give a first impression on how a layout approximately looks like.
Description of standard layouts
- High Banner, media gallery bottom – this is a classic layout with news title, abstract, body text and a square banner image on the right side. The media gallery is shown underneath the text, at the bottom of the article.
- High Banner, embedded media gallery – this layout resembles the one above, with the difference that the media gallery is embedded within the main text.
- High Banner, media gallery bottom – this is a layout with news title, abstract, body text and a wide banner image on the top of the article. The media gallery is shown underneath the text, in the bottom of the article.
- High Banner, embedded media gallery – this layout resembles the one above, with the difference that the media gallery is embedded within the main text.
Changing the news article layout
It is possible to change the news article layout afterwards.
To change a layout, edit the news item and navigate to the wizard step “Layout”. The current layout is highlighted, now you can select another layout by clicking on it and then pressing Next.
Note: On the step “Text & Media”, some changes might have to be made to complete the save process, e.g. cropping the banner to an aspect ratio that suits the new layout, if the banner size has changed. The wizard will notify the author which fields need editing.
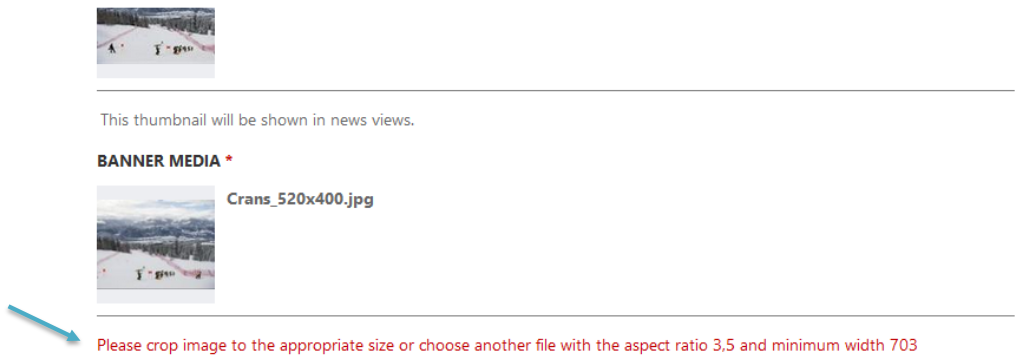
Figure 27 – Changing the layout
Text & Media
In this step, the language and title of the page are mandatory fields. A news item without language or title cannot be saved.
The text elements comprise an abstract and the main text.
The text is saved as pure text with minimal formatting. The formatting is set in the news article template and cannot be changed by the user. This guarantees a universal corporate design.
However, some few basic formatting are provided:
- Bold
- Italic
- Bullet list
- Ordered list
- URL links
- "Mail to” links
- Tables
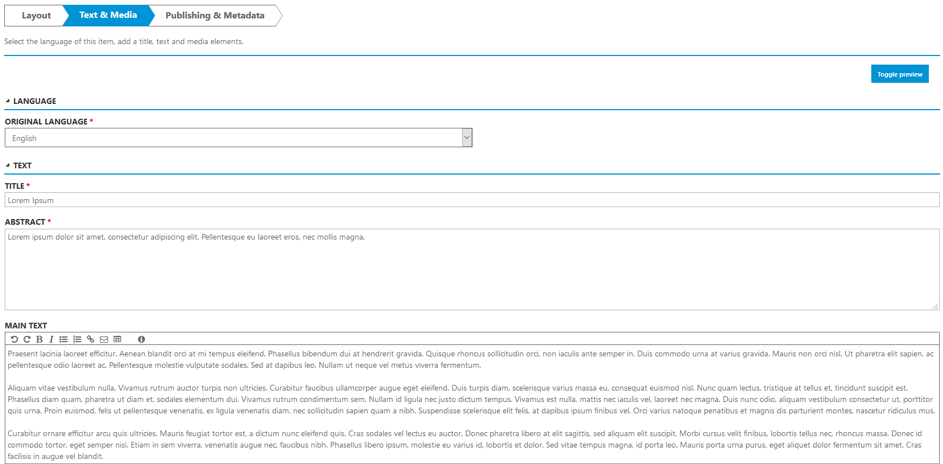
Figure 28 – Text & Media: Text
There is an info button that directs users to a page where they can see how to format text using markdown.
The media elements are the thumbnail of the news article, its banner and content media.
The thumbnail will appear in the news overviews, as well as in all other views where news articles are linked or shown in streams.
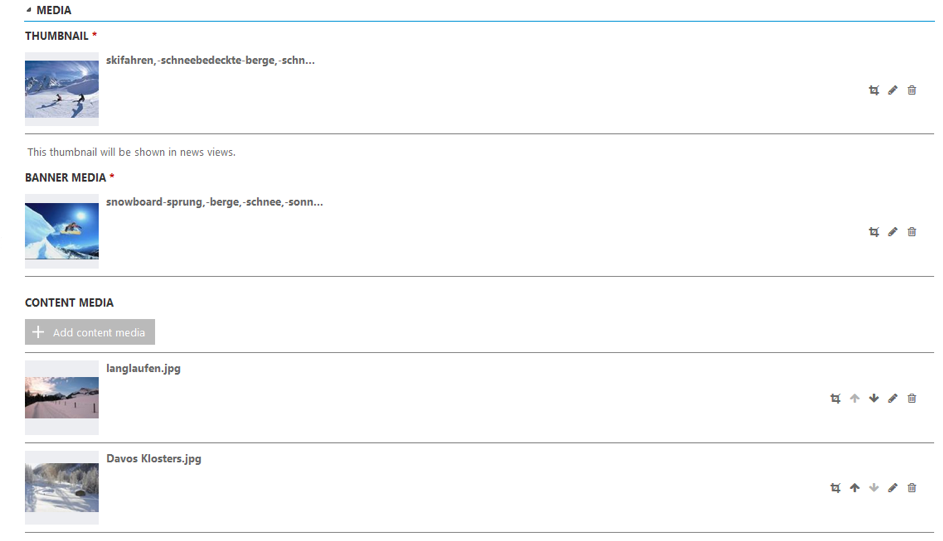
Figure 29 – Text & Media: Media
Adding a thumbnail, banner or content media element is very easy.
First, click on the button Add thumbnail media (respectively, Add banner media).
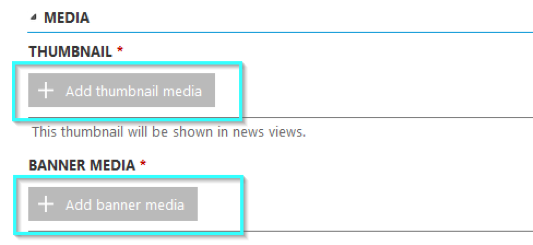
Figure 30 – Add thumbnail/banner media
The modal dialog “Select media” opens.
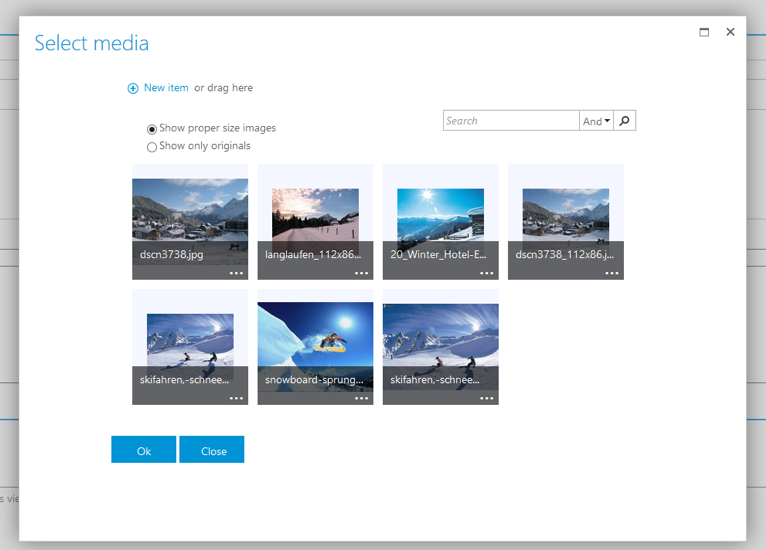
Figure 31 – Select media modal
By default, the modal dialog opens with the view “Show proper size images”.
Thumbnails and banners require a minimum aspect ratio. The images in the view “Show proper size images” may already have been cropped and fulfil the required size.
All images uploaded are shown in the view “Show only originals”. These are the original images that have not been cropped yet.
In both views, you can directly drag and drop an image.
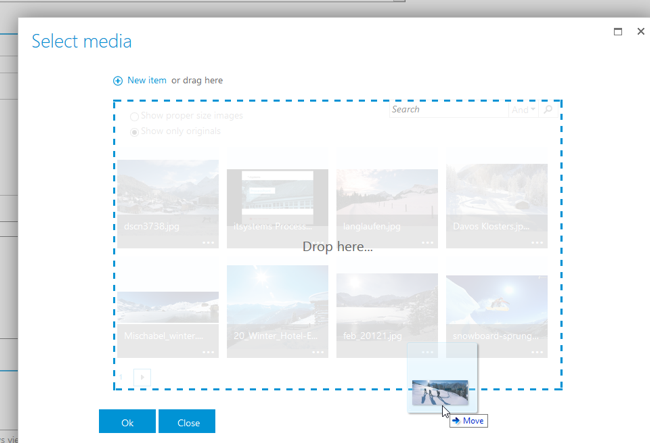
Figure 32 - Drag & drop an image
You can also browse for an image, using the link “new item”.
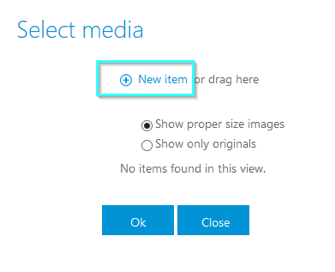
Figure 33 - Add new image
A browse modal is opened.
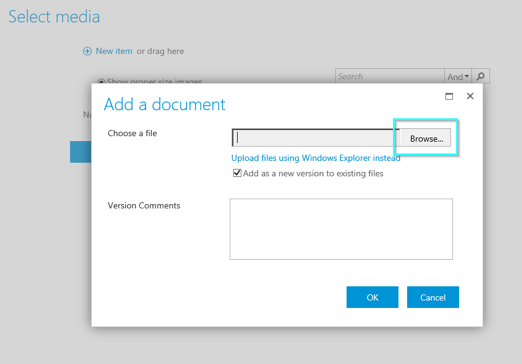
Figure 34 – Browse
When adding an element using the “browse” function, a properties window will appear once the item is uploaded. In these fields, properties like title, description and tags can be set for the asset.
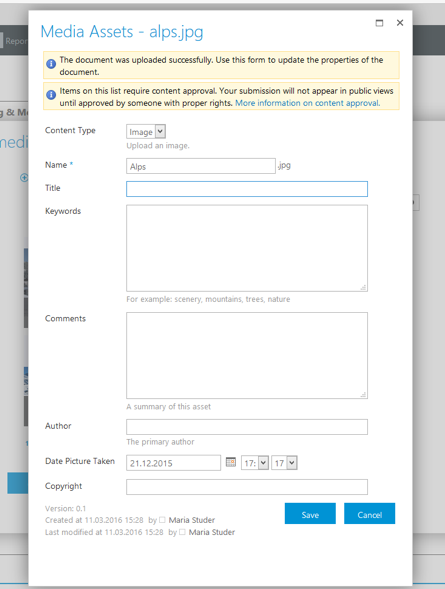
Figure 35 – Asset properties
After uploading the picture, it will be shown in the modal. You may add more pictures.
To choose the image for the thumbnail or banner, select a picture and press OK.
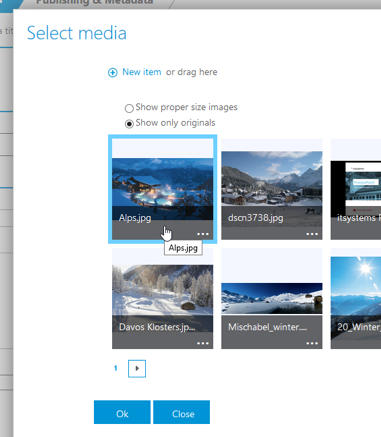
Figure 36 – Select a picture
Next, the cropping assistant opens. The selected picture must be cropped to fit the required size of the thumbnail or banner image.
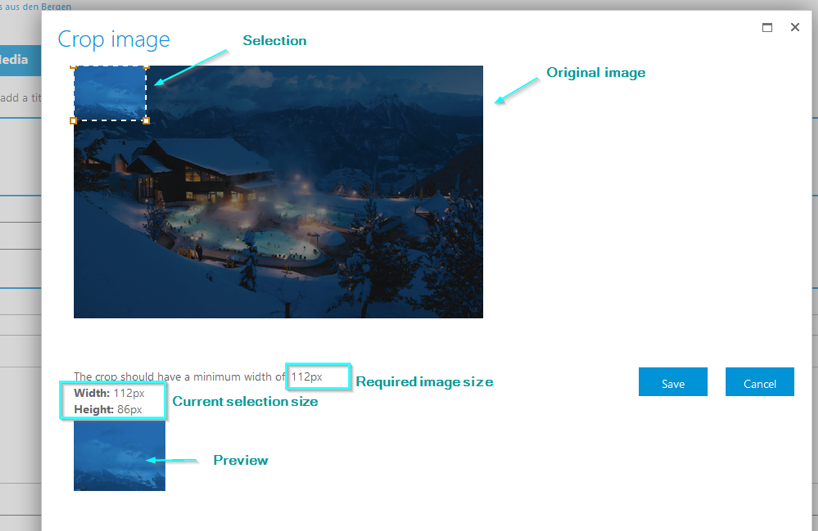
Figure 37 – Cropping assistant
To increase the selected area, drag the bottom right corner in the direction of the arrow as shown below.
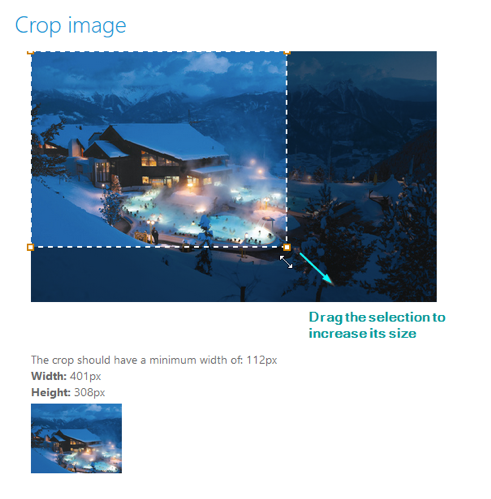
Figure 38 – Drag selection
The selection can be moved across the original picture, to capture any part of the image.
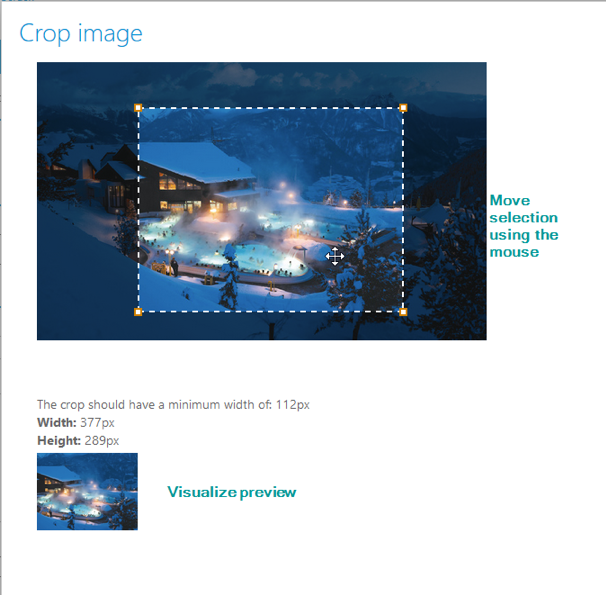
Figure 39 – Move selection
When finished, press Save. The new image will be shown in the wizard under thumbnail media (resp. banner media).
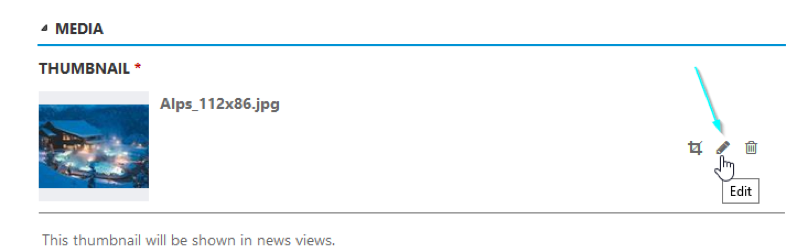
Figure 40 – Thumbnail image
The label of the image can be changed, by clicking on the “Edit” symbol and typing a friendly label.

Figure 41 – Edit label
Then press the checkmark symbol to save the new label.
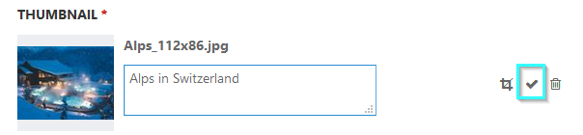
Figure 42 – Save new label
To see how the news article will look like in the readers’ view, use the Toggle preview button within the wizard.
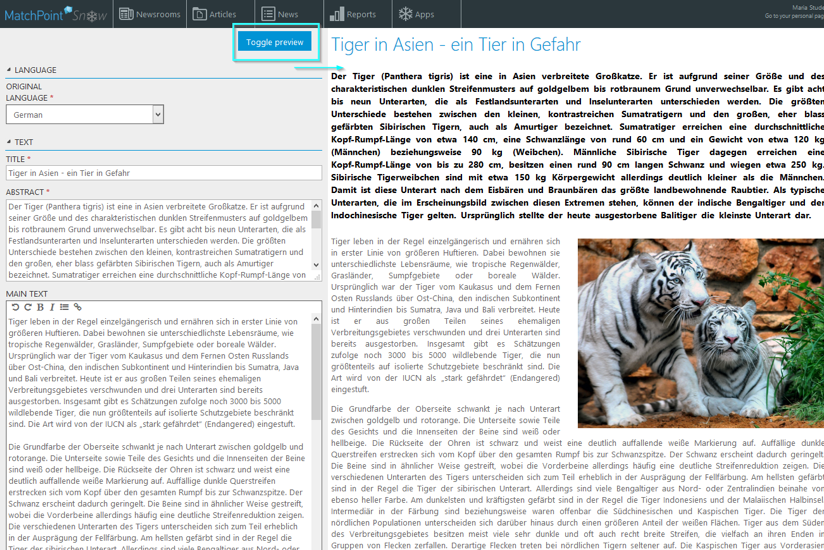
Figure 43 – Toggle preview
A news article may have related links and documents attached to it.
Related links To add a related link, fill in the URL and the friendly label in the fields, and then press the “Edit” symbol.
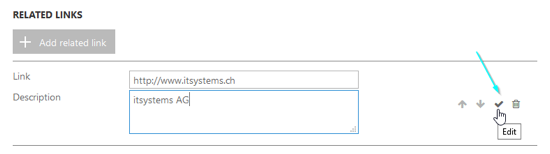
Figure 44 – Add related link
When related links are added, they will appear underneath the news article body.
Downloads
Downloads are related documents that can be downloaded and opened directly from the news article via link. To add such an item, press the button Add download link.
Figure 45 – Add downloads
The modal dialog „Select media“ appears, where you can either drag & drop a document or use the browse functionality, similar to the process described above for adding image media.
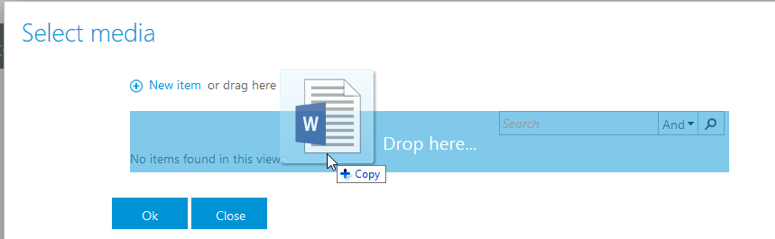
Figure 46 – Drag & drop a document
The documents need to be saved within the current Newsroom.
Note: Please make sure to give your download links a friendly label, since e.g. spaces in file name will not be rendered accordingly in the URL in the end user view.
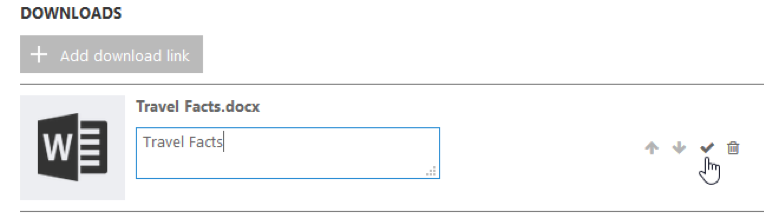
Figure 47 – Download links need friendly labels
Publishing & Metadata
This step contains publishing information and metadata fields, which are described below.
Some additional fields may appear in this wizard step when certain features are activated from the Newsroom configuration. The description of those further functionalities can be found in the following chapters.
Publishing dates
Each news article has a start and an end publishing date. By default when creating a new item, the current date is set as start date.
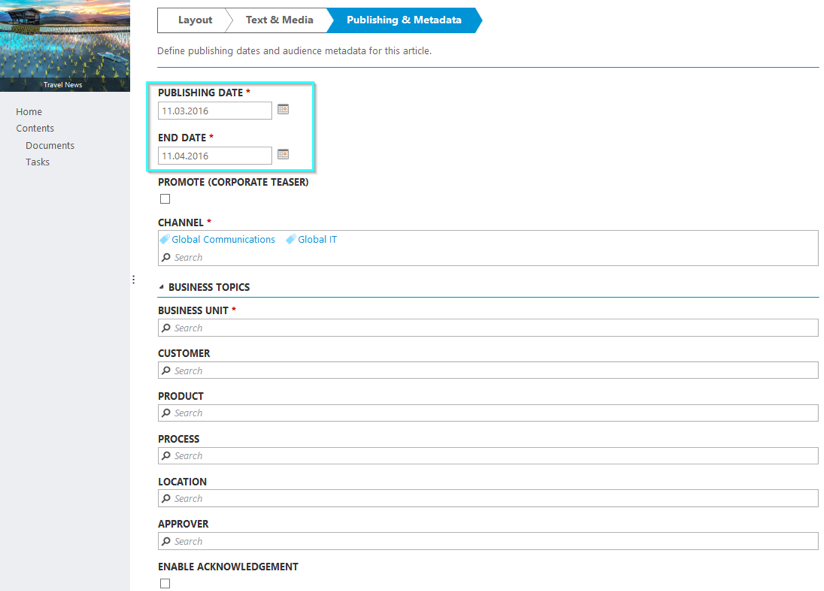
Figure 48 – Publishing & Metadata: publishing dates
To set the start and end date, click on the calendar symbol right next to the date fields. The calendar opens, allowing you to select a date.
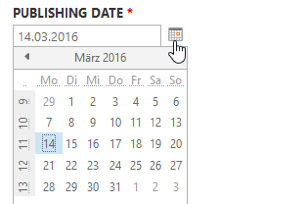
Figure 49 – Select a date
Promote (Corporate Teaser)
Besides the creation of the news article and its standard teaser, this function enables a fast creation of a corporate teaser as well.

Figure 50 – Publishing & Metadata: Promote (Corporate teaser)
When the checkbox is marked, two further fields collapse: “Promote until” and “Banner media”.
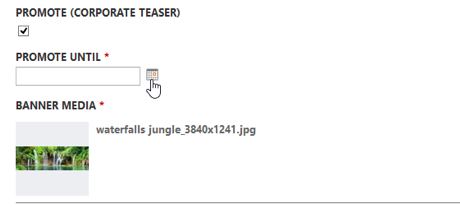
Figure 51 – Corporate teaser details
These fields are used for adding a banner image for the corporate teaser and setting its end date. The corporate teaser will promote the article until the end date selected here.
To create the news article together with a standard and a corporate teaser, the button Submit & Teaser must be used.
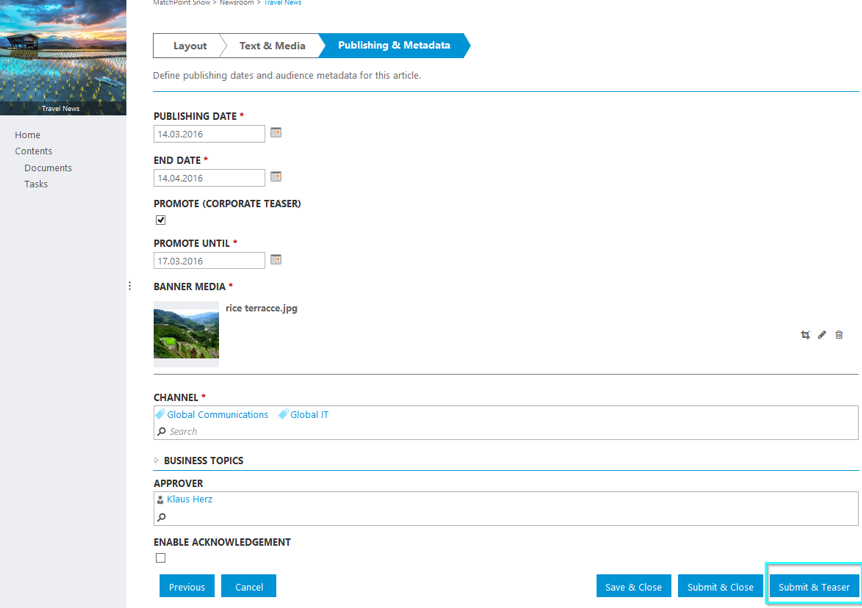
Figure 52 – Direct teaser creation works using the button Submit & Teaser
For more details about the automatic teaser creation see chapter Automatic teaser creation.
Channel
Each news item must be assigned to a channel, this is why this field is mandatory.
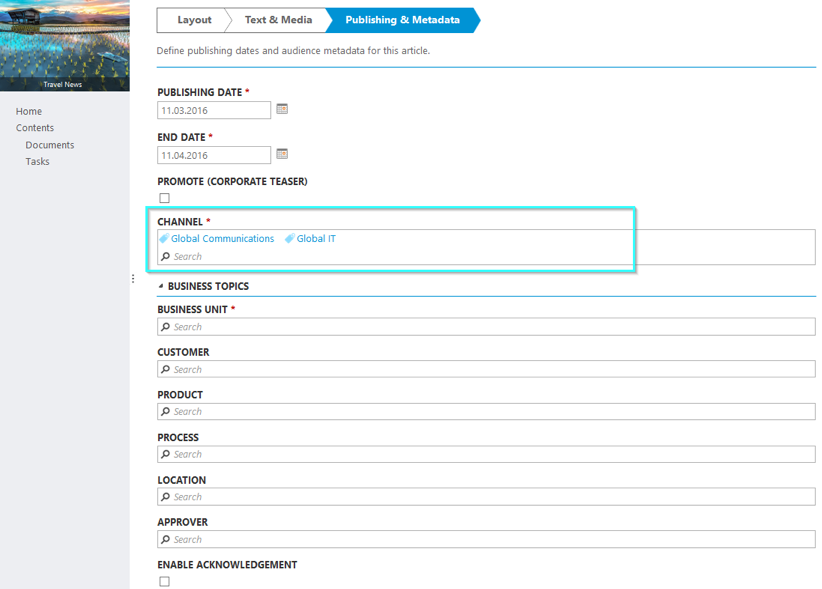
Figure 53 - Publishing & Metadata: Channels
The channels configured as default channels in the Newsroom configuration will populate this field as suggestions. An author can remove them or add further channels. Users who subscribe to those channels will be able to visualize the news item in the readers’ view, once the item is published and the users have read rights on it. Read more about this in chapter Edit preferences.
To add a channel, click inside the channel field on the search symbol, and then click on “browse”.
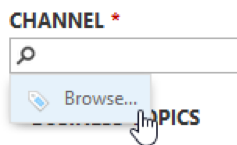
Figure 54 – Browse channels
A list of available channels collapses, allowing the selection of one or more channels from the list.
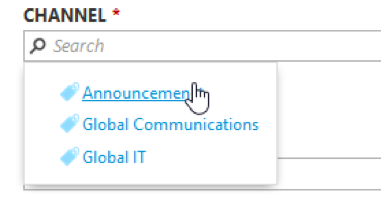
Figure 55 – Add a channel
Click on a channel to add it into the field. Once added, it will populate the field. To remove a channel, click on the “x” symbol right at the end of the channel name.

Figure 56 – Remove a channel
A news item can be attributed as many channels as necessary. From a reader’s perspective, see more details about subscribing to channels in Visualizing content.
Business Topics
Setting tags on a news article enables users to find, aggregate and group that item, along with other news articles sharing the same tag. Tags describe and categorize a news item. Based on this metadata, news can be searched, filtered and aggregated as related content. To make search results more relevant it is advised to add several suitable tags to the news item.
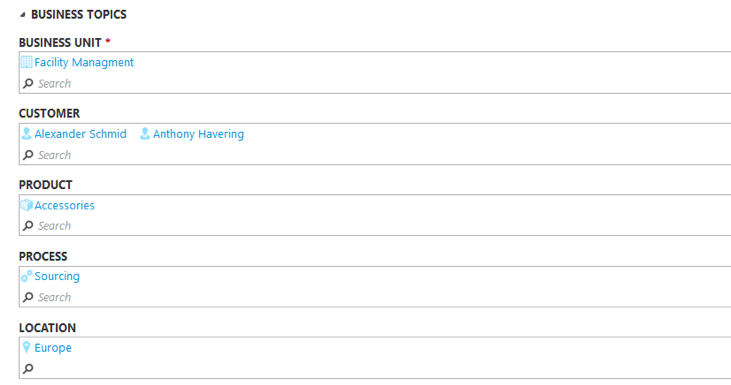
Figure 57 – Publishing & Metadata: Business Topics
These fields will be populated by default with the tags set on the Newsroom, if available there. An author can remove them and/or add new tags.
To add or remove tags, follow the steps described in the step above – the process is the same for all tag fields.
Approver
This field is only visible in the wizard if approval is enabled in the Newsroom.
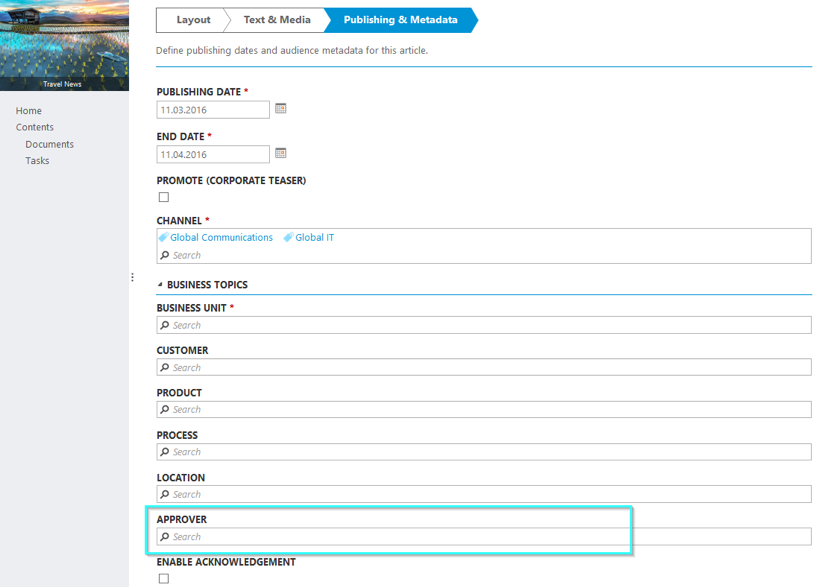
Figure 58 – Publishing & Metadata: Approver
In this field, an author can determine the person who should approve the news item.
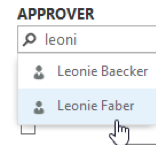
Figure 59 – Picking an approver
That person must have editor rights in the Newsroom, otherwise the wizard validation will throw an error message.
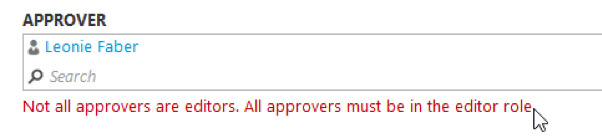
Figure 60 – Approver validation
Note: Please do not use groups in this field; the validation does not work for groups. This field is intended for single users only. You may add one or more users as approvers. If you wish that a group of people is able to approve the page, the best solution is to add that group to the editor role on the workspace. In this way, all the users within the group will be able to approve the item.
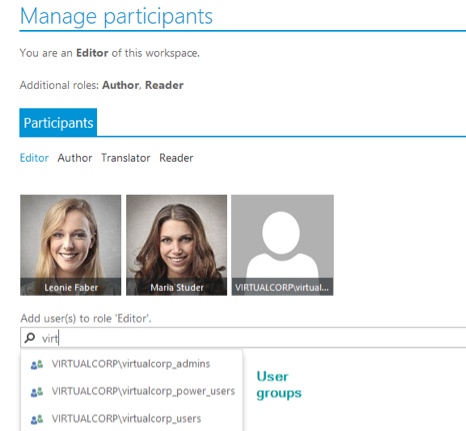
Figure 61 – Adding user groups to role Editor
Furthermore, the user(s) set in the “Approver” field will receive a notification e-mail as soon as the news item is sent to approval.
For more details see the approval workflow, see chapter The approval workflow.
Configurable features
The Newsroom module offers a set of features that can be enabled and disabled easily from the Newsroom configuration. The following features refer to news.
Enable acknowledgement
This checkbox determines whether the acknowledgement is enabled on the news article or not.
For instance, an author intending to publish an important piece of information within the news article, which needs to be read and confirmed by the reader audience, should then enable the acknowledgement.
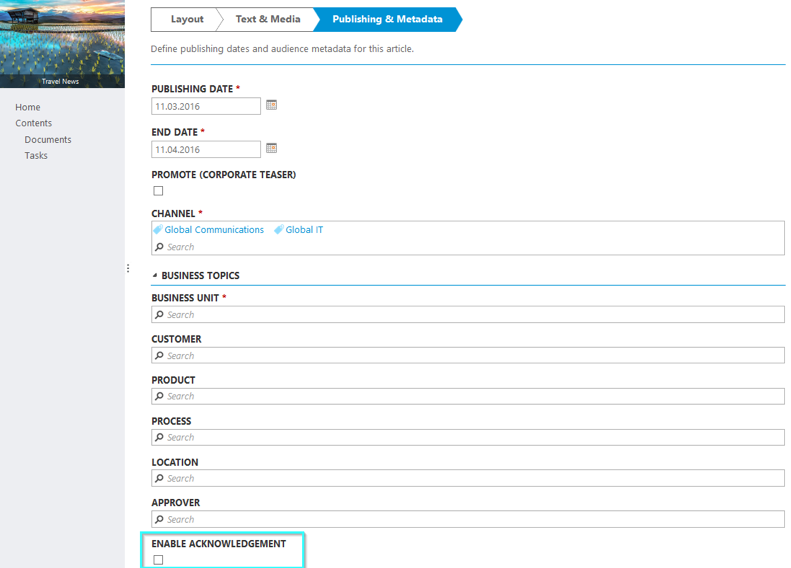
Figure 62 – Publishing & Metadata: Enable acknowledgement
Once the “Enable acknowledgement” checkbox is marked, an additional field “Acknowledgers” is collapsed. This people picker allows choosing the audience that will have to acknowledge the news article.
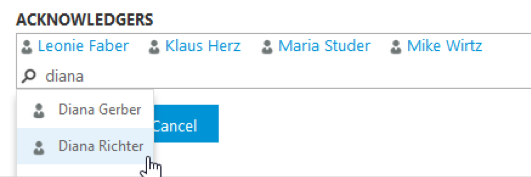
Figure 63 – Picking acknowledgers
If acknowledgement is enabled, but no acknowledgers are selected, the wizard will throw an error when trying to exit.

Figure 64 – Acknowledgement validation
Using the button Save & Close you can save the news article and close the wizard. The article is now in draft mode.

Figure 65 – Save & Close
The button Submit & Close saves the news article, directly sends it to approval and closes the wizard. The article is now in status “waiting for approval”. This button is only visible when the approval is enabled within the Newsroom.
Creating a Teaser
In order for a news article to be visible in the readers’ view, it needs a published teaser – the teaser will appear in the news overviews, anticipating the full article.
There are two ways to create a teaser: automatically when creating a news article, or manually after the article has been created.
Automatic teaser creation
The button Submit & Teaser on the step “Publishing & Metadata” saves the news article, directly creates a standard teaser for it and sends both news and teaser to approval.
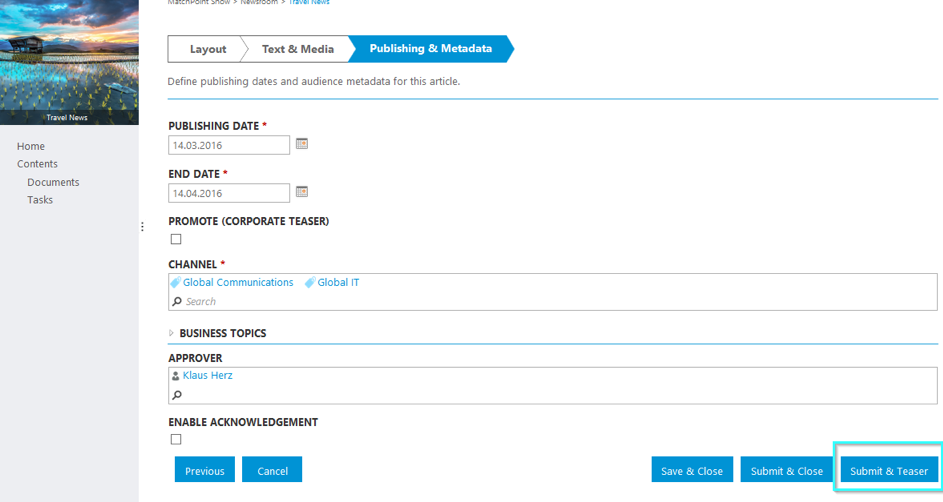
Figure 66 – Submit & Teaser
The teaser is created automatically and inherits the properties of the news article: thumbnail, title, abstract, metadata and publishing dates. These properties can be edited manually afterwards.
Both news article and teaser are in status “waiting for approval” once they have been submitted.
Note: The button Submit & Teaser is only available when creating a new article or editing an existing one that does not have a teaser yet. For existing items which already have a teaser, the button will not be available any more.
Promote (Corporate Teaser)
This feature allows authors to quickly create a news article, including a standard and a corporate teaser. Both teasers will inherit the title, abstract and metadata from the news article automatically. These properties can be edited manually afterwards. Promoting a news article means having a corporate teaser active to it during a certain period of time. To promote a news article, click on the checkbox “Promote (Corporate Teaser)”. By default, the news banner set in the previous step “Text & Media” appears as suggestion for the corporate teaser banner. Depending on the news layout, it might be necessary to adjust the size of the corporate teaser banner.
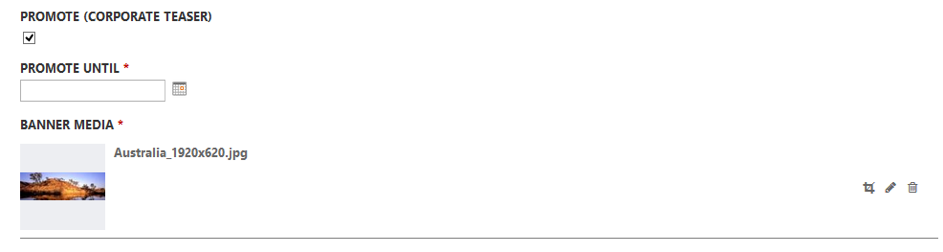
Figure 67 – Promote: banner suggestion inherited from the news banner
To crop the banner, click on the Crop icon to the right side of the picture.

Figure 68 – Crop symbol
Next, the cropping assistant opens. The selected picture must be cropped to fit the required size of the banner image.
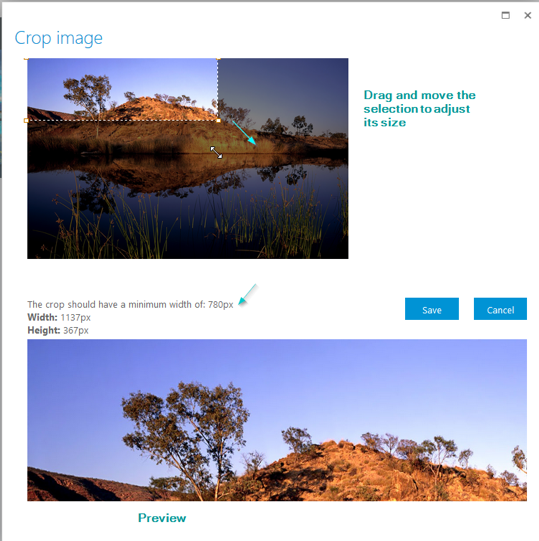
Figure 69 – Crop the corporate teaser banner
When finished, press Save. The image will be shown under banner media.
When creating a corporate teaser automatically via “Promote” checkbox, you can only set the end date, since the start date will be the same as the start date of the news article. In a Newsroom with approval enabled, the items will only be visible for readers once they are all approved.
To set the end date for the corporate teaser, click on the calendar under “Promote until” and select an end date.
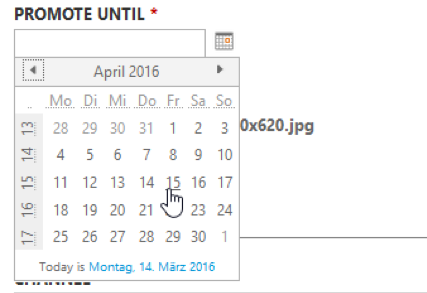
Figure 70 – Promote until
When finished, press Submit & Teaser. The news article, its standard and corporate teaser will be created and sent to approval automatically. The approver or editor will receive a notification about all the items, with links to the news and teasers views.
Note: When accessing the wizard of an already existing news article that either has a standard teaser or has already been promoted, you will not see the “Promote” checkbox any more. This function is only available when creating a new article or editing one without a teaser.
Manual teaser creation
A teaser can be created also manually, for instance by using the action “Create a teaser” from the action panel on the right side.
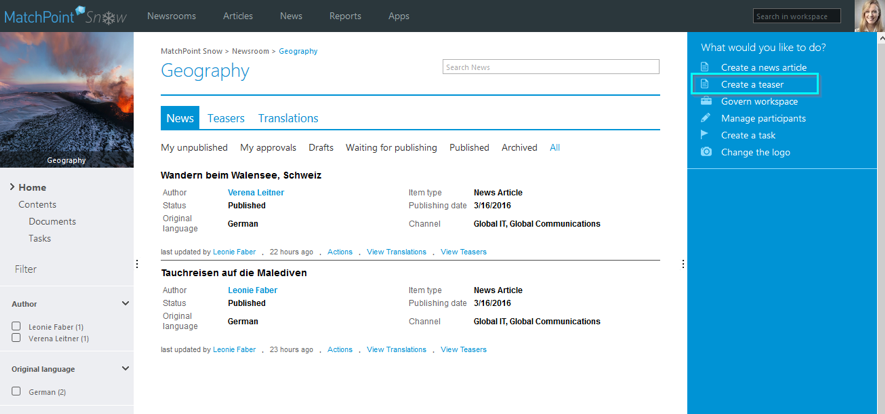
Figure 71 – Create a teaser
The teaser creation wizard opens, with the first step “Article selection”.
Article selection
In this step you can choose to create a teaser for an existing news article or an external teaser. These two scenarios are explained below.
- Article type: News
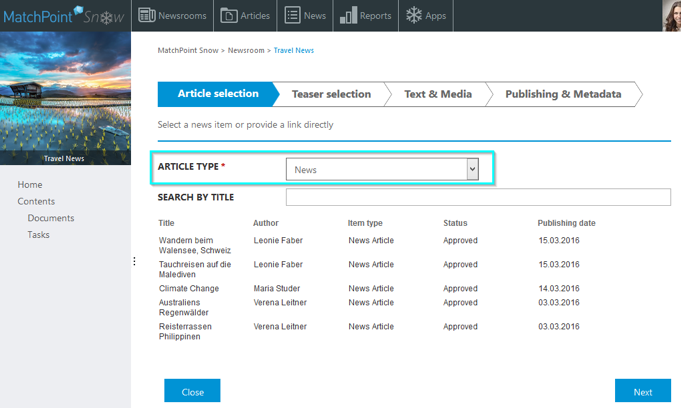
Figure 72 – Default article type is News
The default value of the field “Article type” is News. Underneath it, you can see a list of all existing news from the workspace. Select a news article from the list and press Next.
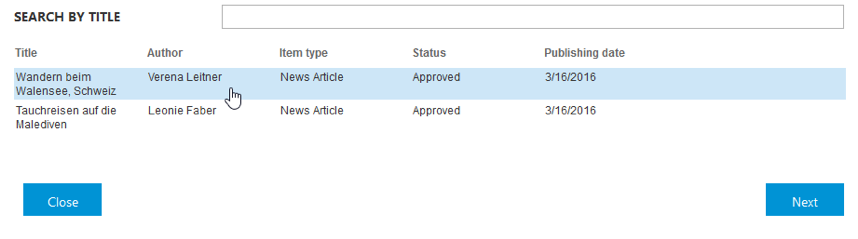
Figure 73 – Select a news article
- Article type: External teaser
It is possible to create a teaser promoting external information sources.
In the step “Article selection”, choose “External teaser” as article type. For an external teaser, a URL must be provided in the field “Teaser link”.
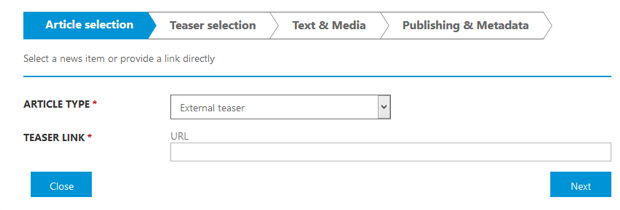
Figure 74 – External teaser
For instance, if your organisation has a new website, you might want to promote this in the intranet with an external teaser. Add the URL of the website as teaser link.
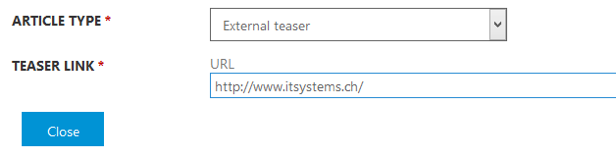
Figure 75 – Add a URL
Teaser selection
In the step “Teaser selection”, you can chose whether to create a standard or a corporate teaser. The default value for this field is standard teaser.
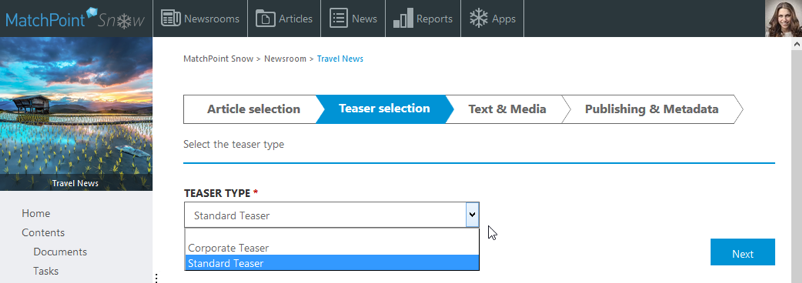
Figure 76 – Teaser selection
To recall the difference between a standard and a corporate teaser, see Teaser.
Text & Media
Next, the teaser language, title, abstract and thumbnail are set in the step “Text & Media”.
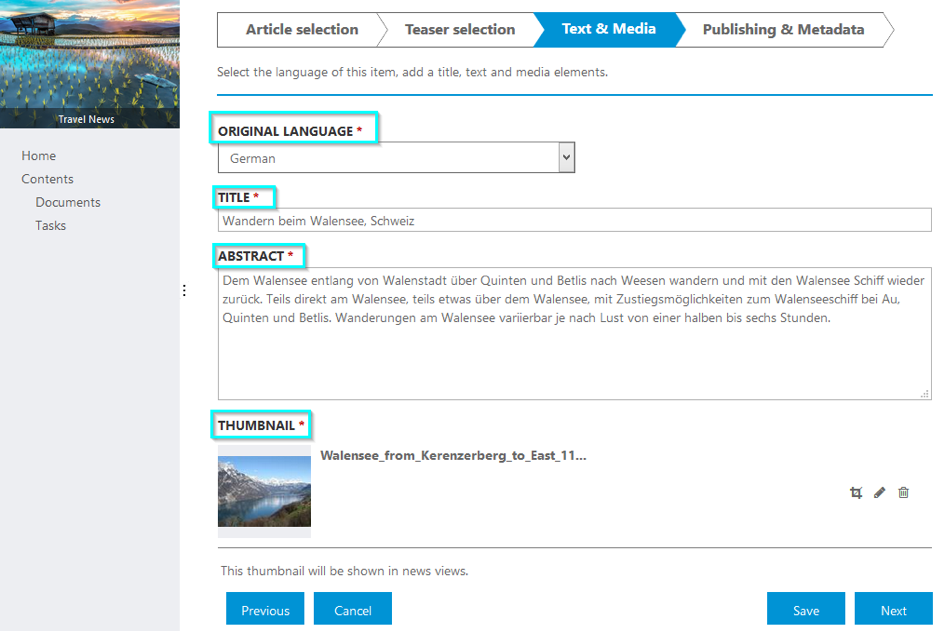
Figure 77 – Text & Media
All these fields are mandatory. By default, they are populated with information inherited from the news article chosen in the first step. These can be changed, since a teaser does not necessarily have to share the same title or image as the article itself.
Publishing & Metadata
In the last step “Publishing & Metadata”, you can set the teaser publishing dates and tags. By default, these fields are populated with the values inherited from the news article chosen, but can of course be changed.

Figure 78 – Publishing & Metadata
Configurable features
The Newsroom module offers a set of features that can be enabled and disabled easily from the Newsroom configuration. The following features refer to teasers.
Show as of
Teasers have this extra field for allowing authors to set a display date for the teasers. For instance, if a teaser should be published today, but become visible for the readers only tomorrow, then the publishing date would be set to today and the “show as of” date tomorrow. The “show as of” date must be higher than or equal to the publishing date.
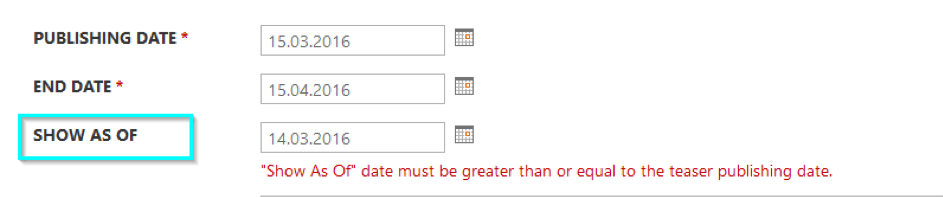
Figure 79 – Show as of date
Post to timeline
The “post to timeline” action is working with teasers only. Therefore, it is possible to post multiple teasers to timeline pointing to the same news article.
By default, the checkbox “post to timeline” is preselected. This means the teaser will be automatically sent to the timeline once it is published.
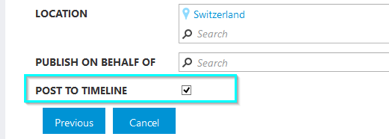
Figure 80 – Post to timeline
Publish on behalf of
It is possible to post a teaser to the timeline in the name of another user. Once this feature is activated in the Newsroom configuration, certain authors and editors will be able to use it. They will see an additional field in the teaser wizard, called “Publish on behalf of”.
This field is a people picker, where you can add the person to be shown on the timeline as the author of the teaser post.
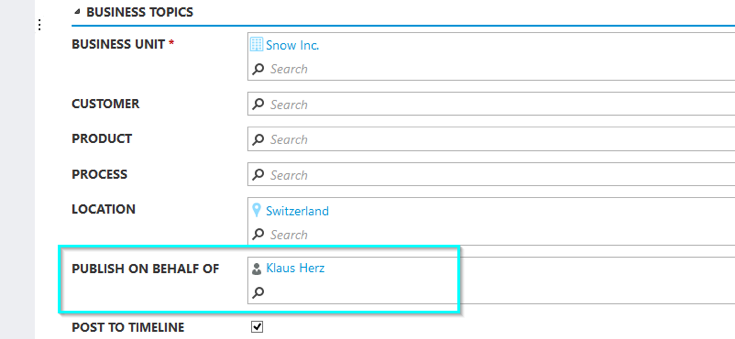
Figure 81 – Publish on behalf of
The user chosen in the field “Publish on behalf of” will appear on the timeline as the user who posted the teaser.
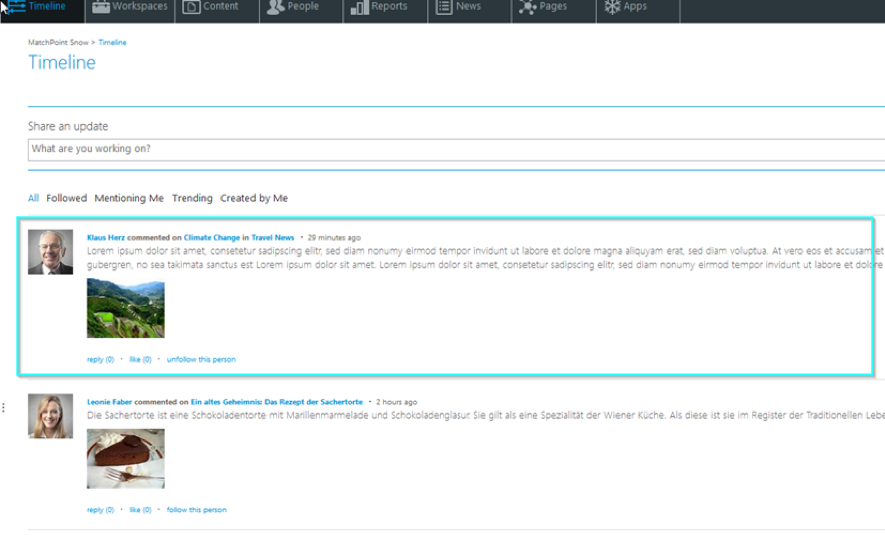
Figure 82 – Timeline post
Centralized view “Articles”
The view “Articles” in the Newsroom module displays all news and teasers from all workspaces in a flat arrangement. In addition, the items are grouped by the approval views, having also a tab for translations. Articles can be filtered or searched in the same way as inside a workspace.
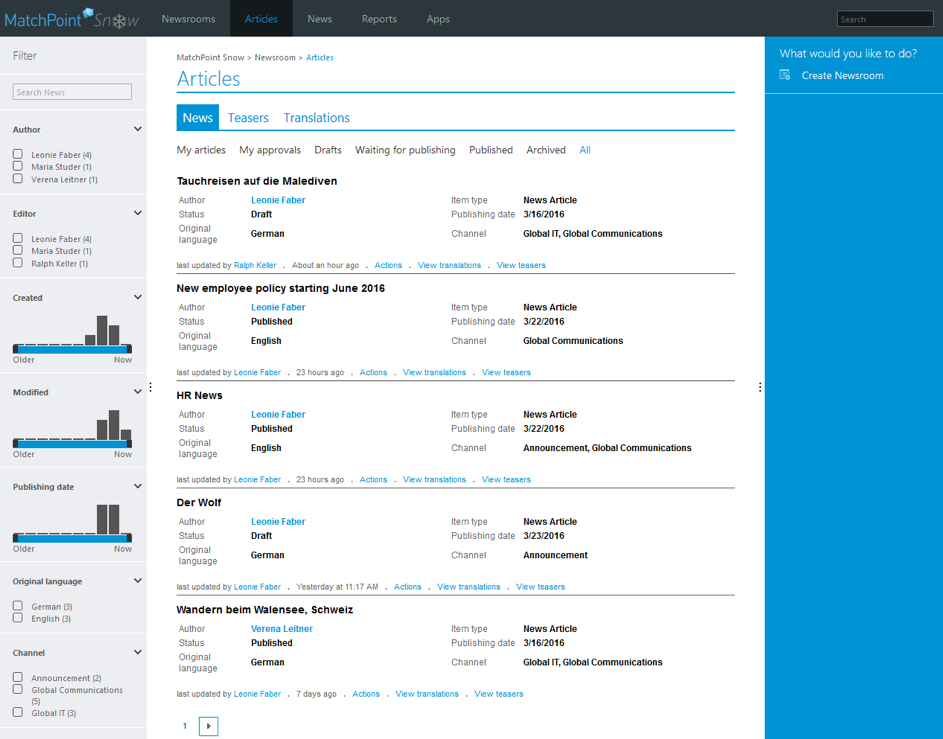
Figure 83 – “Articles” centralized view
The search box on the left side finds items by their title and always according to the active view (in the image above, All). The global search box in the top navigation finds items by title and full text, regardless of the active view. These items are retrieved through SharePoint Search.
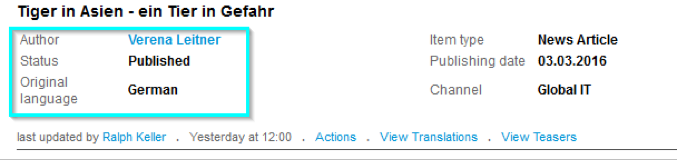
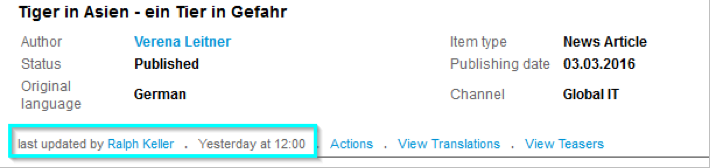
Underneath each item, a range of properties is displayed on two columns: author (the user who created the item), status and original language (the language of the first item version).
On the right column, the item type is shown (news article/ standard teaser/ corporate teaser), the publishing date (the start publication date from the wizard) and channel.
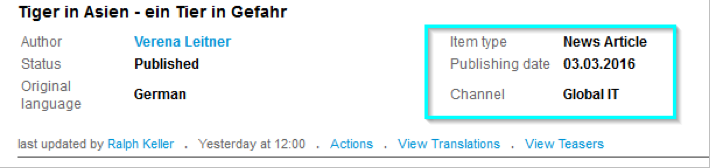
Below the columns there is also information about the user who modified the item the last time, as well as the time stamp of this change.
In this centralized view, the content is grouped by type in News and Teasers. To see all teasers from all workspaces, switch to the tab “Teasers”.
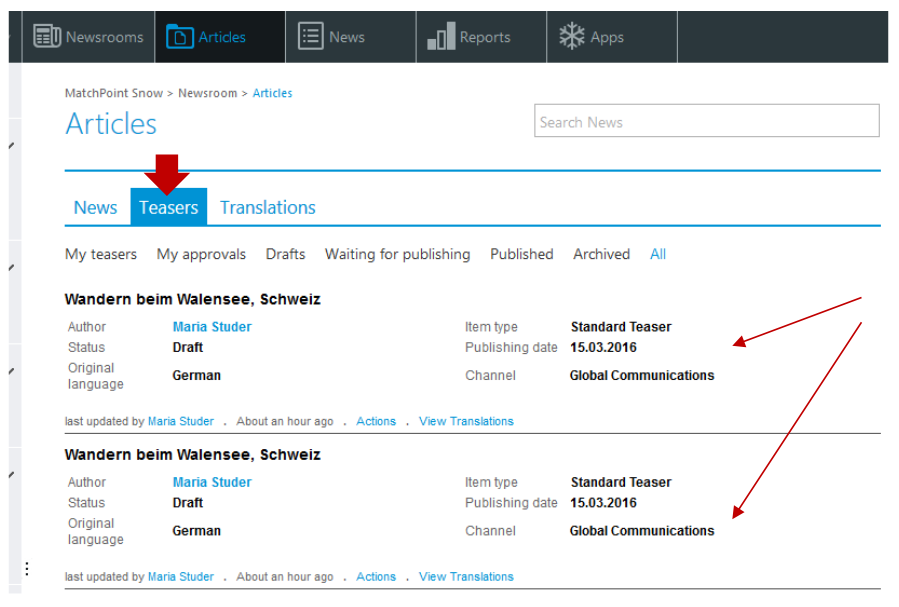
Figure 84 – Teasers centralized view
Actions
Under the actions callout menu, each role sees the granted actions that can be performed on a news article or teaser.
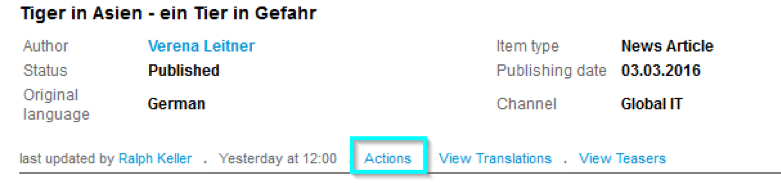
Figure 85 – Actions
The actions available in the callout depend not only on permission level, but also on the status of the item, e.g. an author will see the action “Send to approval” only for an item that has the status draft.
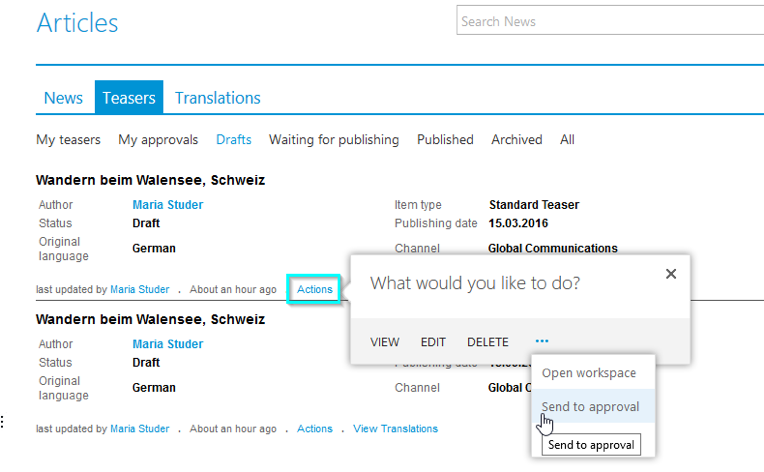
Figure 86 – Actions to a draft teaser as seen by its author
View Teasers
To visualize existing teasers of a news article, use the action “View teasers”.

By clicking on this action, the teasers will expand underneath the news item.
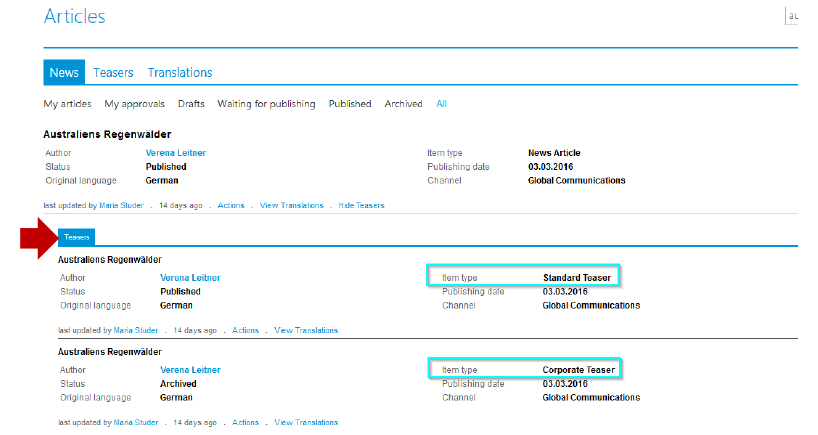
Figure 87 – View teasers
In this view, teaser objects are displayed with title, item type (standard or corporate), status, original language, publishing date and channel information.
For each teaser, an actions callout menu is available.

Figure 88 – Teaser actions callout menu
This allows direct access to a teaser e.g. to edit it, without having to switch to the “Teasers” tab.
To minimize the teasers view, click on “Hide teasers”.
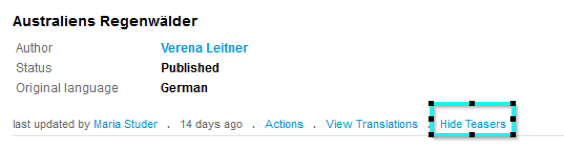
Figure 89 – Hide teasers
Reports
In the standard Newsroom module, a reporting functionality is offered when the acknowledgement feature is enabled. Authors can visualize and export reports of their news articles with acknowledgement activated.
Acknowledgement reports
There are various ways an author can generate reports. The prerequisite for this is that the author has created some news articles on which the acknowledgement is enabled.
- From the Newsroom or the centralized “Articles” view
To quickly identify news with acknowledgement enabled, use the refinement from the filter panel on the left side.
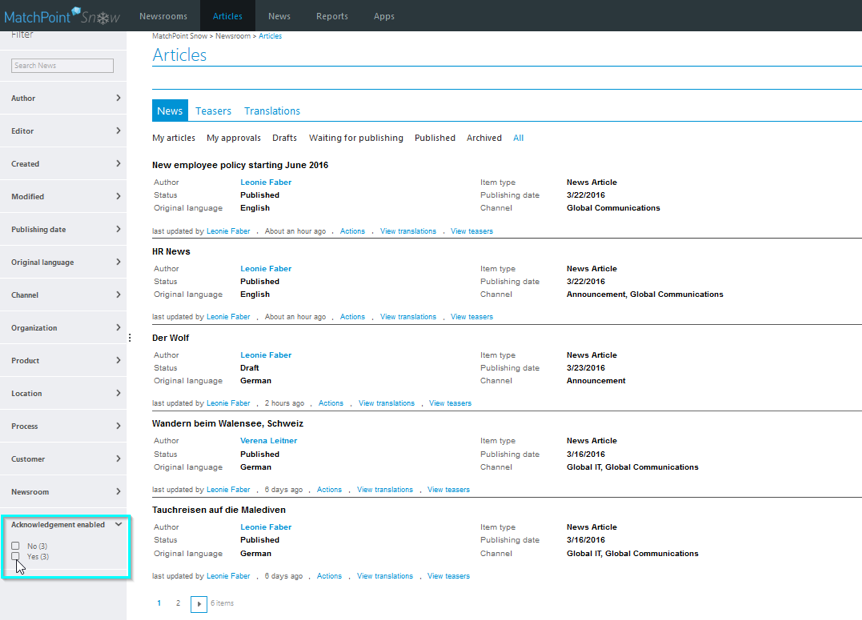
Figure 90 – "Acknowledgement enabled" refinement
When marking “yes”, the news are narrowed down to those having acknowledgement active. To see a report, open the action callout menu corresponding to the news article and select the action “Show reports”.
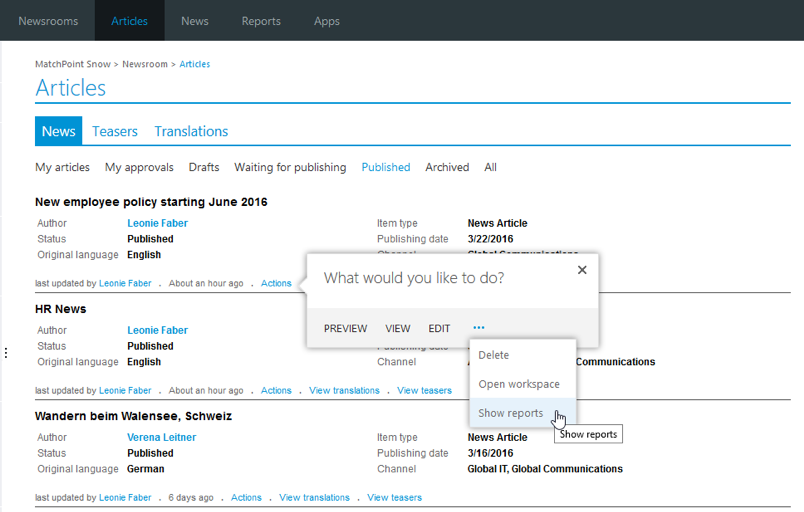
Figure 91 – “Show reports” callout action
The “Acknowledgement reports” dialog will open, having the news article already preselected and showing the reports for it.
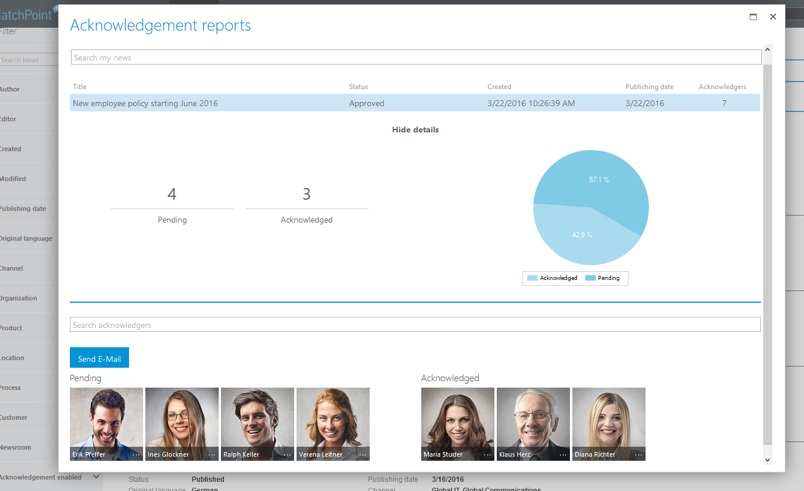
Figure 92 – Acknowledgement reports dialog
The report consists in two main lists of people: “pending” and “acknowledged”.
- “Pending” are the users who haven not acknowledged the news article yet
- “Acknowledged” are those users who already acknowledged the news article
The report shows in addition a pie chart based on the pending and acknowledged count.
In this report window, the author can search further news created by him and check further reports.
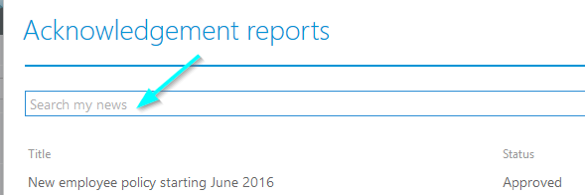
Figure 93 – Search my news
- In the Reports section
Another method to consult reports is to navigate to the “Reports” section.
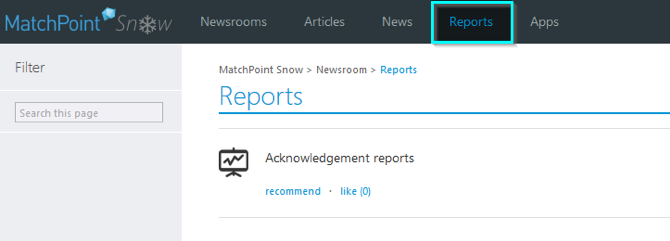
Figure 94 – Reports section
Under „Acknowledgement reports“, an author will directly see the list of news created by him.
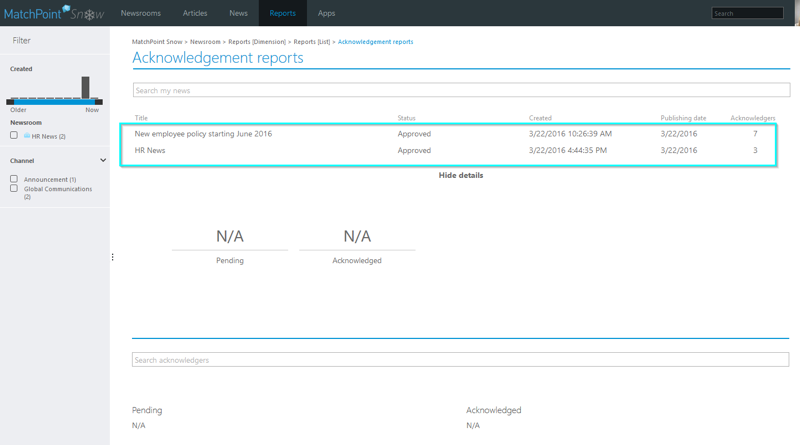
Figure 95 – Acknowledgement reports
To see reports of a news article, select the item. Reporting data is then shown underneath it.
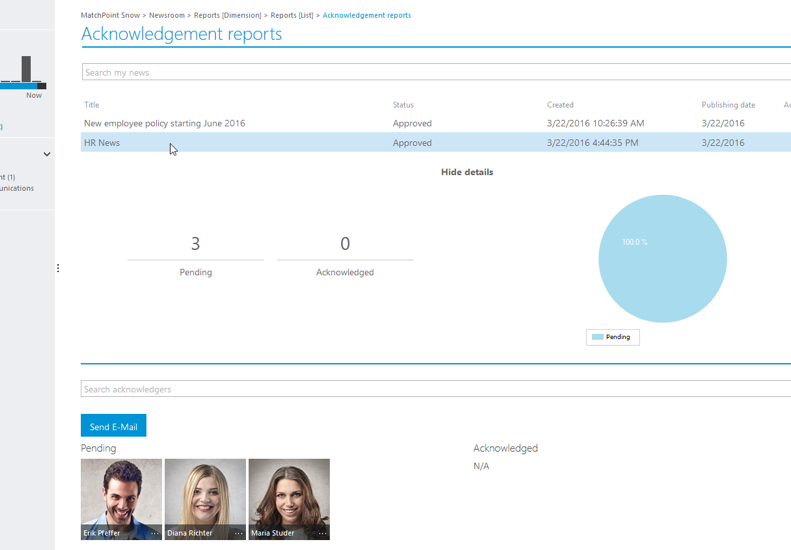
Figure 96 – Select an article to see its reports
The author can export reports data to an Excel sheet, by using the action “Export to Excel” from the action panel on the right side.
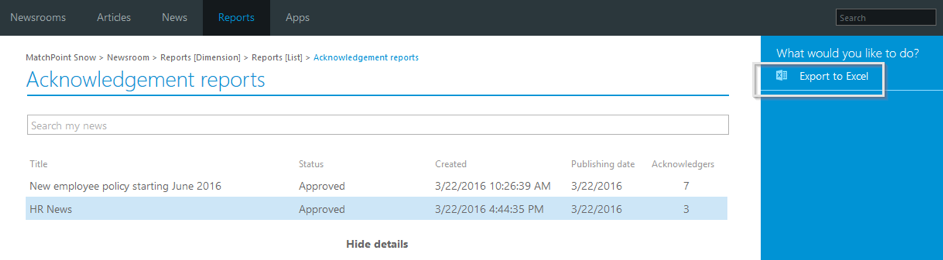
Figure 97 – Export to Excel
The Excel export contains a table displaying news data in separate columns.

Figure 98 – Excel exported sheet
For each news article, the numbers of “pending” and “acknowledged” users as well as their names are exported and visible in the Excel sheet. The news status, its creation and publishing date complete the exported information.
An Excel export will always show only the news items created by the current author.
An author can notify the pending acknowledgers that they have a news article that was not acknowledged. This can be done by pressing on the Sent E-mail button in bottom-left part of the page.
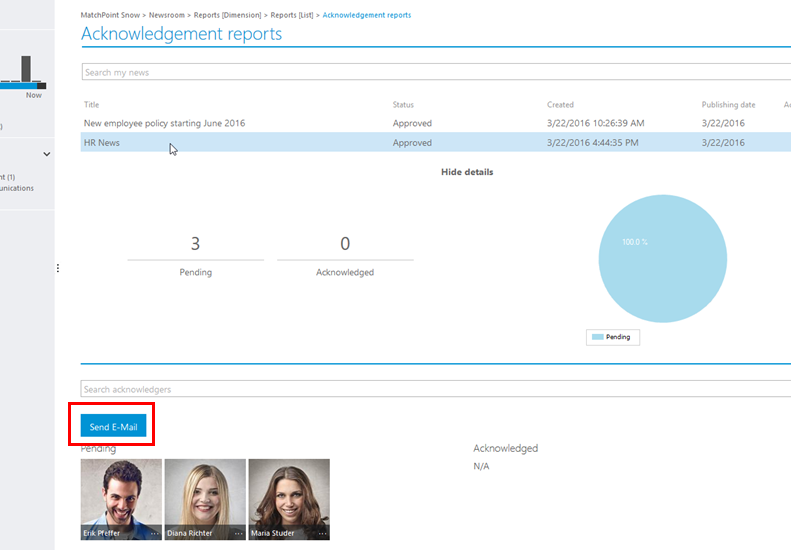
Figure 99 – Notify pending acknowledgers button
After pressing the button a modal wil pop up showing the email that will be sent. At this step you can also add aditional information to the e-mail in the comment field.
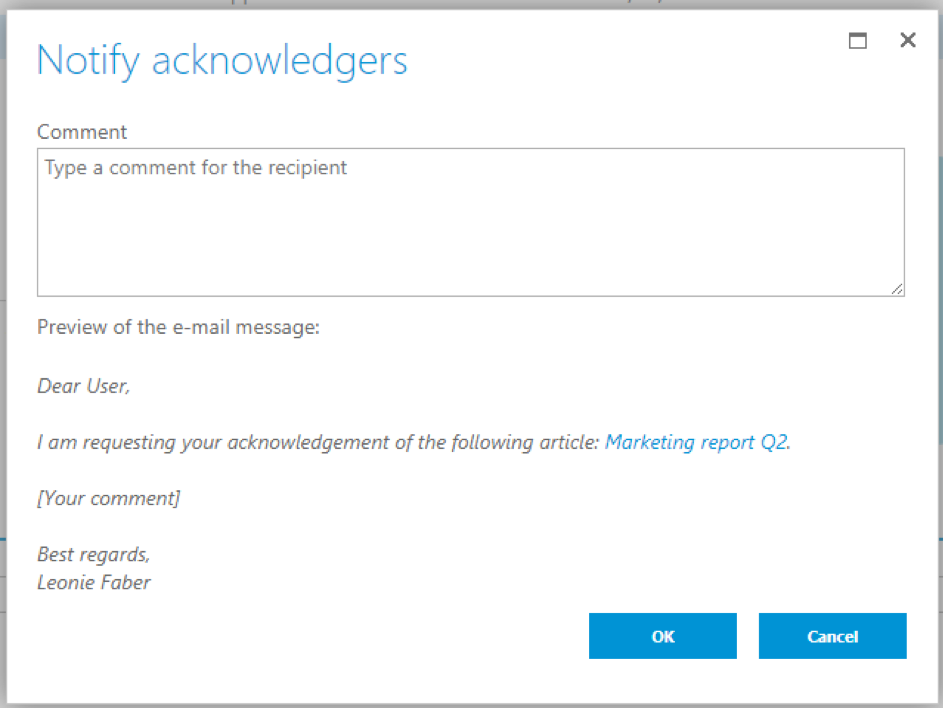
Figure 100 - Notify pending acknowledgers form
- In the readers’ view
Once a news article is published, the author can access the report and visualize the acknowledgers directly in the end user view, from the action panel on the right side.
- Acknowledgers – all users pointed to acknowledge the article
- Pending Acknowledgers – users who have not acknowledged the news article yet
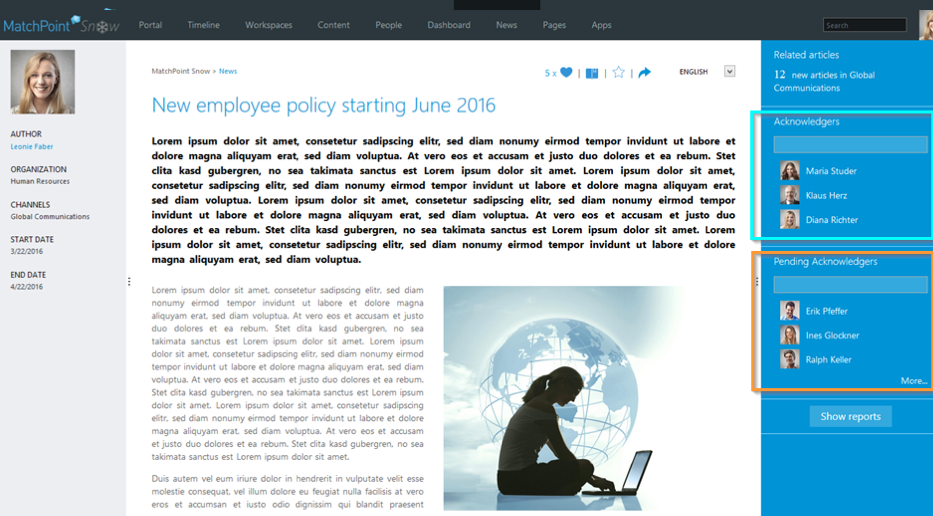
Figure 101 – Acknowledgers and pending acknowledgers
To find a user faster, use the search box above the list or click on the “more” button to see the users not displayed in the list (by default, only three users are displayed in the list).
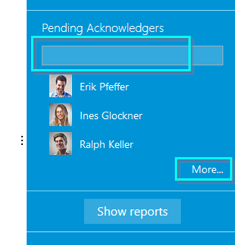
Figure 102 – User search box and "more" button
To visualize the complete report, click on the Show reports button.
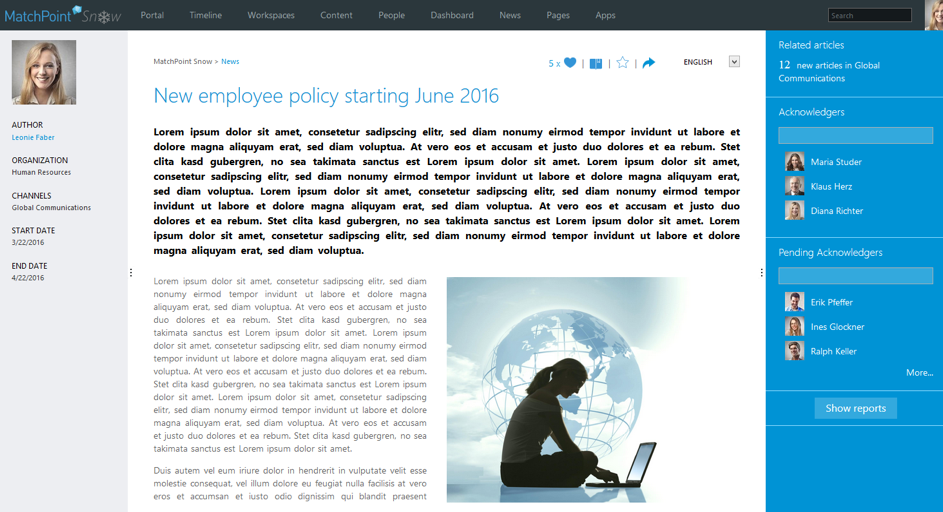
Figure 103 – Show reports button