Upgrade MatchPoint 5.0.x/2016.0 to 2019.0
The migration process of MatchPoint version 5.0.x/2016.0 to MatchPoint version 2019.0 follows the migration path from SharePoint 2019 to SharePoint 2019 as specified by Microsoft.
The migration process for upgrades from MatchPoint 5.0.x/2016.0 versions to MatchPoint 2019.0 requires following steps:
Update to the latest 2016.x MatchPoint version on the SharePoint 2016 environment.
Put the SharePoint 2016 farm and the databases into read-only mode and back up the content and the service application databases.
Code helper snippet can be found in the setDBsReadOnly.ps1 and BackupSqlDBs.sql script files.
- Obtain the Passphrase from SharePoint 2016 environment. This will be required later. If installed by CYCL, it is usually found in the C:\Assist\ path. In the .xml file, search for \
- Install SharePoint 2019.
- Restore a copy of the SharePoint 2016 databases to the SQL Server instance on the SharePoint Server 2019 farm and set the databases to read-write (make sure to enable the option: Replace content).
Configure / create / upgrade the same service applications you had on SharePoint 2016 on SharePoint 2019. Upgrade service applications to SharePoint Server 2019 MS Documentation.
Code helper snippet can be found in the UpgradeAppServicesSP2019.ps1 script file.
Create a web application for each web application that existed in the SharePoint 2016 environment. Create web applications MS Documentation.
- Install MatchPoint version 2019.0 by adding and deploying the required
MatchPoint solutions package files:
- Microsoft.Deployment.Compression.wsp
- Newtonsoft.Json.wsp
- Colygon.MatchPoint.wsp
- Colygon.MatchPoint.TaggingService.wsp
- Optional: Colygon.MatchPoint.Samples.wsp (if it was deployed on SharePoint 2016)
- Optional: Colygon.MatchPoint.Solutions.wsp (if it was deployed on SharePoint 2016)
- Optional: Install & configure MatchPoint Content Enrichment Web Service.
- Restart the SharePoint timer service
restart-service sptimerv4
Attach & upgrade the SharePoint 2016 content Databases (
Mount-SPContentDatabaseCmdlet)- Note: Use the paramter
SkipSiteUpgradeso the sites are not upgraded directly!
Attach a content database to a web application and upgrade the database - MS Documentation
- Note: Use the paramter
- Activate the following features on the web applications:
- Colygon.MatchPoint.Core.Infrastructure
- Colygon.MatchPoint.Tagging.Inheritance
- Upgrade all sites to SharePoint 2019.
For example by using:
Get-SPSite -Limit All | Upgrade-SPSite -VersionUpgrade –Unthrottled - Reactivate the Colygon.MatchPoint.Core.Administration feature on the
MatchPoint Instance site collection.
(
Enable-SPFeature -Identity cde85a0c-4b3d-4ac8-b9db-4c805ca7358d -Url <url> -Force) - Install and activate MatchPoint Tagging service farm feature:
Install-SPFeature –Path Colygon.MatchPoint.Tagging.ServiceEnable-SPFeature -Identity Colygon.MatchPoint.Tagging.Service
- Create Tagging Service Applications:
- Attach the SharePoint 2016 Tagging Service database to MS SQL server.
- Create a new Tagging Service Application in SharePoint 2019 Central Administration.
- Specify the database name of the attached database in the "Database" section of the "Create new MatchPoint Tagging Service Application" dialog.
- Repeat this step for every Tagging Service Application.
- Install managed properties by using:
Add-MPManagedProperties- Optional:
Add-MPContentEnrichmentManagedProperties
- Start a full crawl in the Search Service Application.
- Upgrade custom code that uses the MatchPoint API. The custom code needs to be compiled against the MatchPoint 2019.0 DLL files.
Cleanup Steps:
- Remove the ListItemEventHandler configuration referencing the WorkflowListEventHandler version 5.0/2016.0 and add a ListItemEventHandler configuration referencing the WorkflowListEventHandler version 2019.0.
Please note that the same authentication mode must be used for the new web application. If this is not the case all user associations might be lost including site collection administrators and unexpected behavior might occur.
Upgrade MatchPoint Solutions
The MatchPoint solutions can be updated either automatically using the MatchPoint installer executable, or by using standard the SharePoint solution deployment mechanisms:
Update-SPSolution -Identity Colygon.MatchPoint.wsp
                  -LiteralPath C:\Colygon.MatchPoint.wsp
                  -GACDeploym

Update-SPSolution -Identity Colygon.MatchPoint.TaggingService.wsp
                  -LiteralPath C:\Colygon.MatchPoint.Tagging.Service.wsp
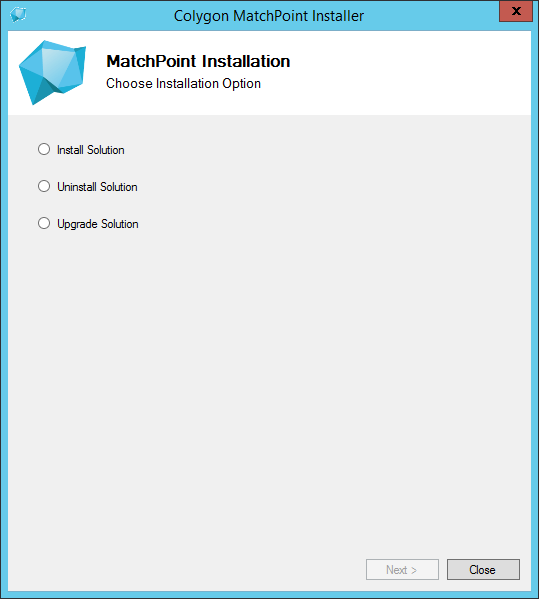
If you are using the MatchPoint installer, choose "Upgrade" (after System Check succeeded).

After MatchPoint has been upgraded, restart the IIS and the SharePoint TimerJob Service and every frontend server. Also, you need to reschedule the MatchPoint timer jobs:
Reschedule-MPTimerJobs -WebApplication <SPWebApplicationPipeBind>
Restart Tagging Service Instances
Open Central Administration. In Application Management -> Manage Services on Server, stop and start running Tagging Service on all servers.
Reactivate the instance administration feature
If MatchPoint was upgraded using the installer, this step can be skipped since it was already done by the installer.
Open a new PowerShell console – a previously used PowerShell console might use an application domain that has not loaded the upgraded MatchPoint assembly.
Execute the following PowerShell command for every MatchPoint instance site collection:
Enable-SPFeature -Url "<instance site url>" -Force -Identity
Colygon.MatchPoint.Core.Administration
Upgrading Custom Code
If custom code is deployed that uses interfaces of the MatchPoint API, it is required to recompile the code against the MatchPoint 2019.0 assemblies. Any custom assemblies should be re-deployed to the environment after the migration has been executed. Note that it might be necessary to restart the "SharePoint 2019 Timer" service and to recycle the application pool of any web applications using MatchPoint functionality.